メインコンテンツにスキップ

必要な工具と部品

この分解は修理ガイドでは ありません。 お持ちのOculus Rift DK1を修理する際は、iFixitの修理ガイドをご利用ください。

  1. Oculus Rift DK1拆解, Oculus Rift DK1拆解: 手順 1、 2の画像 1 Oculus Rift DK1拆解, Oculus Rift DK1拆解: 手順 1、 2の画像 2
    • 在我们开始之前,我们要说明这是开发者套件中包含的Oculus Rift的开发版本。 它本质上是消费者版本的早期原型。

    • 虽然在技术规格方面并不多,但是我们到目前为止已经收集到了:

    • 分辨率为1280 x 800像素,每个眼为640 x 800。

    • 水平视场大于90度。

    • 对角线视场大于110度。

    • 使用1000 Hz绝对9DOF方向传感器(包括陀螺仪,加速度计和磁力计)完成磁头跟踪。

    • 目前只适用于PC。

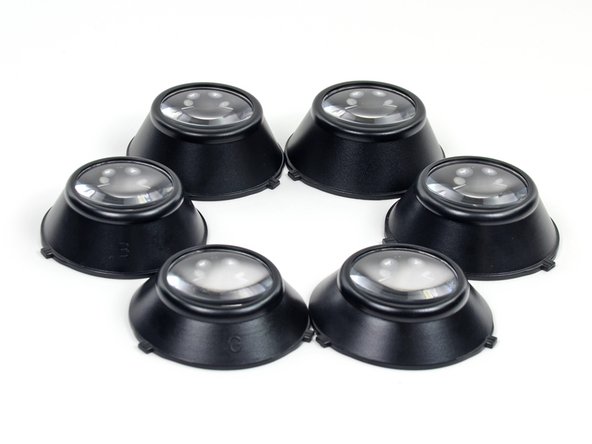
    • 我们还发现,它有一个很好的例子,它拥有超过十亿条电缆/适配器(我们的专业估计)。

  2. Oculus Rift DK1拆解: 手順 2、 3の画像 1 Oculus Rift DK1拆解: 手順 2、 3の画像 2 Oculus Rift DK1拆解: 手順 2、 3の画像 3
    • 它不是一个全息的—相反,Oculus提醒了护目镜和平板电脑之间的交互点

    • 等等,我们以前见过这样的东西。

    • snazzy可调节的头套可以保持运动在你的脸上,这是我们在Wii看到的一个缺点。

  3. Oculus Rift DK1拆解: 手順 3、 3の画像 1 Oculus Rift DK1拆解: 手順 3、 3の画像 2 Oculus Rift DK1拆解: 手順 3、 3の画像 3
    • 啊,一个机器人的友好的面孔,好吧,直到虚拟死亡。

    • 对于我们来说,这场死亡的形式是Team Fortress 2,Rift的兼容游戏之一,或者说它的在线约会。

    • Rift带来的最创新的技术之一是其头部跟踪功能。 使用陀螺仪,加速度计和磁力计完成,Rift允许3度自由度,因此您可以围绕虚拟世界观看,而无需移动您的整个身体

    • 我们预见了全国各地的星巴克咖啡桌的未来。(调侃?)

  4. Oculus Rift DK1拆解: 手順 4、 3の画像 1 Oculus Rift DK1拆解: 手順 4、 3の画像 2 Oculus Rift DK1拆解: 手順 4、 3の画像 3
    • 在我们拆开设备之前,我们不禁把玩一下吧!

    • 使用闪亮的硬币,我们调整两侧的焦距,以优化3D视觉体验。

    • 我们准备开玩了。戴上,军团要塞2!

    • 不,还不是这样。

    • 显然,我们必须为我们的眼睛选择A号,B号或C号。 然后我们必须测量我们的IPD(瞳孔间距离),并将TF2放入VR模式。

    • 几个小时后,我们准备好玩了。 戴上,军团要塞2!_(:3 」∠)_

    • 看吧! 戴着Riff只允许一只眼睛看到左边的图像,而另一只眼睛看到右边的图像。 事实证明,Riff的3D效果实际上并不是魔术,而是科学!

    • 如果你仔细观察,你可以看到左边的图像被轻轻地框到右边,反之亦然。 我们的大脑 - 梦幻般的电脑,它们是 - 注意每个眼睛中的图像之间的差异,计算角度和尺寸,并将它们合并成一个具有可察觉深度的单个图像。

    • Perst-o blam-o! 3D火箭飞过我们的n00b头。

  5. Oculus Rift DK1拆解: 手順 6、 3の画像 1 Oculus Rift DK1拆解: 手順 6、 3の画像 2 Oculus Rift DK1拆解: 手順 6、 3の画像 3
    • 为了将显示屏与头带组合分开,我们所需要的是我们54位工具套件中的Phillips#1位。

    • 事实上,这不是最后的生产版本的Riff有什么关系,容易分手? 可能 - 只有时间会说。

    • 最终的消费者版本会更难进入吗? 我们希望不会。

  6. Oculus Rift DK1拆解: 手順 7、 2の画像 1 Oculus Rift DK1拆解: 手順 7、 2の画像 2
    • 到现在为止还挺好。 让我们看看我们可以轻松拆开显示屏!

    • 两个框架与夹子一起夹紧,轻松松开塑料打开工具。

    • 随着镜头罩的拆卸,我们首先非常清楚地看到了1280x800液晶显示器。

  7. Oculus Rift DK1拆解: 手順 8、 3の画像 1 Oculus Rift DK1拆解: 手順 8、 3の画像 2 Oculus Rift DK1拆解: 手順 8、 3の画像 3
    • 一些夹子和一些粘性泡沫粘合剂将显示器牢固地固定在Oculus的前面板中,确保在游戏中鞭打你的头时牢牢抓住屏幕。

    • 从显示屏断开一根电路,可以完全将其拆下来进一步检查。

  8. Oculus Rift DK1拆解: 手順 9、 2の画像 1 Oculus Rift DK1拆解: 手順 9、 2の画像 2
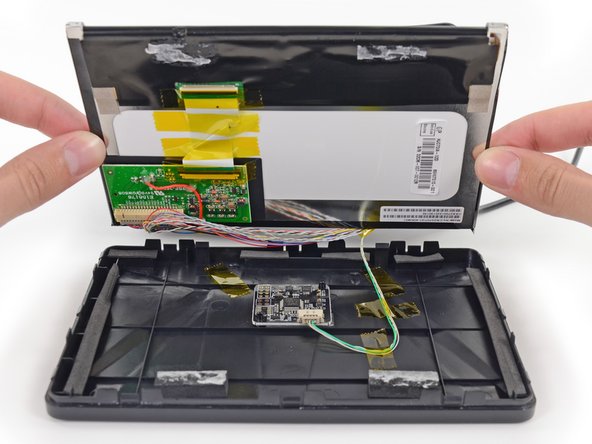
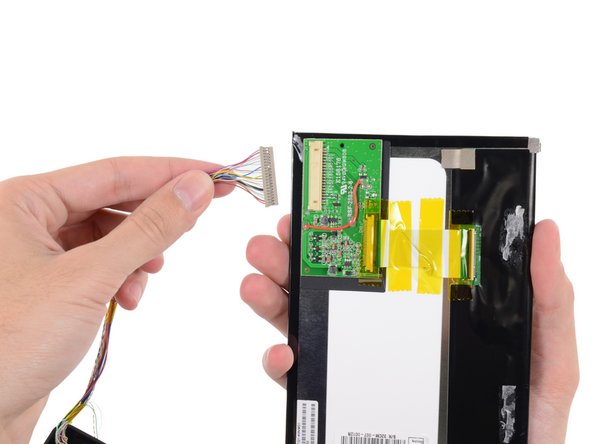
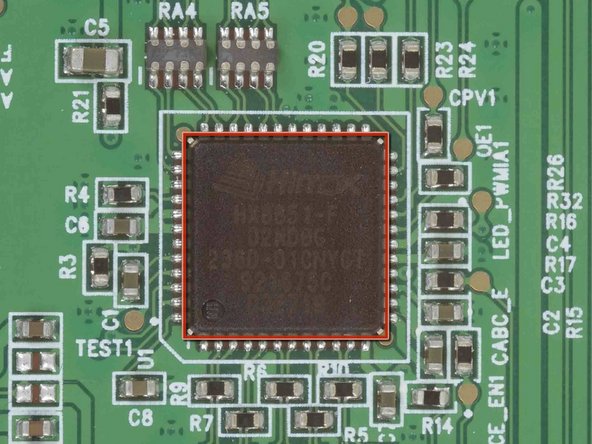
    • 好消息! Oculus使用Innolux HJ070IA-02D 7“LCD。

    • Chimei Innolux是台湾最大的LCD制造商,据传是苹果iPad Mini屏幕的替代品。

    • 液晶显示器背面配有一个Himax HX8851定时控制器。

    Hello everyone!

    I plug the wrong DC adapter into the controller and I burnt the Techcode TD1484A synchronous rectified step-down converter... I live in France and I cannot find this specific component. Does anyone know which similar component I could use instead?

    Thanks a lot!

    bastien bonard - 返信

    hi bastien

    i did they same thing to my control box did you ever find a way of fixing it ?

    sean -

    As of this posting of this comment, go to:

    http://www.aliexpress.com/wholesale?init...

    -- and then you can choose from a list of vendors selling this chip.

    John Becker - 返信

  9. Oculus Rift DK1拆解: 手順 10、 3の画像 1 Oculus Rift DK1拆解: 手順 10、 3の画像 2 Oculus Rift DK1拆解: 手順 10、 3の画像 3
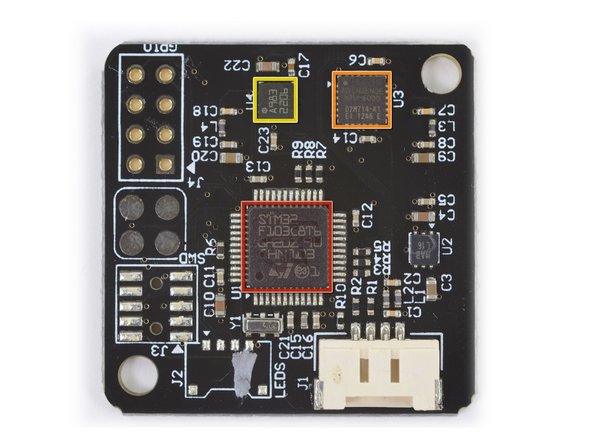
    • 耳机中的最后一个组件是Oculus Tracker V2板,定制设计并针对1000 Hz刷新率进行了优化。

    • 在这里,我们发现控制革命性头部跟踪设备的芯片:

    • STMicroelectronics 32F103C8具有72 MHz CPU的ARM Cortex-M3微控制器

    • Invensense MPU-6000六轴(陀螺仪+加速度计)运动跟踪控制器

    • 霍尼韦尔HMC5983三轴数字罗盘,可能与加速度计配合使用,以校正陀螺仪位移。

    • 传感器板的背面覆盖有闪亮的接触点,大概是为了轻松测试弹簧触点钻机中的每个板。

    The A983 three-axis magnetometer is the Honeywell HMC5983:

    http://www.digikey.com/product-detail/en...

    C C Tan - 返信

  10. Oculus Rift DK1拆解: 手順 11、 2の画像 1 Oculus Rift DK1拆解: 手順 11、 2の画像 2
    • 你问Oculus Rift如何连接到您的电脑? 当然有控制盒。

    • 我们的开发套件控制盒是一个非常基本的设备,包括用于调整Rift设置和少数I / O端口的按钮。

    • 从左到右:HDMI,DVI,Mini USB和DC-in。

    • Oculus Rift的视频输入是DVI,但是方便的dandy控制盒能够将您的PC的HDMI输出转换为DVI。 目前不支持VGA。

  11. Oculus Rift DK1拆解: 手順 12、 2の画像 1 Oculus Rift DK1拆解: 手順 12、 2の画像 2
    • 就像它的耳机对应,控制盒打开后,取出四个十字头#1螺丝。

    • Oculus可以简单地将控制箱粘合在一起,而不是用螺钉和可拆卸面板固定控制盒。 这种设计可以显示即使未来的设备也可以轻松访问。

    • 控制盒主板上的主芯片:

    • Realtek RTD2483AD显示接口控制器

    • 华邦W25X20CL 256 KB串行闪存

    • Techcode TD1484A同步整流降压转换器

  12. Oculus Rift DK1拆解: 手順 13、 2の画像 1 Oculus Rift DK1拆解: 手順 13、 2の画像 2
    • Oculus Rift开发套件可修复性得分:9(10最好)

    • 这是一个初步得分,因为这个Rift本质上是一个beta产品。 一旦真正的东西被发行下来,我们一定会知道的 - 但是现在我们已经有了!

    • 头戴式耳机和控制盒都使用标准十字螺丝#1粗螺纹螺丝,使其成为打开它们。

    • 围绕周边的标准夹具使前面板分离非常简单。

    • 将液晶显示器固定到位的两个泡沫胶垫是一个烦人的,但在重新组装时易于重新粘附。

    • 整个设备可以在不到10分钟内拆开。

    • 卡普顿胶带用于将一些电线固定在一起,如果产品拆卸,则应将其替换为新胶带。

以下の翻訳者の皆さんにお礼を申し上げます:

en zh

100%

笑得像个300斤的孩子さんは世界中で修理する私たちを助けてくれています! あなたも貢献してみませんか?
翻訳を始める ›

9 件のコメント

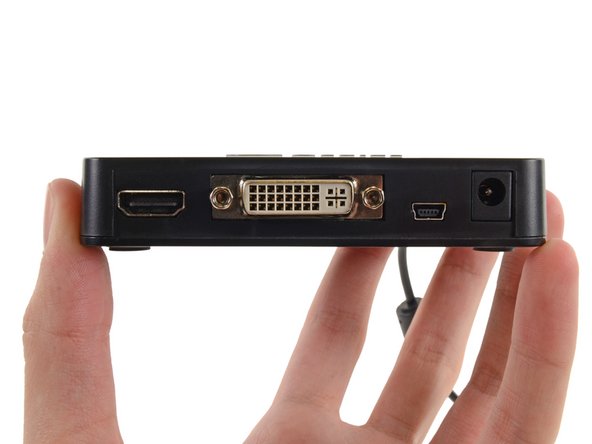
I have a Dell M6400 with only a VGA (female) out, would a DVI adapter work? Any Suggestions?

Are the cables/connections provided female/male? DVI-D, DVI-A, or DVI-I?

hello - 返信

You would need something like this:

http://www.datapro.net/products/vga-to-d...

It requires a converter with active electronics; a passive adapter would not work.

A different rev. of the Rift might support analog input, but this one does not appear to have the signals hooked up (based on what I can see, which isn't quite enough).

cityzen -

Thank you for the confirmation cityzen! and for the recommendation.

a digital converter is a pricey addition, do you think a USB2.0 to HDMI adapter (http://www.amazon.com/Sabrent-1920x1080-...) could be a more economical option?

or maybe an ExpressCard or PCMCIA card would provide the necessary bandwidth? But don't see many offerings.

hello -

A USB2.0 adapter would not be suitable for fast-action video. I wouldn't count on the other options, either. You can find cheaper adapters than the one I pointed out, which was just the first I happened to come across. Another example is: http://www.ambery.com/2covivgatodv.html

Actually, looking at the specs for your notebook, you should have a DisplayPort, and you can get a cheap adapter from that to DVI-D.

cityzen -

cityzen, you are a gentleman and a scholar. my thanks go out to you!

hello -

If it only works on PC then why is the guy in Step 3 using a MAC????

Mark - 返信

...bootcamp.

hello -

Because it's the future of Starbucks coffee tables!

Miroslav Djuric -

Is it possible to change the display and put in a higher resolution screen? Such as a 1080p. Japan Display also has a 7 inch 2560x1600.

Jesse Dostie - 返信

コメントを追加

統計データ:

過去 24時間: 3

過去 7 日: 8

過去 30 日: 41

今までの合計 139,400