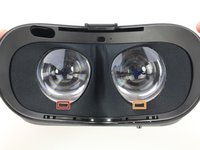
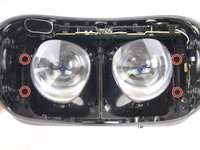
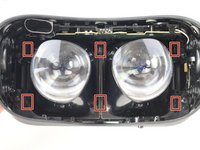
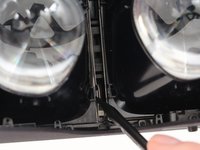
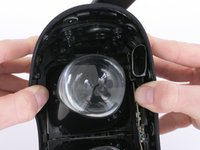
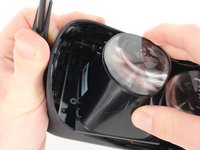
メインコンテンツにスキップ

Oculus Rift CV1 Lens Replacement

必要な工具と部品

  1. Oculus Rift CV1 Lens Replacement, Facial Interface: 手順 1、 1の画像 1
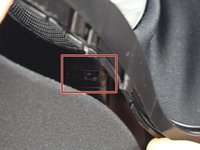
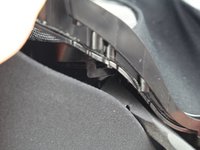
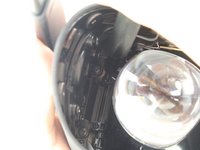
    • Pull firmly from the top of the headset facial interface to remove the foam frame.

  2. Oculus Rift CV1 Lens Replacement: 手順 2、 1の画像 1
    • Remove the six T3 4mm screws from the top and bottom edges of the case.

  3. Oculus Rift CV1 Lens Replacement: 手順 3、 1の画像 1
    • Insert the spudger underneath the edge of the lens on the left or right side.

    • Slide the spudger upwards and around the edge of the frame to undo the tabs underneath.

    • Repeat for the other side of the frame.

  4. Oculus Rift CV1 Lens Replacement: 手順 4、 3の画像 1 Oculus Rift CV1 Lens Replacement: 手順 4、 3の画像 2 Oculus Rift CV1 Lens Replacement: 手順 4、 3の画像 3
    • Lift up the frame to see a tab hidden underneath the lycra mesh along the edge of the lens.

    • Pull up on the tab with the spudger.

    • Repeat for the corresponding tab on the other lens.

  5. Oculus Rift CV1 Lens Replacement: 手順 5、 1の画像 1
    • Lift up on the plastic frame around the lens.

    • Slide a finger around the inside edge, pulling outward from the center of the lens to release the other tabs.

    • Repeat for the frame on the other lens.

  6. Oculus Rift CV1 Lens Replacement: 手順 6、 1の画像 1
    • Pull up along the outer frame.

    • Remove the facial interface.

  7. Oculus Rift CV1 Lens Replacement, Lens: 手順 7、 3の画像 1 Oculus Rift CV1 Lens Replacement, Lens: 手順 7、 3の画像 2 Oculus Rift CV1 Lens Replacement, Lens: 手順 7、 3の画像 3
    • Move the lenses as close together as possible by sliding the button on the bottom of the frame towards the center of the frame.

    • Remove the four Phillips #00 4mm screws from the outer edge of the base of the lenses.

    • There are two screws that are near the lens that are difficult to see. Remove the screw that is the nearest to the lens. Do not remove the larger screw farther from the lens.

  8. Oculus Rift CV1 Lens Replacement: 手順 8、 3の画像 1 Oculus Rift CV1 Lens Replacement: 手順 8、 3の画像 2 Oculus Rift CV1 Lens Replacement: 手順 8、 3の画像 3
    • Push off the 8 tabs (4 per lens) from the base of the lens using a spudger.

    • Spread the lenses back apart using the button on the bottom of the headset to access the center tabs more easily.

  9. Oculus Rift CV1 Lens Replacement: 手順 9、 2の画像 1 Oculus Rift CV1 Lens Replacement: 手順 9、 2の画像 2
    • Stretch the headset frame apart to make the lenses more accessible.

    • Be careful when removing the lens not to scratch the screen that is directly underneath.

    • While the headset frame is spread apart, pull the corner of the lens out. The rest of the lens will unlatch.

    • Pull out the lens.

    • Repeat for the other lens.

終わりに

To reassemble your device, follow these instructions in reverse order.

3 の人々がこのガイドを完成させました。

作成者

3人の作成者と共同で作成されました。

Jennifer Lai

メンバー登録日: 01/24/19

271 ポイント

2のガイドは作成済み

チーム

Cal Poly, Team S18-G4, White Winter 2019 Cal Poly, Team S18-G4, White Winter 2019人のメンバー

CPSU-WHITE-W19S18G4

3 メンバー

10のガイドは作成済み

コメント 1 件

Where can i get spare lens?

Night Gryphon - 返信

コメントを追加

統計データ:

過去 24時間: 5

過去 7 日: 59

過去 30 日: 171

今までの合計 15,298