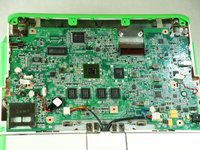
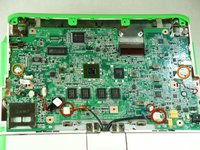
メインコンテンツにスキップ

OLPC XO-4 Touch Power Button Replacement

必要な工具と部品

  1. OLPC XO-4 Touch Power Button Replacement, Battery: 手順 1、 1の画像 1
    • Turn the laptop upside-down, with the handle facing away from you.

  2. OLPC XO-4 Touch Power Button Replacement: 手順 2、 2の画像 1 OLPC XO-4 Touch Power Button Replacement: 手順 2、 2の画像 2
    • Pull the lock tabs towards the green outer edges of the laptop.

    • Hold the left lock tab in the unlock position until the battery is completely removed in the next step.

  3. OLPC XO-4 Touch Power Button Replacement: 手順 3、 2の画像 1 OLPC XO-4 Touch Power Button Replacement: 手順 3、 2の画像 2
    • Lift up on the middle of the battery to remove it from the device.

  4. OLPC XO-4 Touch Power Button Replacement, Screen Frame: 手順 4、 3の画像 1 OLPC XO-4 Touch Power Button Replacement, Screen Frame: 手順 4、 3の画像 2 OLPC XO-4 Touch Power Button Replacement, Screen Frame: 手順 4、 3の画像 3
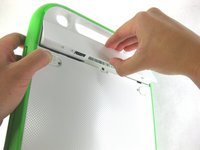
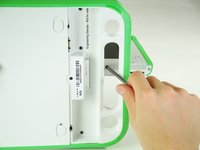
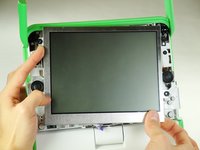
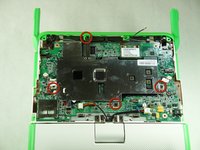
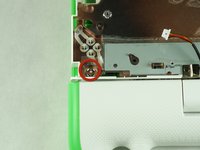
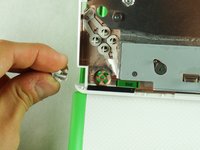
    • Remove the two 4mm Phillips #1 screws underneath the screen on the right-hand side.

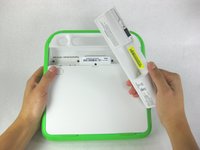
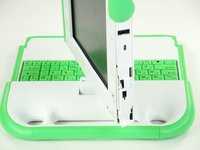
    • Rotate the screen 180° and remove the other two screws.

    • You will have to put your screwdriver through the handle in order to reach the middle screw for both sides.

  5. OLPC XO-4 Touch Power Button Replacement: 手順 5、 3の画像 1 OLPC XO-4 Touch Power Button Replacement: 手順 5、 3の画像 2 OLPC XO-4 Touch Power Button Replacement: 手順 5、 3の画像 3
    • Remove the green side panel by pressing down on the small green button on the top and sliding the panel up.

    • Repeat the step above for the panel on the other side.

  6. OLPC XO-4 Touch Power Button Replacement: 手順 6、 1の画像 1
    • Be careful not to pull the bottom too far out because a ribbon cable is under the frame and can easily break.

    • Gently lift up the lower part of the frame and pull it down to free the screen frame.

  7. OLPC XO-4 Touch Power Button Replacement: 手順 7、 2の画像 1 OLPC XO-4 Touch Power Button Replacement: 手順 7、 2の画像 2
    • Lift the black connector and pull the ribbon cable out by the purple tab, freeing the frame.

  8. OLPC XO-4 Touch Power Button Replacement, Screen: 手順 8、 1の画像 1
    • Remove the four 7.62mm screws using a Phillips #1 screwdriver.

  9. OLPC XO-4 Touch Power Button Replacement: 手順 9、 2の画像 1 OLPC XO-4 Touch Power Button Replacement: 手順 9、 2の画像 2
    • Be careful not to pull the screen out too far. There are two ribbon cables attached to the screen, and they can easily break.

    • Carefully lift the screen out.

  10. OLPC XO-4 Touch Power Button Replacement: 手順 10、 3の画像 1 OLPC XO-4 Touch Power Button Replacement: 手順 10、 3の画像 2 OLPC XO-4 Touch Power Button Replacement: 手順 10、 3の画像 3
    • Notice that the laptop in this picture has been turned 180° with the antennas now below the screen.

    • For each ribbon cable, lift up the black connector and gently pull the ribbon cables out by the plastic tabs.

  11. OLPC XO-4 Touch Power Button Replacement: 手順 11、 1の画像 1
    • Remove the screen from the laptop.

  12. OLPC XO-4 Touch Power Button Replacement, Back Cover: 手順 12、 1の画像 1
    • Remove the four 6mm screws using a Phillips #1 screwdriver.

  13. OLPC XO-4 Touch Power Button Replacement: 手順 13、 2の画像 1 OLPC XO-4 Touch Power Button Replacement: 手順 13、 2の画像 2
    • Rotate the top half of the laptop so that the back cover is facing you.

    • Pull up the tabs on the lower part of the back cover and pull it down and away from the antennas.

    • Remove the back cover by gently lifting it off of the laptop.

  14. OLPC XO-4 Touch Power Button Replacement, Wireless Card: 手順 14、 3の画像 1 OLPC XO-4 Touch Power Button Replacement, Wireless Card: 手順 14、 3の画像 2 OLPC XO-4 Touch Power Button Replacement, Wireless Card: 手順 14、 3の画像 3
    • When pulling out the connectors, make sure to hold the metal connector instead of the wire.

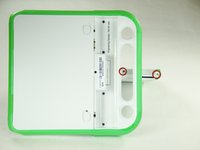
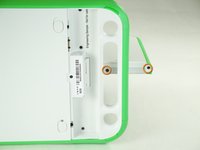
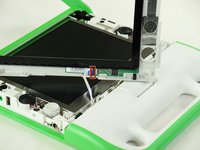
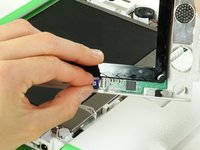
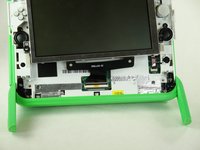
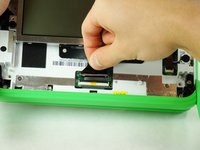
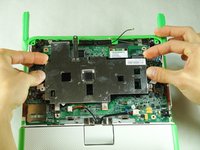
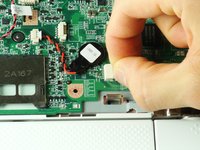
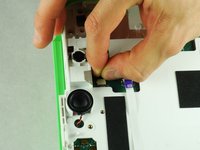
    • Gently pull out the two antenna connectors by pulling them away from the motherboard.

  15. OLPC XO-4 Touch Power Button Replacement: 手順 15、 1の画像 1
    • Remove the black 4mm Phillips #1 screw holding the wireless card in.

  16. OLPC XO-4 Touch Power Button Replacement: 手順 16、 2の画像 1 OLPC XO-4 Touch Power Button Replacement: 手順 16、 2の画像 2
    • Remove the wireless card from the laptop by gently sliding it out of its socket.

  17. OLPC XO-4 Touch Power Button Replacement, Motherboard: 手順 17、 3の画像 1 OLPC XO-4 Touch Power Button Replacement, Motherboard: 手順 17、 3の画像 2 OLPC XO-4 Touch Power Button Replacement, Motherboard: 手順 17、 3の画像 3
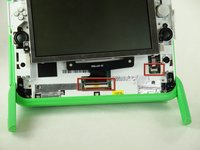
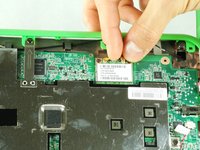
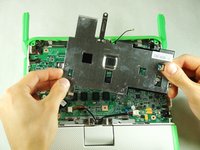
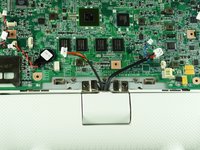
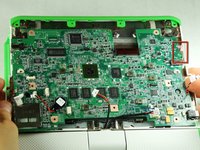
    • Remove the four black 4mm screws from the metal cover using a Phillips #1 screwdriver.

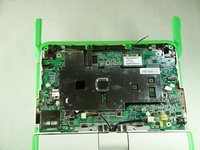
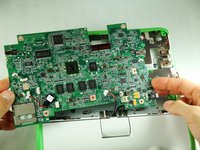
    • Remove the metal cover from the laptop.

  18. OLPC XO-4 Touch Power Button Replacement: 手順 18、 3の画像 1 OLPC XO-4 Touch Power Button Replacement: 手順 18、 3の画像 2 OLPC XO-4 Touch Power Button Replacement: 手順 18、 3の画像 3
    • Pull the connectors out by holding the plastic tabs and not the wires.

    • Unplug the three wires connecting the motherboard to the bottom half of the laptop.

    • Unplug the two speaker wires from the motherboard.

  19. OLPC XO-4 Touch Power Button Replacement: 手順 19、 3の画像 1 OLPC XO-4 Touch Power Button Replacement: 手順 19、 3の画像 2 OLPC XO-4 Touch Power Button Replacement: 手順 19、 3の画像 3
    • Turn the device over to where the screen used to be.

    • Pull out ribbon cable by holding the purple plastic tab.

    • Pull out connector with the black and white wire by holding plastic tab.

  20. OLPC XO-4 Touch Power Button Replacement: 手順 20、 2の画像 1 OLPC XO-4 Touch Power Button Replacement: 手順 20、 2の画像 2
    • Move the motherboard slightly to the left so that the audio input and output jacks are out of the frame.

    • Pull the motherboard out of the laptop.

  21. OLPC XO-4 Touch Power Button Replacement, Power Button: 手順 21、 2の画像 1 OLPC XO-4 Touch Power Button Replacement, Power Button: 手順 21、 2の画像 2
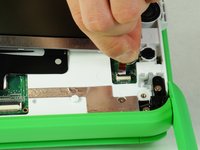
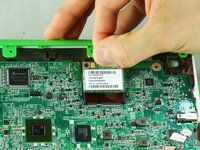
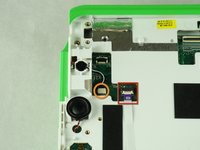
    • Remove the power button by pinching in the four tabs until the power button can be pushed out.

終わりに

To reassemble your device, follow these instructions in reverse order.

作成者

6人の作成者と共同で作成されました。

Matthew Smith

メンバー登録日: 01/25/13

23 ポイント

4のガイドは作成済み

チーム

Cal Poly, Team 3-29, Amido Winter 2013 Cal Poly, Team 3-29, Amido Winter 2013人のメンバー

CPSU-AMIDO-W13S3G29

4 メンバー

20のガイドは作成済み

0 件のコメント

コメントを追加

統計データ:

過去 24時間: 0

過去 7 日: 1

過去 30 日: 3

今までの合計 224