はじめに
Use this guide to replace the motherboard in your Nvidia Shield Tablet.
必要な工具と部品
-
-
Set the tablet so the buttons, microSD, and stylus port are facing you.
-
Open the microSD slot.
-
Using the flat end of the spudger tool, carefully pry open the case starting from the microSD slot, slowly sliding the spudger along the inside edge of the case.
-
-
-
-
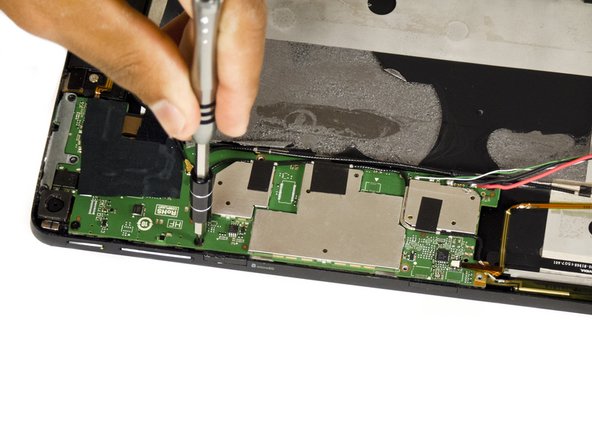
Carefully use the precision tweezers to unplug the ribbon cable.
The rest of this guide is really good but this step is really ambiguous - "unplug the ribbon cable" doesn't make it clear which way to pull or which part should come away, and there's no picture to show it after it's been removed. I followed the guide to the letter, but after reassembly the tablet no longer registers the stylus in its sheath or on the screen and is therefore basically unusable. I've reopened it and replugged the cable but it doesn't stay in place properly - I've clearly broken something as a result of this ambiguous step, and my tablet is ruined :(
-


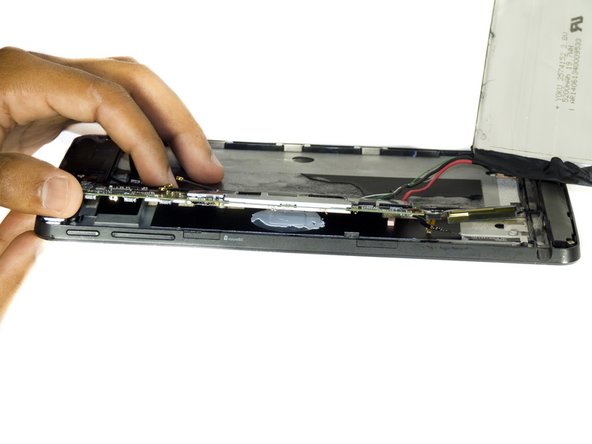


To reassemble your device, follow these instructions in reverse order.
To reassemble your device, follow these instructions in reverse order.
6 の人々がこのガイドを完成させました。
チーム

USF Tampa, Team 2-2, Blackwell Fall 2015 USF Tampa, Team 2-2, Blackwell Fall 2015人のメンバー
USFT-BLACKWELL-F15S2G2
3 メンバー
11のガイドは作成済み
9 件のコメント
Where do you obtain a new motherboard?
The real question is more about how to find a new shield tablet motherboard ??
willixlive - 返信
where can i buy the motherboard
waar kan ik een nieuw shield moederbord kopen?
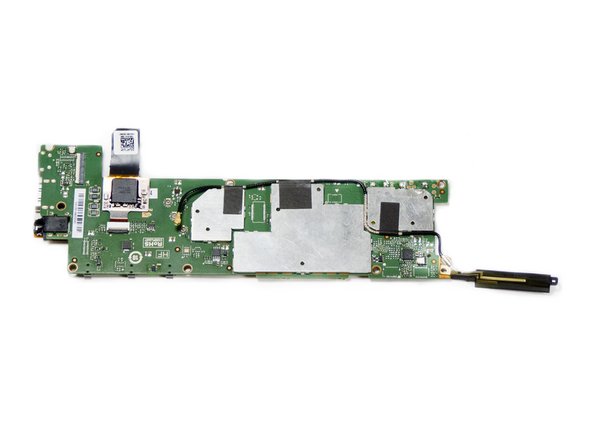
Hello, I'm looking for a description of the various ribbon connectors on the motherboard.
I'm also looking for a hint to solve a problem I have after replacing the screen+digitizer: the right side (half) of the touch screen does'n work.
Hi, i just did some work on mine. What connectors would you like to know about ?
This is exactly the problem I have! Top left of the touch screen in my case.
I tried this today, please update the intructions.
The original Shield has a flatribbon on the right side for the stylus under the board.
And on the right side there a two flatribbons that connect the cameras, if you lift the board without loosening the cameras first you will ripp the cables.
Following this steps you will rip off the Touchscreen Controller Ribbon - as it is actually as well on the pictures. The step #6 last photo showed damaged ribbon of the touch screen controller. Thanks for posting such non accurate and wrong information I damaged my tablet as actually the person who did the tutorial did too….. Really thanks …. This is a tutorial - How to damage your tablet