はじめに
This guide explains how to replace the motherboard in the NVIDIA SHIELD Portable or NSP (model number: 945-12450-0001-000), a handheld game console released by nVidia in 2013. The motherboard allows all the components of the controller to communicate with one another. Signs of motherboard failure can include: display malfunctioning, error codes appearing, system locking or rebooting, or external ports failing. By following the steps in this guide, you will be able to successfully access and replace the motherboard in your NVIDIA SHIELD Portable.
必要な工具と部品
-
-
Remove the seven 6.4mm T5 Torx screws from the back panel.
-
Use the spudger to separate the front and back panels.
-
-
-
-
Remove the six 6.5mm T5 Torx screws.
-
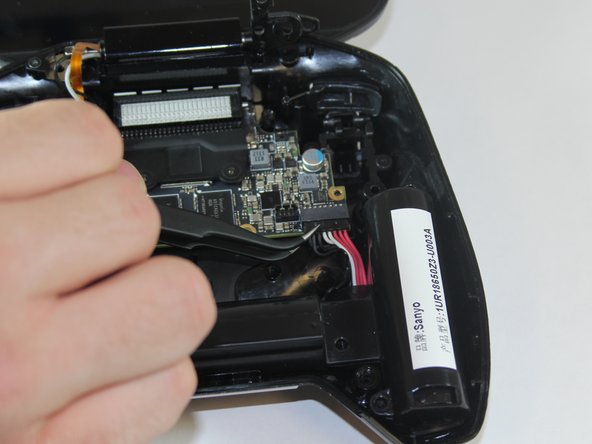
Disconnect the power wires.
-
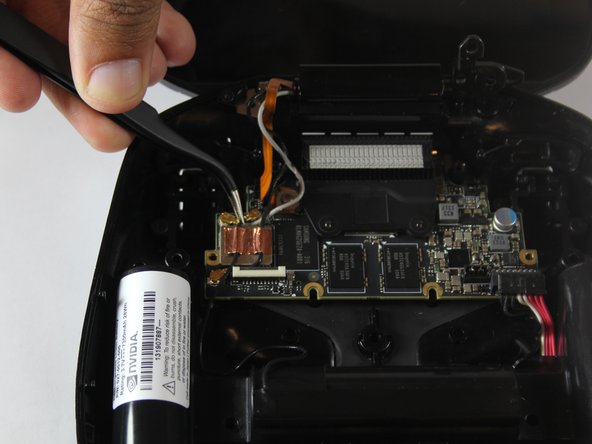
Peel back the copper tape and disconnect the black and white wires.
-
-
-
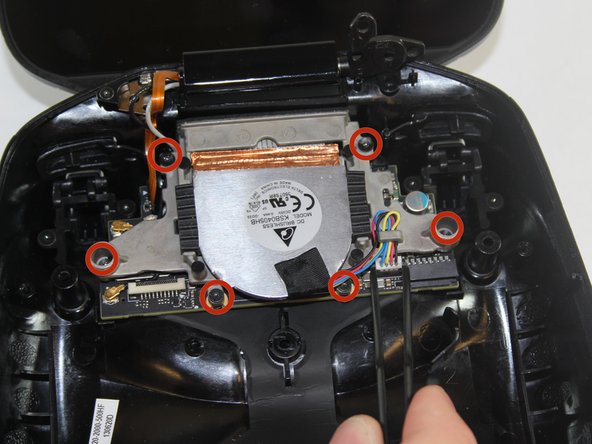
Remove the two 7.3mm and four 8.4mm T5 Torx screws and disconnect the power cable.
-
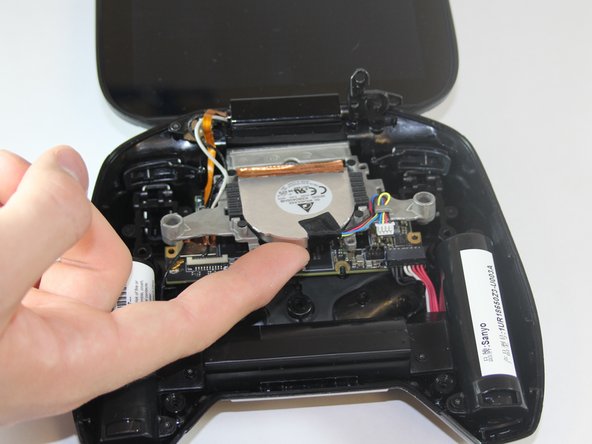
Lift the fan free after the screws and cable are removed.
-
-
-
Using your T5 Torx screwdriver, remove six screws from the motherboard—two 7.3 mm screws and four 8.4 mm screws.
-
Simply pull gently on the edges of the board, wiggling it if necessary so as not to damage the ports at the top of the board.
-


To reassemble your device, follow these instructions in reverse order.
To reassemble your device, follow these instructions in reverse order.
3 の人々がこのガイドを完成させました。

チーム

USF Tampa, Team 1-1, Hickman Fall 2014 USF Tampa, Team 1-1, Hickman Fall 2014人のメンバー
USFT-HICKMAN-F14S1G1
4 メンバー
18のガイドは作成済み
コメント 1 件
Hay ich suche Ersatzteile für Nvidia shield Portable ich suche Board da wo kühler drauf ist , weil mein ist kaput gegangen :(