メインコンテンツにスキップ

Nostalgia Electrics RHP-310 Replacing Housing Replacement

必要な工具と部品

  1. Nostalgia Electrics RHP-310 Replacing Housing Replacement, Power Switch: 手順 1、 1の画像 1
    • Unplug the popper.

    • Remove the plastic lid by lifting the lid up.

  2. Nostalgia Electrics RHP-310 Replacing Housing Replacement: 手順 2、 1の画像 1
    • Lay the popper on its side.

    • Remove the five 12mm Philips #2 screws around the perimeter of the base with the Phillips #2 phillips head screwdriver.

    • Remove the two 15mm Philips #2 screws in the center of the base with the Phillips #2 phillips head screwdriver.

    • Save the screws you remove from the base in a safe place. They will be needed to reattach the housing to the base.

  3. Nostalgia Electrics RHP-310 Replacing Housing Replacement: 手順 3、 1の画像 1
    • Flip the base to view the interior surface of the base.

    • Unscrew the two screws (10 mm Philips #2 screws) from the base.

    • Remove the base and set it aside.

  4. Nostalgia Electrics RHP-310 Replacing Housing Replacement: 手順 4、 2の画像 1 Nostalgia Electrics RHP-310 Replacing Housing Replacement: 手順 4、 2の画像 2
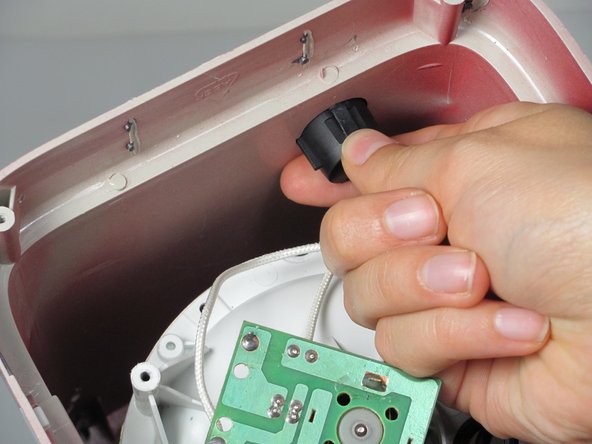
    • Locate the power switch connected to the side of the housing.

    • Carefully pinch the sides of the power switch.

    • Push the power button up and out of the housing.

  5. Nostalgia Electrics RHP-310 Replacing Housing Replacement: 手順 5、 1の画像 1
    • Now that the power switch is removed from the housing, you must remove the wires connected to the power switch.

    • Use the plastic opening tool to gently pry the wires loose from the power switch.

    • The wires should easily pop out from the power switch.

  6. Nostalgia Electrics RHP-310 Replacing Housing Replacement: 手順 6、 1の画像 1
    • Remove the power switch from the device.

    • You can now replace the power switch if necessary.

  7. Nostalgia Electrics RHP-310 Replacing Housing Replacement, Replacing Housing: 手順 7、 2の画像 1 Nostalgia Electrics RHP-310 Replacing Housing Replacement, Replacing Housing: 手順 7、 2の画像 2
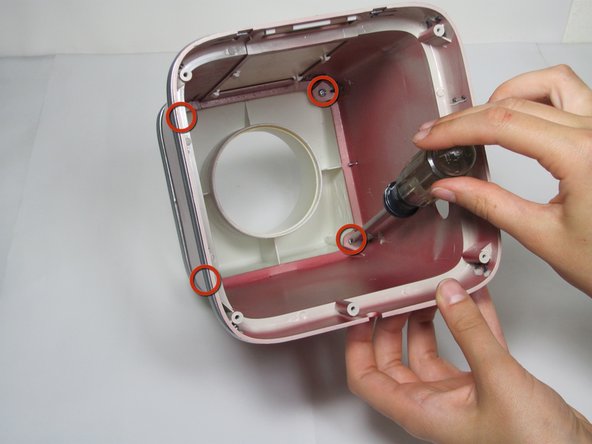
    • Now that the power switch is disconnected from the popper, you will need to remove the white top.

    • Gently remove the heating component from the popper.

    • Unscrew the four screws (11mm Philips #2 screws) that connect the white top to the housing.

  8. Nostalgia Electrics RHP-310 Replacing Housing Replacement: 手順 8、 1の画像 1
    • Remove the white top from the housing.

    • Save the screws from previous step. You will need them to connect the new housing to the white top.

終わりに

To reassemble your device, follow these instructions in reverse order.

作成者

5人の作成者と共同で作成されました。

Dana Clarke

メンバー登録日: 09/26/12

50 ポイント

6のガイドは作成済み

チーム

Cal Poly, Team 16-57, Forte Fall 2012 Cal Poly, Team 16-57, Forte Fall 2012人のメンバー

CPSU-FORTE-F12S16G57

5 メンバー

6のガイドは作成済み

0 件のコメント

コメントを追加

統計データ:

過去 24時間: 0

過去 7 日: 1

過去 30 日: 2

今までの合計 480