メインコンテンツにスキップ

Nook Tablet Speaker Assembly Replacement

必要な工具と部品

  1. Nook Tablet Speaker Assembly Replacement, Back Cover: 手順 1、 1の画像 1
    • Flip the Nook over.

  2. Nook Tablet Speaker Assembly Replacement: 手順 2、 2の画像 1 Nook Tablet Speaker Assembly Replacement: 手順 2、 2の画像 2
    • Lift the flap that reads "Nook" to reveal the tape that is underneath. Remove the memory card if one is present.

    • Remove the tape covering the round holes to reveal two T5 Torx screws.

    • Remove the two T5 Torx screws securing the back cover.

  3. Nook Tablet Speaker Assembly Replacement: 手順 3、 2の画像 1 Nook Tablet Speaker Assembly Replacement: 手順 3、 2の画像 2
    • Insert the flat end of a spudger between the front panel and the rear assembly.

    • Though these photos show a screwdriver, use a spudger or plastic opening tool in order to prevent damage to the device.

    • Use a spudger to lift the the back panel from the rest of the Nook.

  4. Nook Tablet Speaker Assembly Replacement: 手順 4、 2の画像 1 Nook Tablet Speaker Assembly Replacement: 手順 4、 2の画像 2
    • Slide the spudger around the edges of the Nook to loosen the back panel.

  5. Nook Tablet Speaker Assembly Replacement: 手順 5、 1の画像 1
    • Pull the back panel off the Nook.

  6. Nook Tablet Speaker Assembly Replacement, Screen Bezel: 手順 6、 2の画像 1 Nook Tablet Speaker Assembly Replacement, Screen Bezel: 手順 6、 2の画像 2
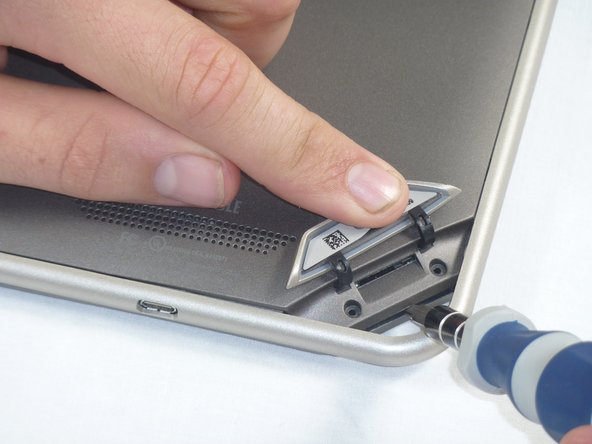
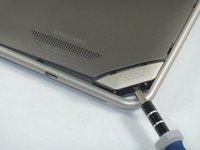
    • Using the T5 Torx screwdriver, remove the ten T5 screws from around the edges of the silver midframe.

  7. Nook Tablet Speaker Assembly Replacement: 手順 7、 2の画像 1 Nook Tablet Speaker Assembly Replacement: 手順 7、 2の画像 2
    • Using a spudger or plastic opening tool, carefully pry the screen bezel away from the silver midframe.

  8. Nook Tablet Speaker Assembly Replacement, Disconnect the Battery: 手順 8、 2の画像 1 Nook Tablet Speaker Assembly Replacement, Disconnect the Battery: 手順 8、 2の画像 2
    • Lift up the foam pad at the corner of the battery to reveal the battery connector.

    • Use a spudger or plastic opening tool to disconnect the battery cable from the motherboard.

    • These photos show a screwdriver, but we recommend using a nonconductive tool like a spudger to prevent a potential short.

  9. Nook Tablet Speaker Assembly Replacement, Midframe: 手順 9、 1の画像 1
    • Lift up the foam that covers the power connector and volume connector.

    • Disconnect the power and volume cables from their sockets on the motherboard.

  10. Nook Tablet Speaker Assembly Replacement: 手順 10、 2の画像 1 Nook Tablet Speaker Assembly Replacement: 手順 10、 2の画像 2
    • Carefully lift the silver midframe away from the motherboard and display assembly.

    • Be careful when handling the motherboard, making sure to not dislodge/shift any of its major components.

  11. Nook Tablet Speaker Assembly Replacement, Removing Speaker Assembly: 手順 11、 1の画像 1
    • Using your hands pull the square speaker assembly component off the motherboard.

  12. Nook Tablet Speaker Assembly Replacement, Replacing Speaker Assembly: 手順 12、 1の画像 1
    • Now place the new speaker assembly component back in the same square location.

    • As Step 12 mentions, make sure to realign the speaker assembly correctly in the square.

終わりに

To reassemble your device, follow these instructions in reverse order.

ある他の人がこのガイドを完成しました。

作成者

6人の作成者と共同で作成されました。

Josh Fisher

メンバー登録日: 09/26/12

9 ポイント

1ガイドが承認済み

チーム

Cal Poly, Team 1-4, Propen Fall 2012 Cal Poly, Team 1-4, Propen Fall 2012人のメンバー

CPSU-PROPEN-F12S1G4

4 メンバー

14のガイドは作成済み

0 件のコメント

コメントを追加

統計データ:

過去 24時間: 0

過去 7 日: 0

過去 30 日: 0

今までの合計 2,089