はじめに
Today I will show you how to replace the battery on your "Nook (1st Edition)".
必要な工具と部品
-
-
Begin by facing the back of your Nook upwards.
-
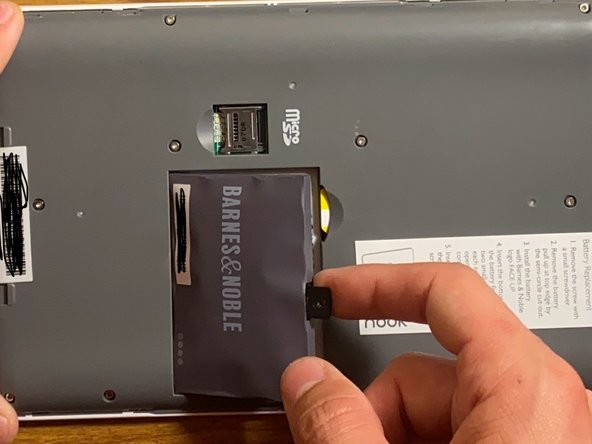
Next, please turn your Nook so the charging port is facing upwards. The orange mark is for the next part of this step.
-
Using your fingernail or a spudger, please grip the space between the charging port, and back cover, and gently pull them apart. Please place the back cover aside once complete.
-
-
-
-
Please notice, the single screw holding the battery in place. Please retrieve your Phillips #0 Screwdriver and please remove the screw.
-
Then, using your finger or a spudger, lift the battery out of its slot by the plastic tab that held in the screw.
-
You may now discard the original battery.
-
-
-
To install the new battery, please place it bottom first, in the battery compartment. This is because the battery has plastic tabs that will not insert any other way.
-
Next, retrieve your Phillips #0 Screwdriver one more time, and install the screw in its original position.
-
Congratulations, you have successfully replaced a "Nook (1st Generation)" battery.
-


To reassemble your device, follow these instructions from step 1, in reverse order.
To reassemble your device, follow these instructions from step 1, in reverse order.