メインコンテンツにスキップ

Nokia Lumia 620 Volume and Power Button Replacement

必要な工具と部品

  1. Nokia Lumia 620 Volume and Power Button Replacement, Volume and Power Button: 手順 1、 1の画像 1
    • Check condition of switches on logicboard

    • Rule out failure of cover

  2. Nokia Lumia 620 Volume and Power Button Replacement: 手順 2、 1の画像 1
    • Torx 6 screwdriver

    • Soldering iron (thin tip)

    • Decent quality solder (thin wire)

  3. Nokia Lumia 620 Volume and Power Button Replacement: 手順 3、 1の画像 1
    • Remove cover, battery and SIM

    • Remove 6 torx screws

    • Note: Green is fine thread

    • Note: Red is coarse thread

  4. Nokia Lumia 620 Volume and Power Button Replacement: 手順 4、 2の画像 1 Nokia Lumia 620 Volume and Power Button Replacement: 手順 4、 2の画像 2
    • Remove plastic clover near battery

    • Keep track of all parts

  5. Nokia Lumia 620 Volume and Power Button Replacement: 手順 5、 1の画像 1
    • Gently release logicboard connectors

  6. Nokia Lumia 620 Volume and Power Button Replacement, Remove logic board: 手順 6、 2の画像 1 Nokia Lumia 620 Volume and Power Button Replacement, Remove logic board: 手順 6、 2の画像 2
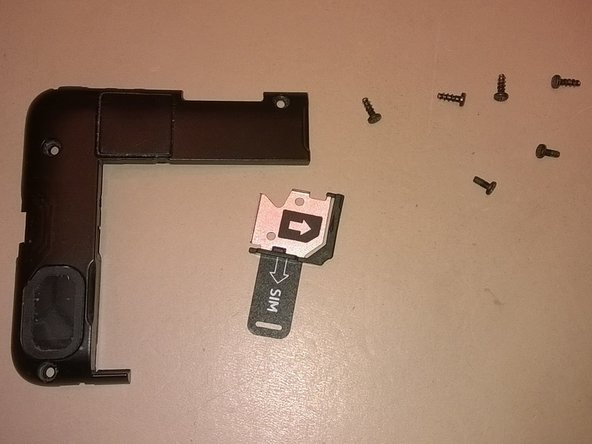
    • There is a clip that needs to be moved out of the way before the board will move.

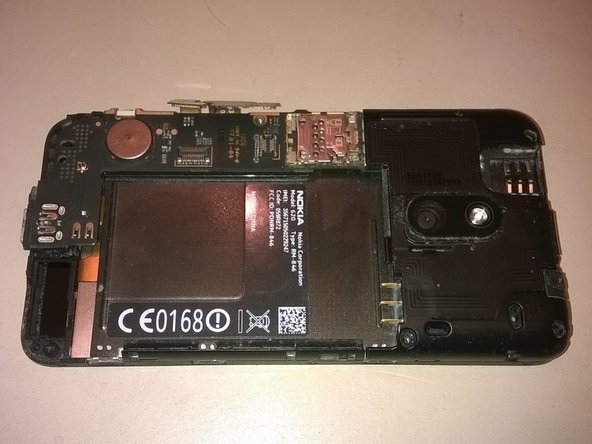
    • Start by lifting long side of logicboard

    • Gently wiggle and lift

    • Undo plastic clips near battery with force

  7. Nokia Lumia 620 Volume and Power Button Replacement: 手順 7、 1の画像 1
    • Check connections of failed buttons

  8. Nokia Lumia 620 Volume and Power Button Replacement: 手順 8、 1の画像 1
    • Resolder broken connections

    • Make sure the pads do not short

  9. Nokia Lumia 620 Volume and Power Button Replacement: 手順 9、 1の画像 1
    • Put back logicboard

    • Make sure pins near camera line-up

    • Note: Plastic clips need quite some force

  10. Nokia Lumia 620 Volume and Power Button Replacement: 手順 10、 1の画像 1
    • Reconnect logicboard connectors

  11. Nokia Lumia 620 Volume and Power Button Replacement: 手順 11、 1の画像 1
    • Put back plastic cover

  12. Nokia Lumia 620 Volume and Power Button Replacement: 手順 12、 1の画像 1
    • Gently tighten screws

    • Put back SIM card and battery

    • Close cover

    • Enjoy the result ;)

ゴール

11 の人々がこのガイドを完成させました。

作成者

5人の作成者と共同で作成されました。

Anne

メンバー登録日: 10/17/14

456 ポイント

1ガイドが承認済み

4 件のコメント

Realmente funcionó el tutorial, sirven de nuevo los dos botones que fallaban.

Gaia501 - 返信

Only the 2 middle screws are fine threaded. And you can see in the pictures here, that there are 4 coarse threaded ones and 2 fine threaded ones. The green one in the corner should be red

shadow118 - 返信

hafıza kart okuyucu çalışmıyor ne yapmam lazım

davutcigir - 返信

Omg it looks complicated

Maz Hanvey - 返信

コメントを追加

統計データ:

過去 24時間: 0

過去 7 日: 3

過去 30 日: 13

今までの合計 10,178