メインコンテンツにスキップ

必要な工具と部品

この分解は修理ガイドでは ありません。 お持ちのNokia E61iを修理する際は、iFixitの修理ガイドをご利用ください。

  1. この手順は未翻訳です。 翻訳を手伝う。

    : 手順 1、 2の画像 1 : 手順 1、 2の画像 2
    • Remove the back cover to access the battery. Press the tab on the bottom of the cover.

    • Slide the back cover downwards off of the phone while pressing the tab down.

  2. この手順は未翻訳です。 翻訳を手伝う。

    : 手順 2、 1の画像 1
    • Locate the bottom-left corner of the phone where there is a spot to remove the battery.

  3. この手順は未翻訳です。 翻訳を手伝う。

    : 手順 3、 1の画像 1
    • Lift the battery out using your finger.

    • The E61i uses a Nokia BP-4L standard battery.

  4. この手順は未翻訳です。 翻訳を手伝う。

    : 手順 4、 2の画像 1 : 手順 4、 2の画像 2
    • Remove the four screws that secure the front cover to the rest of the phone using a T7 screwdriver.

  5. この手順は未翻訳です。 翻訳を手伝う。

    : 手順 5、 1の画像 1
    • Remove the cover by pulling it up and off.

  6. この手順は未翻訳です。 翻訳を手伝う。

    : 手順 6、 1の画像 1
    • Once the front cover has been removed, there is nothing holding the keyboard to the rest of the phone. Simply remove the keyboard from the cover by lifting the keyboard from its interior side.

  7. この手順は未翻訳です。 翻訳を手伝う。

    : 手順 7、 2の画像 1 : 手順 7、 2の画像 2
    • Take off the casing and keyboard.

    • Remove the screws while holding the screen in place using a Torx T6 screwdriver.

    • Remove the single screw while holding the screen in place using a Torx T5 screwdriver.

    • Lift the ribbon off of the contact with the motherboard.

    • Firmly press the contacts into place to connect the ribbon and the motherboard when reassembling.

  8. この手順は未翻訳です。 翻訳を手伝う。

    : 手順 8、 2の画像 1 : 手順 8、 2の画像 2
    • Gently pull the screen off of the phone.

    • Be sure not to rip the sticker that connects the display and the motherboard.

    • Pull the silver case off to completely free the cracked or damaged screen.

  9. この手順は未翻訳です。 翻訳を手伝う。

    : 手順 9、 2の画像 1 : 手順 9、 2の画像 2
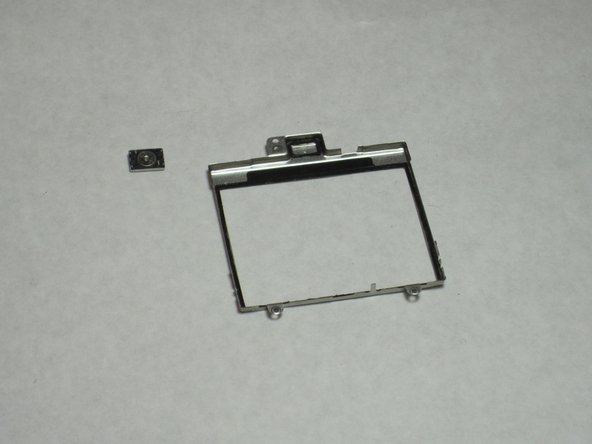
    • Remove the speaker by pulling it off of the display frame.

    • The speaker is connected to the display frame by a ring of adhesive foam (visible in second picture). By removing the speaker, this foam is torn. However, the speaker sticks quite well to the frame without reapplication of any adhesive.

  10. この手順は未翻訳です。 翻訳を手伝う。

    : 手順 10、 3の画像 1 : 手順 10、 3の画像 2 : 手順 10、 3の画像 3
    • Pull the green motherboard from the back casing.

  11. この手順は未翻訳です。 翻訳を手伝う。

    : 手順 11、 2の画像 1 : 手順 11、 2の画像 2
    • After the logic board has been removed, there is nothing else securing the antenna to the back cover. Simply remove the antenna by pushing outward from the interior side.

  12. この手順は未翻訳です。 翻訳を手伝う。

    : 手順 12、 1の画像 1
    • The volume control buttons are secured to the frame only by their fit around a small piece of the plastic. Using a small flat-head screwdriver or other flat object, lift the ribbon over this piece of the cover.

  13. この手順は未翻訳です。 翻訳を手伝う。

    : 手順 13、 1の画像 1
    • Next, remove the volume control buttons from the cover by pushing or pulling them out away from the interior of the cover.

  14. この手順は未翻訳です。 翻訳を手伝う。

    : 手順 14、 1の画像 1
    • Remove the connector housing by pushing and sliding it off the back panel.

    • Be very careful not to lose the small loose spring from behind the button or the small button itself.

  15. この手順は未翻訳です。 翻訳を手伝う。

    : 手順 15、 1の画像 1
    • After the Connector Housing has been removed, there is nothing else holding the Microphone in place. Simply remove if from the housing by pulling up.

  16. この手順は未翻訳です。 翻訳を手伝う。

    : 手順 16、 1の画像 1
    • Remove the headset jack from the housing by pulling it up.

作成者

3人の作成者と共同で作成されました。

Christopher Patton

メンバー登録日: 04/07/11

208 ポイント

12のガイドは作成済み

チーム

Cal Poly, Team 9-63, Walters Spring 2011 Cal Poly, Team 9-63, Walters Spring 2011人のメンバー

CPSU-WALTERS-S11S9G63

5 メンバー

12のガイドは作成済み

コメント 1 件

hai sir.. can you help me to suggestion for campatible camera module (from another nokia series) for Nokia E61i ?

Ricky Rekintan Sumsago - 返信

コメントを追加

統計データ:

過去 24時間: 0

過去 7 日: 0

過去 30 日: 2

今までの合計 7,534