メインコンテンツにスキップ

Nokia 6560 Speaker Replacement

必要な工具と部品

  1. Nokia 6560 Speaker Replacement, Battery: 手順 1、 2の画像 1 Nokia 6560 Speaker Replacement, Battery: 手順 1、 2の画像 2
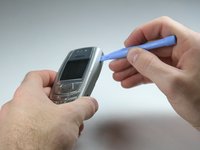
    • Remove the back cover of your cell phone by pushing the small slider with your fingernail towards the top of the phone.

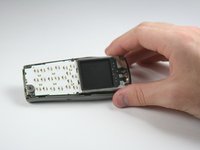
    • Lift off your cell phone's back cover.

  2. Nokia 6560 Speaker Replacement: 手順 2、 2の画像 1 Nokia 6560 Speaker Replacement: 手順 2、 2の画像 2
    • Use your index finger to first push down and then lift up the battery as shown.

    • Remove the battery from your cell phone.

  3. Nokia 6560 Speaker Replacement, Keypad: 手順 3、 2の画像 1 Nokia 6560 Speaker Replacement, Keypad: 手順 3、 2の画像 2
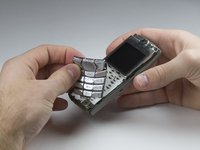
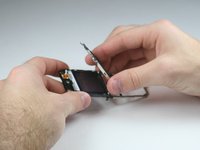
    • Open the front cover of your cell phone with the plastic opening tool or finger nail.

    • Lift the cover upwards, starting from the bottom below the keypad.

  4. Nokia 6560 Speaker Replacement: 手順 4、 2の画像 1 Nokia 6560 Speaker Replacement: 手順 4、 2の画像 2
    • Lift the keypad off of the keyboard as it is not attached to the phone anymore.

    • If you want to clean your keyboard do not use chemical cleaners or too much water, instead, use a damp cloth.

    • It may be tricky to get the keypad in the right position while closing the front cover for the reassembly. Ensure they are aligned properly before closing the front cover!

  5. Nokia 6560 Speaker Replacement, Keyboard: 手順 5、 1の画像 1
    • Unscrew the six T6 torx screws which attach the frame to the cell phone case.

    • Be careful not to scratch your display with the screw driver.

  6. Nokia 6560 Speaker Replacement: 手順 6、 1の画像 1
    • Lift the frame off of your cell phone.

  7. Nokia 6560 Speaker Replacement: 手順 7、 1の画像 1
    • Lift the keyboard out of the plastic frame.

  8. Nokia 6560 Speaker Replacement, Display: 手順 8、 2の画像 1 Nokia 6560 Speaker Replacement, Display: 手順 8、 2の画像 2
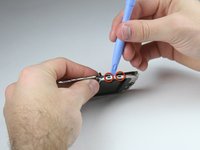
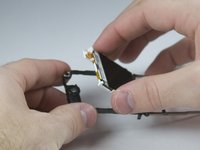
    • Use the plastic opening tool to unmount the thin metal frame at the tab connections. You must do this on both sides.

    • Lift the thin metal frame off of the plastic frame.

    • Pay attention while lifting the frame off because it can easily be bent.

  9. Nokia 6560 Speaker Replacement: 手順 9、 3の画像 1 Nokia 6560 Speaker Replacement: 手順 9、 3の画像 2 Nokia 6560 Speaker Replacement: 手順 9、 3の画像 3
    • Pull the sides of the plastic frame apart in order to loosen the display.

    • Take the display out of the plastic frame.

  10. Nokia 6560 Speaker Replacement, Speaker: 手順 10、 2の画像 1 Nokia 6560 Speaker Replacement, Speaker: 手順 10、 2の画像 2
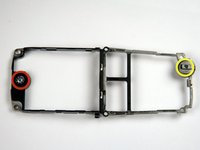
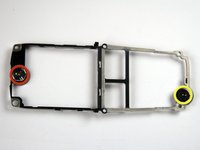
    • Now you have the bare plastic frame that holds the speaker.

    • The microphone is held at the bottom of this frame.

    • Neither the speaker nor the microphone can be repaired. You must replace the whole frame.

終わりに

To reassemble your device, follow these instructions in reverse order.

作成者

5人の作成者と共同で作成されました。

Nathan Whitacre

メンバー登録日: 01/20/10

21 ポイント

2のガイドは作成済み

チーム

Cal Poly, Team 3-17, Maness Winter 2010 Cal Poly, Team 3-17, Maness Winter 2010人のメンバー

CPSU-MANESS-W10S3G17

4 メンバー

12のガイドは作成済み

0 件のコメント

コメントを追加

統計データ:

過去 24時間: 1

過去 7 日: 1

過去 30 日: 1

今までの合計 2,664