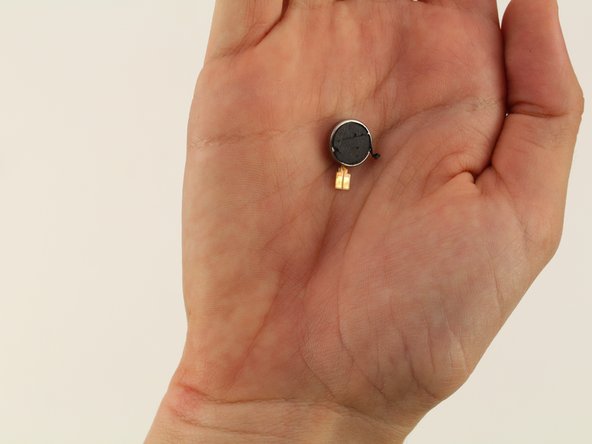
メインコンテンツにスキップ

Nokia 6 Vibrator Replacement

必要な工具と部品

  1. Nokia 6 Vibrator Replacement, Display Assembly: 手順 1、 3の画像 1 Nokia 6 Vibrator Replacement, Display Assembly: 手順 1、 3の画像 2 Nokia 6 Vibrator Replacement, Display Assembly: 手順 1、 3の画像 3
    • Power off your Nokia 6 before beginning disassembly.

    • Insert the SIM card ejection tool into the hole on the left side of the phone.

    • Remove the SIM card and microSD card.

  2. Nokia 6 Vibrator Replacement: 手順 2、 1の画像 1
    • If your display glass is cracked, take precaution by taping over the display to prevent further breakage and harm.

    • Lay overlapping strips of clear packing tape over the Nokia 6's display until the whole screen is covered.

  3. Nokia 6 Vibrator Replacement: 手順 3、 1の画像 1
    • To soften the adhesive, use a heat gun and heat one edge of the phone for five minutes.

    • To use the heat gun, plug it into an outlet.

    • When the heat gun is plugged in, the heat gun automatically turns on and will start blowing hot air.

  4. Nokia 6 Vibrator Replacement: 手順 4、 1の画像 1
    • Take a Jimmy and slide it under the glass after the adhesive has been softened.

    • Place a pick under the glass after lifting with the pry tool so that the screen won't re-adhere to the frame again.

    • Make sure to not touch the LCD edge underneath the glass layer with the metal pry tool or the cards. This can damage the ribbon cables underneath and compromise the structural integrity of the phone itself.

    • The corners of the screen are the most fragile part of the screen. Make sure that the entire edge of the screen is dislodged from the frame before prying at the corners.

  5. Nokia 6 Vibrator Replacement: 手順 5、 1の画像 1
    • Lift the screen off of the phone.

  6. Nokia 6 Vibrator Replacement: 手順 6、 2の画像 1 Nokia 6 Vibrator Replacement: 手順 6、 2の画像 2
    • Use a Phillips #000 screwdriver to remove the 1 mm x 1.4 mm screw holding down the metal bracket over the screen ribbon connector.

  7. Nokia 6 Vibrator Replacement: 手順 7、 1の画像 1
    • Remove the metal bracket with a tweezer.

  8. Nokia 6 Vibrator Replacement: 手順 8、 1の画像 1
    • Use a spudger to disconnect the screen ribbon connector and free the display assembly.

    • The corners and edge of the LCD are fragile. Be careful attaching it to the back of the phone.

    • Carefully remove the screen from the device.

  9. Nokia 6 Vibrator Replacement, Home Button Assembly: 手順 9、 1の画像 1
    • Disconnect the battery connector with a spudger.

  10. Nokia 6 Vibrator Replacement: 手順 10、 2の画像 1 Nokia 6 Vibrator Replacement: 手順 10、 2の画像 2
    • Use a Phillips #00 screwdriver to remove the 1.2 mm x 2.2 mm screw in the upper hand corner of the phone.

    • Use tweezers to remove the bracket.

  11. Nokia 6 Vibrator Replacement: 手順 11、 2の画像 1 Nokia 6 Vibrator Replacement: 手順 11、 2の画像 2
    • Detach the cable with the black nylon spudger.

    • Detach the home button and remove it from the device.

  12. Nokia 6 Vibrator Replacement, Midframe: 手順 12、 1の画像 1
    • Remove 18 screws.

    • There is one 1 mm x 1.4 mm screw that needs to be removed by a Phillips #000 screwdriver.

    • One of the screws is 1.2 mm x 4.2 mm and will be removed by a Phillips #00.

    • The remaining 16 screws can be removed by the Phillips #00 screwdriver and are 1.2 mm x 2.2 mm.

  13. Nokia 6 Vibrator Replacement: 手順 13、 2の画像 1 Nokia 6 Vibrator Replacement: 手順 13、 2の画像 2
    • Decouple the midframe with the spudger and remove the midframe from the device.

  14. Nokia 6 Vibrator Replacement, Motherboard: 手順 14、 2の画像 1 Nokia 6 Vibrator Replacement, Motherboard: 手順 14、 2の画像 2
    • Remove the bracket with tweezers.

  15. Nokia 6 Vibrator Replacement: 手順 15、 3の画像 1 Nokia 6 Vibrator Replacement: 手順 15、 3の画像 2 Nokia 6 Vibrator Replacement: 手順 15、 3の画像 3
    • Detach the two cables with the spudger.

    • Detach the cable with a pair of tweezers.

    • Be careful when detaching the cables, make sure to not completely remove the cables from the phone!

  16. Nokia 6 Vibrator Replacement: 手順 16、 1の画像 1
    • Remove six screws.

    • Two of these screws are 1.0 mm x 1.4 mm and need to be removed by a Phillips #000 screwdriver.

    • The remaining four screws are 1.2 mm x 2.2 mm and are removed by a Phillips #00 screwdriver.

  17. Nokia 6 Vibrator Replacement: 手順 17、 2の画像 1 Nokia 6 Vibrator Replacement: 手順 17、 2の画像 2
    • Remove the motherboard from the Nokia 6 with the spudger.

    • Be careful because the motherboard is fragile. Wiggle it gently to remove it.

  18. Nokia 6 Vibrator Replacement, Microphone: 手順 18、 1の画像 1
    • With tweezers, lift the wire by the microUSB port and the microphone unit.

  19. Nokia 6 Vibrator Replacement: 手順 19、 1の画像 1
    • Remove three screws.

    • Two of these are 1 mm x 1.4 mm and can be removed by a Phillips #000.

    • One of the screws is 1.2 mm x 2.2 mm and can be removed by a Phillips #00.

  20. Nokia 6 Vibrator Replacement: 手順 20、 2の画像 1 Nokia 6 Vibrator Replacement: 手順 20、 2の画像 2
    • Remove the microUSB port and the microphone by lifting the unit with a spudger.

    • Lift the black strip gently with the spudger, make sure not to rip it.

  21. Nokia 6 Vibrator Replacement, Loudspeaker: 手順 21、 2の画像 1 Nokia 6 Vibrator Replacement, Loudspeaker: 手順 21、 2の画像 2
    • Use a spudger to remove the loudspeaker from the phone.

  22. Nokia 6 Vibrator Replacement, Vibrator: 手順 22、 2の画像 1 Nokia 6 Vibrator Replacement, Vibrator: 手順 22、 2の画像 2
    • Use tweezers to remove the vibrator.

終わりに

To reassemble your device, follow these instructions in reverse order.

作成者

3人の作成者と共同で作成されました。

Chrissy Robins

メンバー登録日: 04/15/19

1,510 ポイント

10のガイドは作成済み

チーム

Cal Poly, Team S9-G15, Maness Spring 2019 Cal Poly, Team S9-G15, Maness Spring 2019人のメンバー

CPSU-MANESS-S19S9G15

4 メンバー

14のガイドは作成済み

0 件のコメント

コメントを追加

統計データ:

過去 24時間: 0

過去 7 日: 1

過去 30 日: 2

今までの合計 304