メインコンテンツにスキップ

Nokia 515 Front cover and keypad replacement

必要な工具と部品

  1. Nokia 515 Front cover and keypad replacement, Front cover and keypad: 手順 1、 1の画像 1
    • Remove the back cover with your fingers or with the eject tool which is included by Nokia.

    • Don't forget to turn off your device!

  2. Nokia 515 Front cover and keypad replacement: 手順 2、 1の画像 1
    • Remove the battery, the microSD card and the SIM card.

  3. Nokia 515 Front cover and keypad replacement: 手順 3、 1の画像 1
    • Remove the 2 screws with the T4 screwdriver.

    • Please store the screws on a safe place! I already lost a screw!

  4. Nokia 515 Front cover and keypad replacement: 手順 4、 2の画像 1 Nokia 515 Front cover and keypad replacement: 手順 4、 2の画像 2
    • Take the metal spudger and pry it firmly under the plastic hinges.

    • Although you want to replace the cover, be very careful by doing it! You could harm yourself with the metal spudger.

    • You could also use your fingers instead of the spudger to do it!

  5. Nokia 515 Front cover and keypad replacement, Remove the keypad: 手順 5、 3の画像 1 Nokia 515 Front cover and keypad replacement, Remove the keypad: 手順 5、 3の画像 2 Nokia 515 Front cover and keypad replacement, Remove the keypad: 手順 5、 3の画像 3
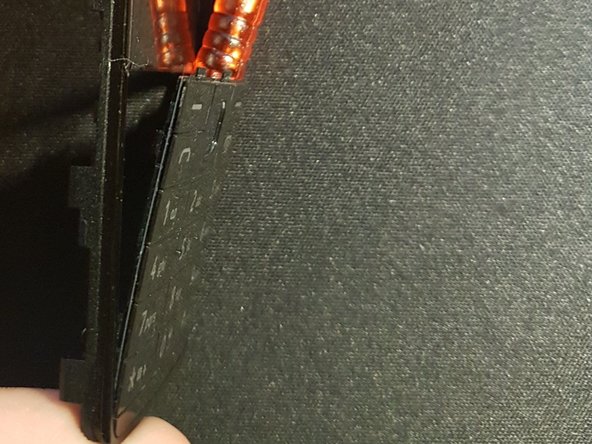
    • To remove the keypad, you should use the spudger to push the top clamps down a little bit while pressing your fingers against the inside of the keypad.

    • The keypad should be loose at the top.

    • To remove the bottom, just use a little bit of force to pull it off the front panel.

    • Just use a little bit of force.

  6. Nokia 515 Front cover and keypad replacement: 手順 6、 1の画像 1
    • To assemble the new keypad, start at the upper half of the keyboard.

  7. Nokia 515 Front cover and keypad replacement: 手順 7、 3の画像 1 Nokia 515 Front cover and keypad replacement: 手順 7、 3の画像 2 Nokia 515 Front cover and keypad replacement: 手順 7、 3の画像 3
    • To reassemble the front, just click it in place (you hear a clicking noise).

    • Now screw the T4 screws back into the holes.

    • Now you put the microSD card, the SIM card and the battery back into your device.

    • Now you can turn on your device.

終わりに

You did it!

3 の人々がこのガイドを完成させました。

以下の翻訳者の皆さんにお礼を申し上げます:

de en

100%

Leonさんは世界中で修理する私たちを助けてくれています! あなたも貢献してみませんか?
翻訳を始める ›

作成者

1人の作成者と共同作成されました。

Leon

メンバー登録日: 03/28/19

376 ポイント

1ガイドが承認済み

0 件のコメント

コメントを追加

統計データ:

過去 24時間: 0

過去 7 日: 6

過去 30 日: 24

今までの合計 796