はじめに
The keypad is fairly easy to retrieve and it is not actually secured by any piece of the phone other than the cover plate. When replacing the keypad, make sure it is oriented properly because it tends to slide around.
-
-
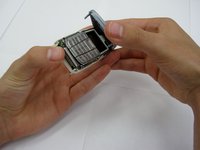
Remove the back cover plate of the phone. To do this press down the lock as you slide the cover toward the bottom of the phone.
-
-
-
-
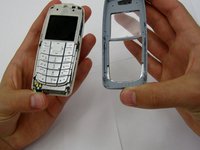
Using your fingernails or another tool, pry the front face plate out along its edges and corners.
-
-
-
Once the cover plate has been removed, the existing keypad should be easily removed.
-
To install a new keypad, simply place the new keypad in the same place where the old keypad was.
-


To reassemble your device, follow these instructions in reverse order.
To reassemble your device, follow these instructions in reverse order.
2 の人々がこのガイドを完成させました。

チーム

Clemson, Team 13-2, Benson Spring 2013 Clemson, Team 13-2, Benson Spring 2013人のメンバー
CLEM-BENSON-S13S13G2
3 メンバー
14のガイドは作成済み