メインコンテンツにスキップ

Nokero N400 Solar Panel Replacement

必要な工具と部品

  1. Nokero N400 Solar Panel Replacement, Remove Battery Cover: 手順 1、 3の画像 1 Nokero N400 Solar Panel Replacement, Remove Battery Cover: 手順 1、 3の画像 2 Nokero N400 Solar Panel Replacement, Remove Battery Cover: 手順 1、 3の画像 3
    • Press down firmly to remove the battery cover and display battery.

    • Then remove the battery.

  2. Nokero N400 Solar Panel Replacement, Unscrew Back Cover: 手順 2、 2の画像 1 Nokero N400 Solar Panel Replacement, Unscrew Back Cover: 手順 2、 2の画像 2
    • Remove the 7mm Phillips #1 screw.

  3. Nokero N400 Solar Panel Replacement, Pry Open Back Cover: 手順 3、 2の画像 1 Nokero N400 Solar Panel Replacement, Pry Open Back Cover: 手順 3、 2の画像 2
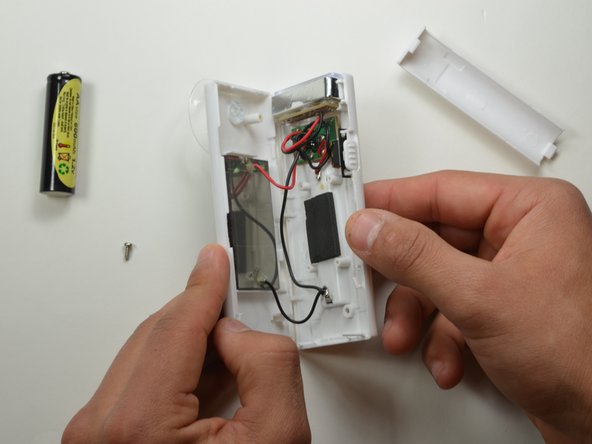
    • Place the plastic opening tool in between the two plastic panels and slowly work your way around the device.

    • Unlatch the clips on the inside and pull device apart.

    • Some clips will break when forced open.

  4. Nokero N400 Solar Panel Replacement, Solar Panel: 手順 4、 2の画像 1 Nokero N400 Solar Panel Replacement, Solar Panel: 手順 4、 2の画像 2
    • Pull the panel away from the rest of the assembly and cut the red and black wires coming from the panel

    • Be careful not to cut the ground-wire for the motherboard, it is the same color and goes to the exact same place as the solar panel wire.

    • For reassembly you will need to either splice, or solder the wires onto the replacement.

終わりに

To reassemble your device, follow these instructions in reverse order.

作成者

1人の作成者と共同作成されました。

Daniel Bumiller

メンバー登録日: 01/20/15

201 ポイント

2のガイドは作成済み

チーム

USF Tampa, Team 19-2, Blackwell Winter 2015 USF Tampa, Team 19-2, Blackwell Winter 2015人のメンバー

USFT-BLACKWELL-W15S19G2

4 メンバー

5のガイドは作成済み

0 件のコメント

コメントを追加

統計データ:

過去 24時間: 0

過去 7 日: 0

過去 30 日: 1

今までの合計 133