はじめに
頻繁に使用したり、過度の力を加えたりすると、Nintendo Switchジョイコン のケースが摩耗したり割れたりすることがあります。 これにより、Joの電子回路が露出し、さらなる損傷のリスクにさらされる可能性があります。 ただしジョイコン は、新しいシェルがなくても機能できます。ジョイコンの新しいペアを購入する前に、シェルを交換することをお勧めします。 摩耗したスイッチケースを修理したい場合は、このガイドを使用して、右側ジョイコンのシェルを交換してください。
注意してください 左側ジョイコンの修理手順 と手順が異なります。
ジョイコンのシェルの交換には、電子部品のネジを緩めて動かすだけですが、一部の手順では、小さな部品を再取り付けするために精度が必要です。
ジョイコンはメインシステムとは別のものであるため、ジョイコンのシェルを交換する前にスイッチをオフにする必要はありません。
必要な工具と部品
-
-
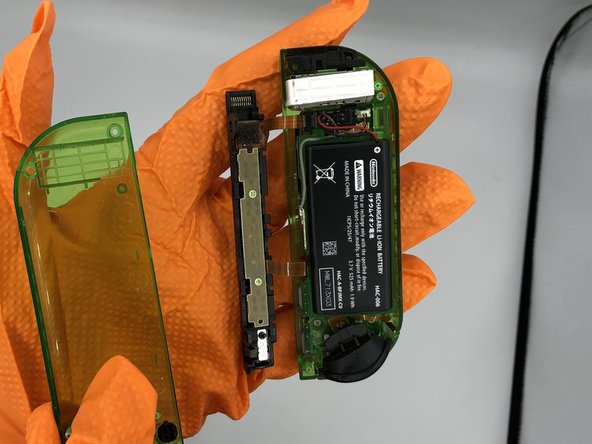
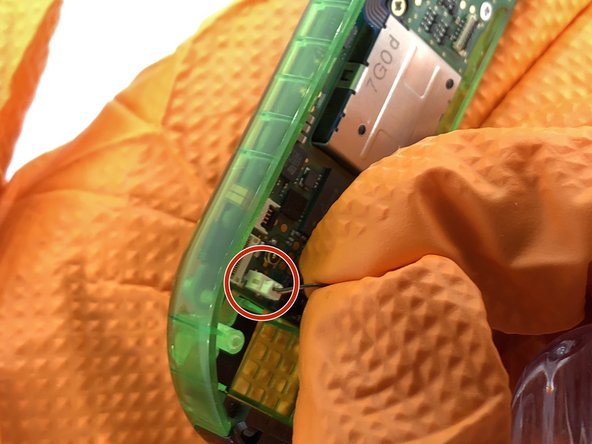
バッテリーを取り外し、マザーボードから取り外します。ピンセットまたは手を使用して、マザーボードから接続を引き出すことができます。
I messed up the pins for one of the ribbon cables trying to remove the battery connector, be careful with this one, had to order a new motherboard for my joycon
Milky Manz - 返信
-
-
-
-
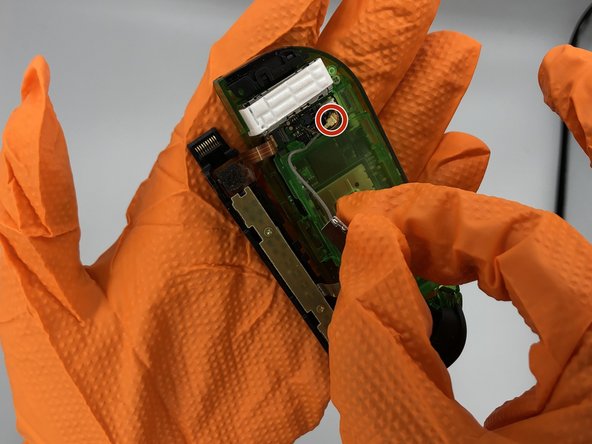
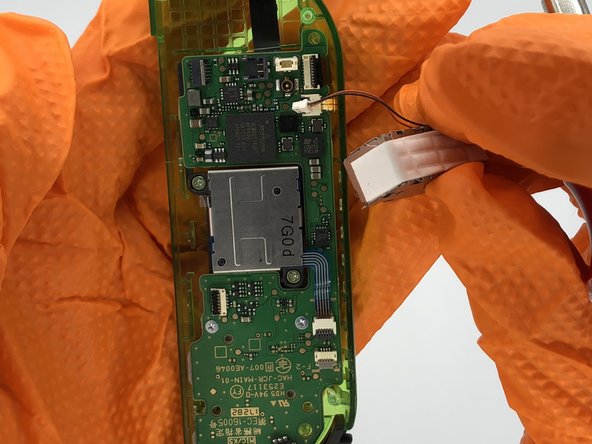
レールとバッテリーケースをマザーボードに接続しているリボンケーブルを取り外します。スパッジャーでコネクタを上向きにひっくり返してケーブルのロックを解除し、ケーブルをコネクタから引き出します。
Gibt es die Platine für die beiden Taster an der Ladeschiene auch als Ersatzteil? Wenn ich der Joy-Con zusammengebaut ist und damit das Flachbandkabel zusammengedrückt wird funktionieren die beiden Taster nicht. Wenn der Joy-Con auseinander gebaut ist und das Kabel langestreckt ist, dann funktionieren die beiden Taster.
Ich hoffe, dass es am Kabel liegt und nicht am Kontakt auf dem Motherboard.
Um… what happens if you accidentally push on the gray part of the one near the rumble motor?
-
-
-
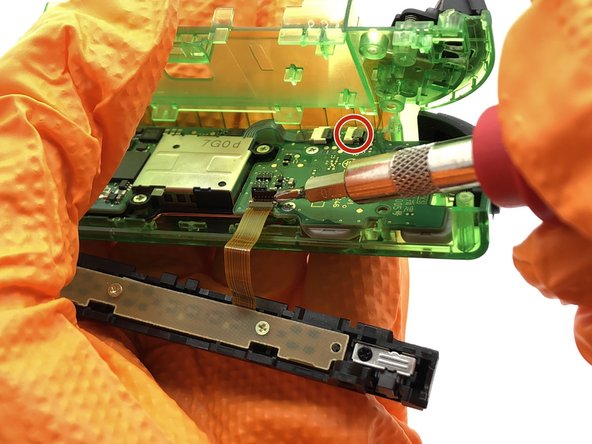
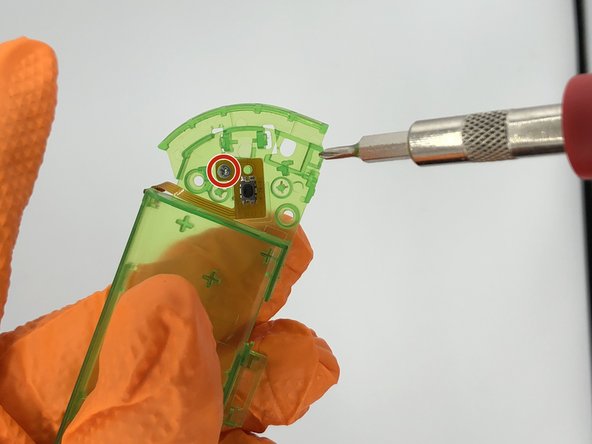
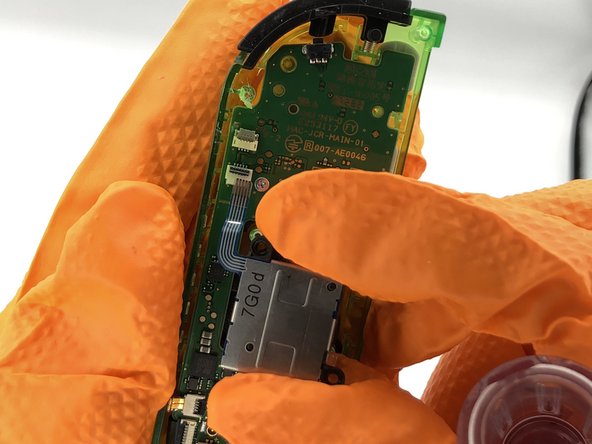
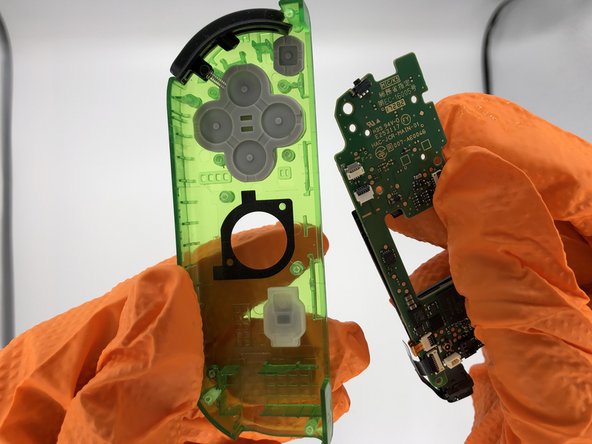
マザーボードをシェルに固定している2本のネジを外します。
Notable omission: be sure to disconnect the Ribbon cables near the bottom left (directly next to the rumble motor connector). You will have to swap the IR sensor and whatever the gold ribbon cable goes to/is (apologies, I don’t really know). Both are loosely held down with adhesive so just do that when you swap the buttons in the next step. When reconnecting the ribbon cables to the motherboard, I found it MUCH easier to put the ribbon cables back in place before screwing in the motherboard. I am amateur at this (only have fixed a couple iphones and few sets of joycons) but I found the angle to be particularly challenging if the motherboard was screwed in.
-


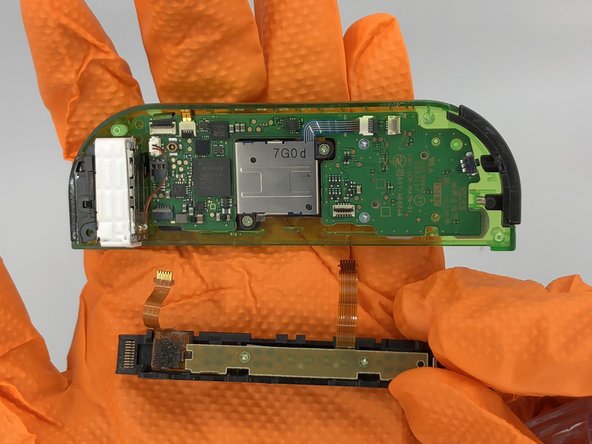


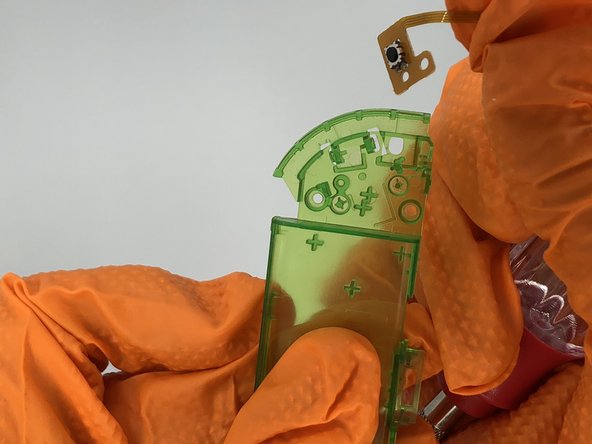


組み立て直すには、これらの手順を逆の順序で実行します。
組み立て直すには、これらの手順を逆の順序で実行します。
52 の人々がこのガイドを完成させました。
以下の翻訳者の皆さんにお礼を申し上げます:
100%

これらの翻訳者の方々は世界を修理する私たちのサポートをしてくれています。 あなたも貢献してみませんか?
翻訳を始める ›
チーム

University of North Texas, Team S1-G8, Raign Spring 2020 University of North Texas, Team S1-G8, Raign Spring 2020人のメンバー
UNT-RAIGN-S20S1G8
2 メンバー
7のガイドは作成済み
4 件のコメント
Not quite as thorough as the other Joy-con tear down but always a handy thing to have, going by the pictures it gave me all the information I needed personally concerning the screws, so I was able to strip the whole controller down and swap it into another shell. It is straight forward once you get in to it and have to give the author their much deserved credit for posting this up!
Very good detailed guide, only thing I would change is I’d probably take the rumble motor out right after of even before the battery. It’s pretty easy to remove, you can do it at anytime after opening, and it gets the wires out of the way to make other parts easier.
I am having difficulty removing the ribbon cable next to the rumble motor on step 7. It would be nice to have a photo of which way the clamp is expected to swing; I suspect I know the correct direction, but my tools are bending it instead.
In fact, this step is unnecessary unless you are replacing the buttons or rail case. The rail may remain attached if you are only replacing the front, back, and middle casing.
earthexe -