メインコンテンツにスキップ

Nintendo Entertainment System Game Cartridge Tray Springs Replacement

必要な工具と部品

  1. Nintendo Entertainment System Game Cartridge Tray Springs Replacement, Game Cartridge Tray: 手順 1、 2の画像 1 Nintendo Entertainment System Game Cartridge Tray Springs Replacement, Game Cartridge Tray: 手順 1、 2の画像 2
    • Remove the six 13.25mm Phillips screws on the bottom of the game console with a #2.5 flathead screwdriver.

    • The screws are recessed about 40 mm.

    • Flip the game console right side up and take off the top by pulling it up and away from the rest of the device with your hands.

  2. Nintendo Entertainment System Game Cartridge Tray Springs Replacement: 手順 2、 2の画像 1 Nintendo Entertainment System Game Cartridge Tray Springs Replacement: 手順 2、 2の画像 2
    • Remove the seven 13.25mm Phillips screws from the metal cover with a Phillips head #2 screwdriver.

    • Remove the metal cover by pulling it up and away from the rest of the console with your hands.

  3. Nintendo Entertainment System Game Cartridge Tray Springs Replacement: 手順 3、 3の画像 1 Nintendo Entertainment System Game Cartridge Tray Springs Replacement: 手順 3、 3の画像 2 Nintendo Entertainment System Game Cartridge Tray Springs Replacement: 手順 3、 3の画像 3
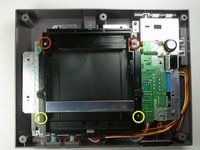
    • Remove the two silver 17.45mm Phillips screws from the cartridge tray using a Phillips head #2 screwdriver.

    • Remove the two bronze 13.25mm Phillips screws from the cartridge tray using a Phillips head #2 screwdriver.

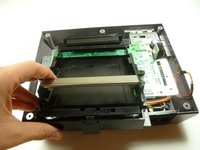
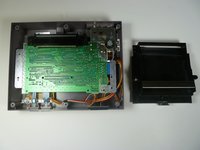
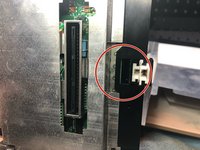
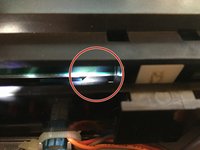
    • Slide the cartridge tray toward you, away from the 72-PIN connector, and off the motherboard assembly.

  4. Nintendo Entertainment System Game Cartridge Tray Springs Replacement: 手順 4、 2の画像 1 Nintendo Entertainment System Game Cartridge Tray Springs Replacement: 手順 4、 2の画像 2
    • Note: Underneath the cartridge tray is a black trapezoid-shaped tab/lip (see marker). When properly assembled this tab/lip goes below the motherboard and shielding as seen here.

    • During reassembly, make sure you orient this tab underneath the motherboard in addition to orienting the tray on top. Failure to do so will bow the cartridge tray and place stress on the component, causing the cartridge spring mechanism to bind.

  5. Nintendo Entertainment System Game Cartridge Tray Springs Replacement, Game Cartridge Tray Springs: 手順 5、 1の画像 1
    • Push down on the spring with your finger and pull out of the plastic casing.

    • If only one spring is worn out, replace only that spring.

終わりに

To reassemble your device, follow these instructions in reverse order.

3 の人々がこのガイドを完成させました。

作成者

6人の作成者と共同で作成されました。

nicholasweiser

メンバー登録日: 09/22/10

2,634 ポイント

6のガイドは作成済み

チーム

Cal Poly, Team 14-40, Forte Fall 2010 Cal Poly, Team 14-40, Forte Fall 2010人のメンバー

CPSU-FORTE-F10S14G40

4 メンバー

20のガイドは作成済み

0 件のコメント

コメントを追加

統計データ:

過去 24時間: 0

過去 7 日: 6

過去 30 日: 37

今までの合計 10,671