はじめに
何時間もタッチペンを使った後に、Nintendo DS Liteのタッチスクリーンはついに寿命を迎えました。私たちは、このタッチスクリーン交換ガイドを用意しました!
必要な工具と部品
-
-
-
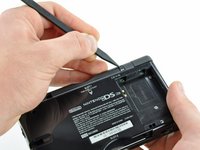
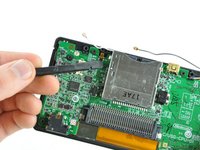
指の爪やプラスチック製開口ツールの先端を使って、下部LCDリボンケーブルの固定フラップを注意深く跳ね上げます。
-
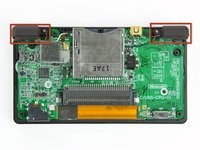
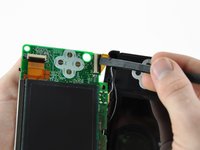
下部LCDアセンブリをまっすぐ引き離し、マザーボード上のソケットから下部LCDリボンケーブルの接続を外します。
-
マザーボードから下部LCDアセンブリを取り外します。
-
-
-
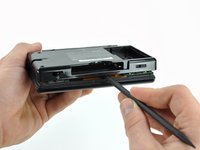
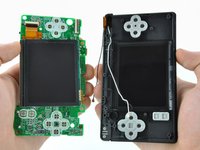
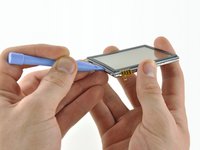
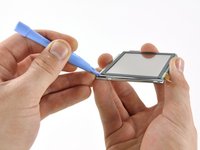
タッチスクリーンとディスプレイ右上角の間にプラスチック製開口ツールを差し込みます。
-
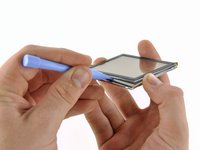
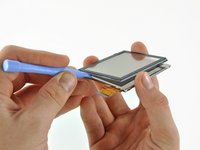
開口ツールをディスプレイ右端から下側に向けてスライドし、タッチスクリーン端を解放します。
-


デバイスを再度組み立てるには、この説明書の逆の順番で組み立ててください。
82 の人々がこのガイドを完成させました。
以下の翻訳者の皆さんにお礼を申し上げます:
100%

これらの翻訳者の方々は世界を修理する私たちのサポートをしてくれています。 あなたも貢献してみませんか?
翻訳を始める ›

7件のガイドコメント
Fixed My Cousins DS lite touch screen using this guide. Thank You.
Excellent directions! Very much appreciated. DS back in full working order. A big thanks to the additional advice in the comments, especially about attaching a thread to the antenna tho I tied it on BEFORE pulling it thru and left it in place thru rest of repair. Pulling back thru was a doddle!
When reassembling I’d suggest to pass the antenna (black wire) between the charging port and the small EM10 chip.
I first put this wire under the EM10, I couldnt close the case of the DS. There was a resistance near this spot. I gues it was the antenna wire.
Although, to put the wire under the cartridge slot, under the EM10 is the best spot. If you look under the catrige slot, you can see there is no obstacle there.
I got this wire stuck under the cartrige slot when reassembling because it was bent upward when I passed it under the slot. So it was bumping against the top of the cartrige underneath sapce. So my advice is to bend it to get it straight before feeding it through the slot. Attach it to a thread before removing it, as advised in other comments, is a good idea too. Just secure the first knot by a second one or it might detach when you pull it.
This guide could have been so much shorter, no need to remove unnecessary components to get to the bottom screen.