はじめに
The LCD unit is the main component of the digital display on the D5100. This guide will teach you how to remove and replace it.
必要な工具と部品
-
-
-
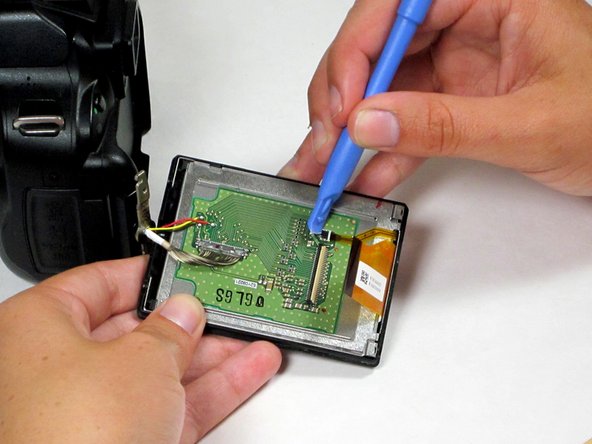
Desolder the 3 wires (red, yellow, and black) connecting the LCD board to the main camera body.
It might have been a better idea to pry-off the board first and then de-solder the contacts. Or at least note that high heat is bad for LCD screens.
It’s very possible that applying the soldering iron to the board, while still attached to the back, caused the LCD to lose its color alignment and darken the display.
-


To reassemble your device, follow these instructions in reverse order.
To reassemble your device, follow these instructions in reverse order.
9 の人々がこのガイドを完成させました。
チーム

Cal Poly, Team 10-54, Amido Spring 2014 Cal Poly, Team 10-54, Amido Spring 2014人のメンバー
CPSU-AMIDO-S14S10G54
4 メンバー
5のガイドは作成済み
6 件のコメント
Thanks for this Liz.
Removing the broken LCD from my Nikon D5100 seems like something I can do now!
I am unsure ?how to do the soldering bit to attach the new LCD, ?where to attach the wires...
Any help is welcome
I was able to fix it, thanks to you guys. But the colors that came on the, LCD are weird. At least I can see the image.
It’s very possible that applying the soldering iron to the board, while still attached to the back, caused the LCD to lose its color alignment and darken the display. I made the same mistake.
Franky -
I am having trouble reconnecting the 16-pin cable to the circuit board. Do you have any tips?
Thank you! I had talked to a camera shop and they said the cost of the crystal would be so much I should buy a new camera…. The crystal was 54.00 and i just need my personal time and labor. THANK YOU!!!
Possible "000" (smaller than "00") size screw driver. My 00 was too big.
Peter XYZ - 返信