メインコンテンツにスキップ

Nikon D5000 Sensor Filter Replacement

必要な工具と部品

  1. Nikon D5000 Sensor Filter Replacement, Back Panel: 手順 1、 3の画像 1 Nikon D5000 Sensor Filter Replacement, Back Panel: 手順 1、 3の画像 2 Nikon D5000 Sensor Filter Replacement, Back Panel: 手順 1、 3の画像 3
    • The battery door has been removed for clarity, but is not necessary. See this guide for how to remove it.

    • Unscrew the eight Phillips #00 screws on the back panel:

    • Two 2.5x6mm screws above the screen.

    • One 3x6mm screw on the upper part of each side (two total; right side shown).

    • One 3x7.5mm screw on the lower part of each side (two total).

    • Two 3x4.5mm screws on the bottom.

  2. Nikon D5000 Sensor Filter Replacement: 手順 2、 3の画像 1 Nikon D5000 Sensor Filter Replacement: 手順 2、 3の画像 2 Nikon D5000 Sensor Filter Replacement: 手順 2、 3の画像 3
    • Pull the back panel up, then tilt it back. There will be two cables still holding it on.

    • Doing this will also release the connector cover on the left side. Set it aside for now, but remember to reinstall it later.

    • Disconnect the ribbon cable by flipping the black tab up, then pulling the cable out.

    • This procedure also applies to all of the other ribbon cables in the D5000.

    • Pull out the other connector by lifting it up with tweezers, or by prying it out. Fingernails also work well.

  3. Nikon D5000 Sensor Filter Replacement, Sensor Filter: 手順 3、 3の画像 1 Nikon D5000 Sensor Filter Replacement, Sensor Filter: 手順 3、 3の画像 2 Nikon D5000 Sensor Filter Replacement, Sensor Filter: 手順 3、 3の画像 3
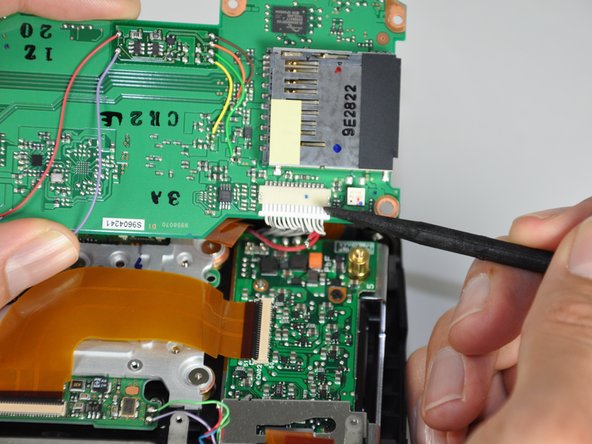
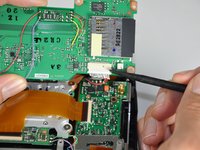
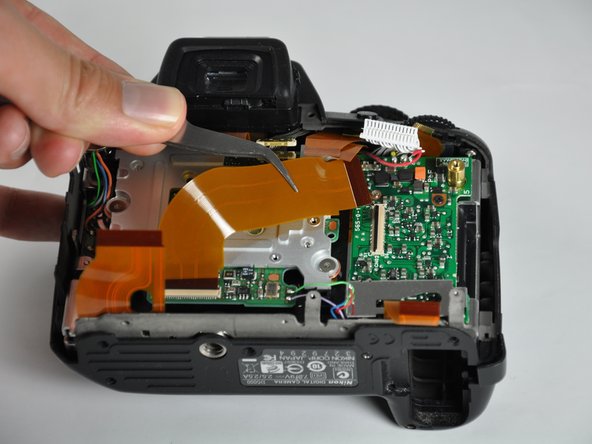
    • Disconnect the six ribbon cables by releasing the clips and pulling the cables out.

    • Pry off the gold-plated connector with an opening tool, spudger, tweezers, or a fingernail.

    • Disconnect a seventh ribbon cable in the lower-right corner.

  4. Nikon D5000 Sensor Filter Replacement: 手順 4、 1の画像 1
    • Desolder the five wires attached to the back of the board.

  5. Nikon D5000 Sensor Filter Replacement: 手順 5、 2の画像 1 Nikon D5000 Sensor Filter Replacement: 手順 5、 2の画像 2
    • Remove the five silver Phillips #00 4x4mm screws.

    • One is hiding under the wide ribbon cable in the lower-right corner.

  6. Nikon D5000 Sensor Filter Replacement: 手順 6、 2の画像 1 Nikon D5000 Sensor Filter Replacement: 手順 6、 2の画像 2
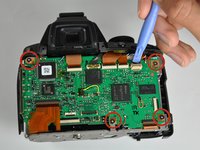
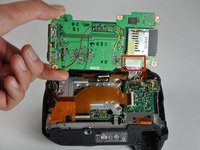
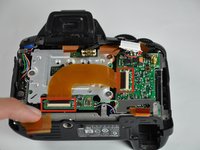
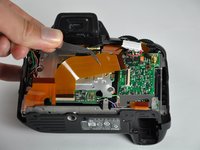
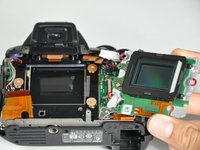
    • Flip up the motherboard.

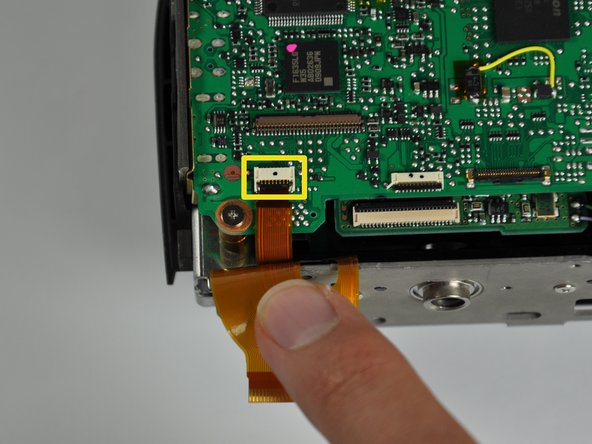
    • Remove the white cable connector by pulling it out of its socket with a spudger or fingernails.

  7. Nikon D5000 Sensor Filter Replacement: 手順 7、 2の画像 1 Nikon D5000 Sensor Filter Replacement: 手順 7、 2の画像 2
    • Remove the L-shaped ribbon cable from both of its connectors.

  8. Nikon D5000 Sensor Filter Replacement: 手順 8、 2の画像 1 Nikon D5000 Sensor Filter Replacement: 手順 8、 2の画像 2
    • Remove the three silver 5x5mm screws.

    • Between the metal backing plate and the standoffs for each screw is a copper washer. Don't lose them!

    • Flip the sensor board out.

    • Be extremely careful from this point on. Dust or scratches on any part of the sensor or its filters can affect picture quality.

  9. Nikon D5000 Sensor Filter Replacement: 手順 9、 2の画像 1 Nikon D5000 Sensor Filter Replacement: 手順 9、 2の画像 2
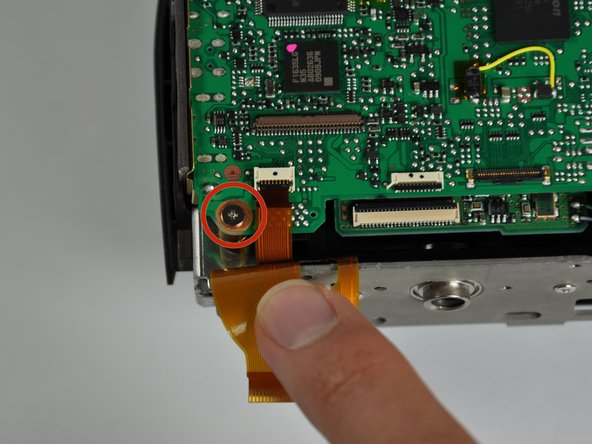
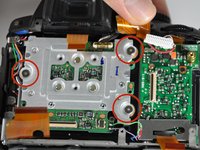
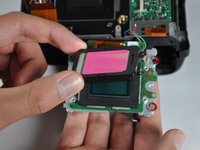
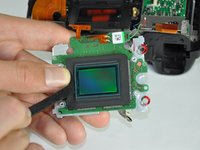
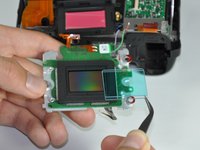
    • Remove the four silver 3.5x3.5mm screws securing the dust cover.

    • Pull the cover straight up to remove it.

  10. Nikon D5000 Sensor Filter Replacement: 手順 10、 2の画像 1 Nikon D5000 Sensor Filter Replacement: 手順 10、 2の画像 2
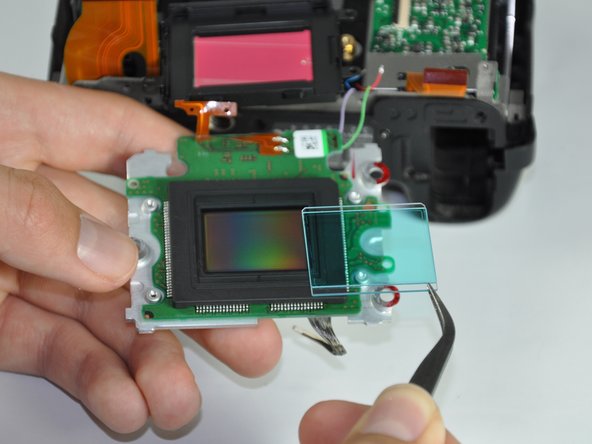
    • To remove the sensor filter, pull back the rubber gasket to expose the edge. Use a spudger or opening tool to carefully pry out the filter.

終わりに

To reassemble your device, follow these instructions in reverse order.

3 の人々がこのガイドを完成させました。

作成者

3人の作成者と共同で作成されました。

Jacob Rardin

メンバー登録日: 04/14/14

1,390 ポイント

6のガイドは作成済み

チーム

Cal Poly, Team 13-28, Maness Spring 2014 Cal Poly, Team 13-28, Maness Spring 2014人のメンバー

CPSU-MANESS-S14S13G28

4 メンバー

7のガイドは作成済み

コメント 1 件

Excelente guía, solo que debo cambiar las cortinillas y creo que es por el frente de la cámara

alcova35 - 返信

コメントを追加

統計データ:

過去 24時間: 1

過去 7 日: 6

過去 30 日: 15

今までの合計 5,218