はじめに
Step by step disassembly and Replace Nikon S3500 Lens part
必要な工具と部品
-
-
Remove 2 (4mm) screws from the bottom of the camera.
-
Remove 2 (4mm) screws from the bottom side of the camera.
-
-
-
Remove 2 (4mm) screws from the right side of the camera.
-
Remove 2 (4mm) screws from the left side of the camera.
-
-
-
Use a spudger or other plastic tool and carefully work your way around the seam and carefully Pry off the rear case.
-
Carefull not to loose the A/V Out cover. Remove it and set it aside.
-
-
-
-
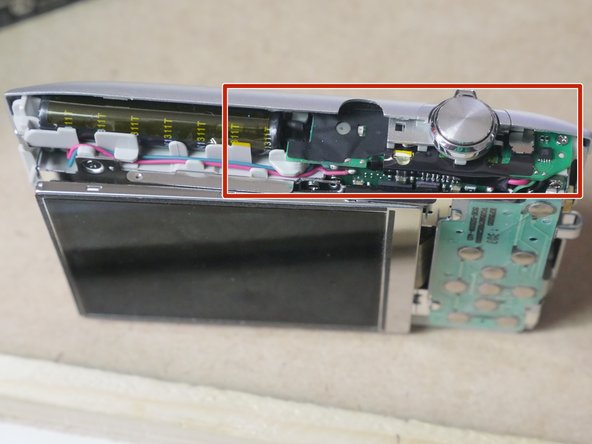
Release the cable clamp using a spudger or similar tool.. or just use your fingernail. Be careful because the clamp breaks easily. Another way to release the cable is to just pull the LCD cable out carefully... this will automatically release the clamp without the risk of damaging the clamp
-
If you decide to pull the cable out make sure you hold the flex cable tightly and pull horizontal to its installed position away from the clamp. Do not hold the LCD!!! Hold only the flex cable and hold it tight.
-
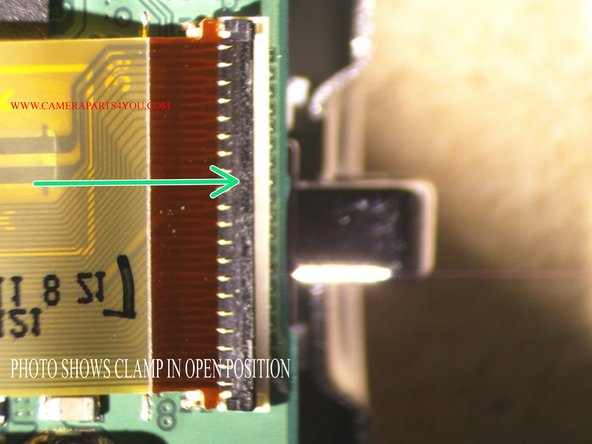
Example photos of open and closed ziff socket clamps
-
-
-
Remove the LCD and Install the replacement Screen. Reverse the instructions to Assemble the unit
-
-
-
Remove 1 (3mm) screw and 2 screws to left.
-
Release the ground tape from the rear metal plate
-
Release the 3 notches from their grooves and remove the rear metal plate.
-
-
-
Release the flex clamps on the board. These clamps are very fragile so please be careful when flipping them up. Use of a spudger is a great help. Notice the two clamps are not in the same direction.
-
Example of Clamp in Closed Position
-
Example of Clamp in Open Position
-
-
-
Remove your old lens and install the new lens. Follow steps in reverse to assemble unit.
-
-
-
If you are using the original sensor, remove the three screws and carefully lift the sensor out.
-
Extremely important is to install this foam and glass piece. I've learned this the hard way that your photos will look all red without this piece of color corrected glass...
-


To reassemble your device, follow these instructions in reverse order.
To reassemble your device, follow these instructions in reverse order.
2 の人々がこのガイドを完成させました。
4 件のコメント
Thanks so much for this tutorial.
I was able to swap out the old lens in about an hour.
Although it was tricky getting some of the cables in and out, everything seems to function properly with the new lens installed.
$16 repair, love it!
I had to pull it apart again because I failed to see there was a tinted lens that goes between the lens and sensor. Luckily it was still sitting in the original lens. Without this glass everything looks really red through the camera. Camera seems to be perfect now.
Meine S3500 hat folgendes Problem: Die 2 Shutter vor der Optik schließen NICHT ganz und der rotierende Teil der Optik-Träger verschwindet nicht ganz im Camera Gehäuse - diese Funktionen hängen wahrscheinlich ‘mechanisch-kinematisch’ zusammen!! Was kann ich machen um diese Zustand zu beenden!! Durch diesen Zustand kann ich die Camera auch NICHT starten - PLEASE HELP !! best regards Werner
For answer please use : werner.hartmann@chello.at
Wieso verschwindet mein Objektiv - Träger NICHT wieseo sind die 2 Shutter NICHT zu - wieso kann ich NICHR starten??? Please HELP!!! for answer ples use : werner.hartmann@chello.at Many thanks