メインコンテンツにスキップ

Nikon Coolpix L840 Flash Replacement

必要な工具と部品

  1. Nikon Coolpix L840 Flash Replacement, Flash: 手順 1、 1の画像 1
    • Press the flash button on the side of the camera to allow the flash to spring upward.

  2. Nikon Coolpix L840 Flash Replacement: 手順 2、 2の画像 1 Nikon Coolpix L840 Flash Replacement: 手順 2、 2の画像 2
    • Unscrew the two black, 4mm screws with a Philips 000. (There should be one screw on each side of the camera).

  3. Nikon Coolpix L840 Flash Replacement: 手順 3、 2の画像 1 Nikon Coolpix L840 Flash Replacement: 手順 3、 2の画像 2
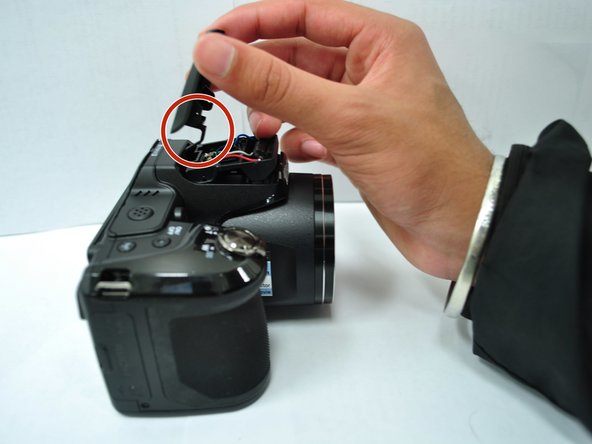
    • Remove the back case of the flash by lifting it off of the flash.

    • The back half cover has a little tail that keeps it locked in place. Wiggling the back cover around may help unhook the tail.

  4. Nikon Coolpix L840 Flash Replacement: 手順 4、 1の画像 1
    • Push the flash inward to pop the flash out of its front case. Since the back case is removed, the flash should pop out from the back.

  5. Nikon Coolpix L840 Flash Replacement: 手順 5、 1の画像 1
    • The see-through protective flash covering is stuck on to the flash with thin, double-sided tape. Pull apart the two components to access the flash.

終わりに

To reassemble your device, follow these instructions in reverse order.

作成者

4人の作成者と共同で作成されました。

Chanelle Mosquera

メンバー登録日: 04/11/16

259 ポイント

1ガイドが承認済み

チーム

Cal Poly, Team 1-11, Maness Spring 2016 Cal Poly, Team 1-11, Maness Spring 2016人のメンバー

CPSU-MANESS-S16S1G11

4 メンバー

10のガイドは作成済み

0 件のコメント

コメントを追加

統計データ:

過去 24時間: 1

過去 7 日: 1

過去 30 日: 3

今までの合計 1,024