メインコンテンツにスキップ

このバージョンは誤った内容を含んでいる可能性があります。最新の承認済みスナップショットに切り替えてください。

Nexus Sのスピーカーの交換

必要な工具と部品

  1. Nexus Sのスピーカーの交換, リアパネル: 手順 1、 1の画像 1
    • 背面カメラ付近のリアパネルとインナーリアフレーム間に、プラスチック製開口ツールを慎重に差し込みます。

    • プラスチック製開口ツールを使って、Nexus Sの周囲を外してリアパネルを持ち上げます。

  2. Nexus Sのスピーカーの交換: 手順 2、 1の画像 1
    • Nexus Sからリアパネルを取り外します。

  3. Nexus Sのスピーカーの交換, バッテリー: 手順 3、 1の画像 1
    • プラスチック製開口ツールの先端を使って、ヘッドホンジャックに最も近いバッテリー先端からバッテリーを持ち上げます。

    • Nexus Sからバッテリーを取り出します。

  4. Nexus Sのスピーカーの交換, SIMカード: 手順 4、 2の画像 1 Nexus Sのスピーカーの交換, SIMカード: 手順 4、 2の画像 2
    • 親指を使って、SIMカードスロットからSIMカードを下部にスライドします。

    • SIMカードを取り出します。

  5. この手順は未翻訳です。 翻訳を手伝う。

    Nexus Sのスピーカーの交換, リアインナーフレーム: 手順 5、 1の画像 1
    • Remove the six Phillips screws securing the rear inner frame to the inner case.

  6. この手順は未翻訳です。 翻訳を手伝う。

    Nexus Sのスピーカーの交換: 手順 6、 1の画像 1
    • Insert the flat edge of a plastic opening tool in between the rear inner frame and the top left corner of the Nexus S.

    • Pry the opening tool upwards to pop the top right corner from the clips securing it to the inner assembly.

  7. この手順は未翻訳です。 翻訳を手伝う。

    Nexus Sのスピーカーの交換: 手順 7、 2の画像 1 Nexus Sのスピーカーの交換: 手順 7、 2の画像 2
    • Insert the plastic opening tool to the right of the power button.

    • Slide the plastic opening tool downwards along the perimeter of the Nexus S to release the clips on the right side.

  8. この手順は未翻訳です。 翻訳を手伝う。

    Nexus Sのスピーカーの交換: 手順 8、 2の画像 1 Nexus Sのスピーカーの交換: 手順 8、 2の画像 2
    • In the same manner as previously described, release the bottom clips located near the bottom of the Nexus S.

  9. この手順は未翻訳です。 翻訳を手伝う。

    Nexus Sのスピーカーの交換: 手順 9、 1の画像 1
    • Insert and pry the plastic opening tool to release the final clip securing the rear inner frame to the inner assembly.

  10. この手順は未翻訳です。 翻訳を手伝う。

    Nexus Sのスピーカーの交換: 手順 10、 1の画像 1
    • Lift and remove the rear inner frame from the Nexus S.

  11. Nexus Sのスピーカーの交換, SIMカードボード: 手順 11、 1の画像 1
    • プラスチック製開口ツールの平面側先端を使って、マザーボード上のソケットからSIMボードコネクタを持ち上げます。

  12. この手順は未翻訳です。 翻訳を手伝う。

    Nexus Sのスピーカーの交換: 手順 12、 3の画像 1 Nexus Sのスピーカーの交換: 手順 12、 3の画像 2 Nexus Sのスピーカーの交換: 手順 12、 3の画像 3
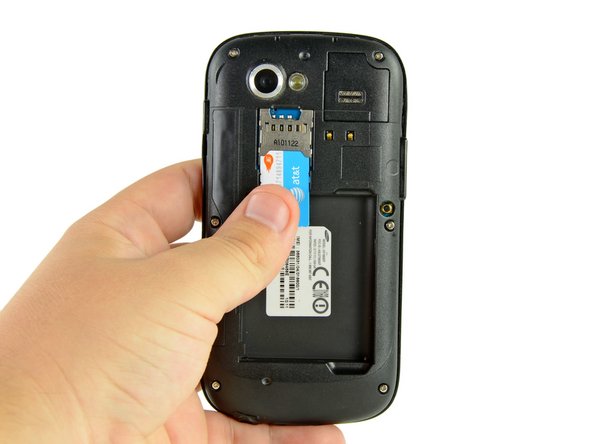
    • Wedge the edge of a plastic opening tool underneath the SIM Card board and motherboard.

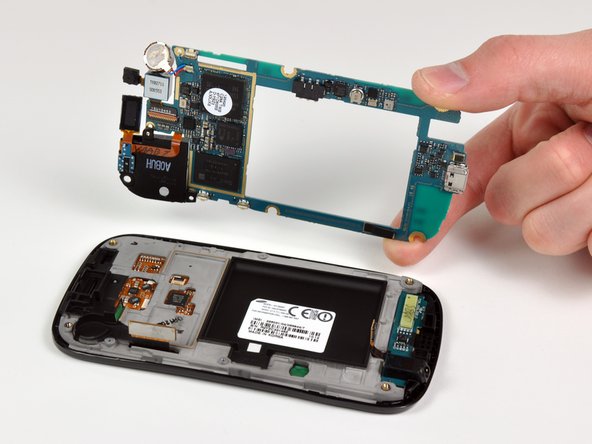
    • Pry the clips located near the right bottom edge of the SIM Card board up off the motherboard.

    • Repeat the process all along the bottom perimeter of the SIM Card board until all clips have been disengaged.

  13. Nexus Sのスピーカーの交換: 手順 13、 1の画像 1
    • Nexus SからSIMカードボードを持ち上げて外します。

  14. Nexus Sのスピーカーの交換, マザーボード: 手順 14、 1の画像 1
    • マザーボード上の各ソケットから次のケーブルの接続を外します:

    • ヘッドホンジャックケーブル

    • デジタイザーケーブルコネクタ

    • カメラ/SIMボードコネクタ

  15. この手順は未翻訳です。 翻訳を手伝う。

    Nexus Sのスピーカーの交換: 手順 15、 3の画像 1 Nexus Sのスピーカーの交換: 手順 15、 3の画像 2 Nexus Sのスピーカーの交換: 手順 15、 3の画像 3
    • Insert the flat edge of a plastic opening tool underneath the headphone jack connector and pry upwards.

    • Make sure to pry on the connector and not the socket itself. Prying the socket may cause severe damage.

    • Repeat the procedure for the digitizer and rear camera/SIM board connectors.

  16. Nexus Sのスピーカーの交換: 手順 16、 1の画像 1
    • マザーボードをフロントディスプレイアセンブリに固定しているプラスネジを3本外します。

  17. この手順は未翻訳です。 翻訳を手伝う。

    Nexus Sのスピーカーの交換: 手順 17、 2の画像 1 Nexus Sのスピーカーの交換: 手順 17、 2の画像 2
    • Wedge the plastic opening tool near the bottom right corner of the motherboard and pry upwards to dislodge it from its recess.

    • Lift and remove the motherboard.

  18. Nexus Sのスピーカーの交換, スピーカー: 手順 18、 1の画像 1
    • スピーカーが残ります。

    • イヤホンパーツは、スピーカーと一体化しているため、フレックスを切断しないようご注意ください。

終わりに

デバイスを再度組み立てるには、この説明書の逆の順番で組み立ててください。

7 の人々がこのガイドを完成させました。

以下の翻訳者の皆さんにお礼を申し上げます:

en jp

100%

これらの翻訳者の方々は世界を修理する私たちのサポートをしてくれています。 あなたも貢献してみませんか?
翻訳を始める ›

作成者

2人の作成者と共同で作成されました。

Walter Galan

694,573 ポイント

1,203のガイドは作成済み

3 件のコメント

Where can I buy the speaker?

Fergal Daly - 返信

Hi, I bought a replacement for my speaker(it's dead) but, the replacement did not come with an earpiece. Can I take the earpiece from my old one and attach it to the new one. I have some soldering experience.

makenova - 返信

hey makenova,

I have the same problem. Did the soldering worked for you ?

Geert Meeusen -

コメントを追加

統計データ:

過去 24時間: 0

過去 7 日: 0

過去 30 日: 1

今までの合計 6,743