メインコンテンツにスキップ

Nextbook Flexx 10 Camera Replacement

必要な工具と部品

  1. Nextbook Flexx 10  Camera Replacement, Front and Rear Camera: 手順 1、 3の画像 1 Nextbook Flexx 10  Camera Replacement, Front and Rear Camera: 手順 1、 3の画像 2 Nextbook Flexx 10  Camera Replacement, Front and Rear Camera: 手順 1、 3の画像 3
    • Remove the top section by pushing the middle button in the center of the base and lift on the screen.

  2. Nextbook Flexx 10  Camera Replacement: 手順 2、 3の画像 1 Nextbook Flexx 10  Camera Replacement: 手順 2、 3の画像 2 Nextbook Flexx 10  Camera Replacement: 手順 2、 3の画像 3
    • Remove the black back panel of the screen.

  3. Nextbook Flexx 10  Camera Replacement: 手順 3、 2の画像 1 Nextbook Flexx 10  Camera Replacement: 手順 3、 2の画像 2
    • Place the panel screen down.

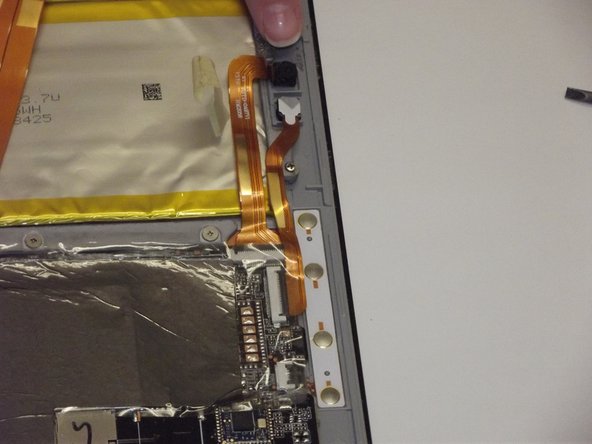
    • Identify the cameras at the top center.

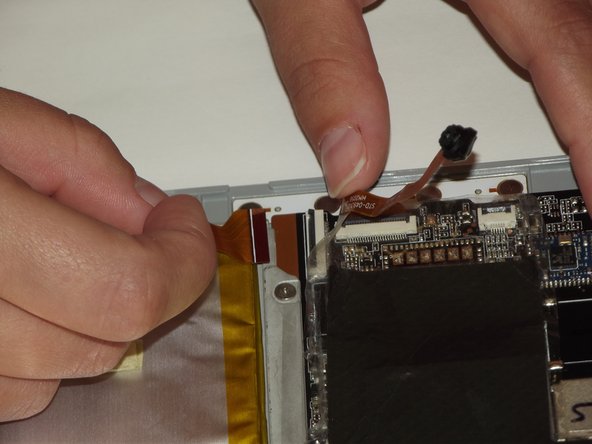
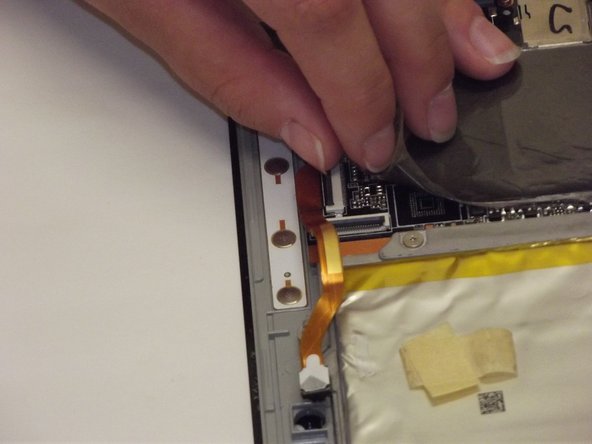
  4. Nextbook Flexx 10  Camera Replacement: 手順 4、 3の画像 1 Nextbook Flexx 10  Camera Replacement: 手順 4、 3の画像 2 Nextbook Flexx 10  Camera Replacement: 手順 4、 3の画像 3
    • Find the front camera.

    • Follow the gold strip to where it connects to the device.

    • There is a black piece that is holding the gold strip. Flip this up to release the camera.

    • Follow bullets above for the rear facing camera.

  5. Nextbook Flexx 10  Camera Replacement: 手順 5、 2の画像 1 Nextbook Flexx 10  Camera Replacement: 手順 5、 2の画像 2
    • Insert new camera into each slot, make connections, and close the black flap.

    • Snap back panel back onto the back of the screen.

    • Put screen and the keyboard back together.

終わりに

To reassemble your device, follow these instructions in reverse order.

作成者

3人の作成者と共同で作成されました。

Jenna Hummer

メンバー登録日: 09/08/17

115 ポイント

1ガイドが承認済み

チーム

Western Carolina University, Team S1-G4, Virtue Fall 2017 Western Carolina University, Team S1-G4, Virtue Fall 2017人のメンバー

WCU-VIRTUE-F17S1G4

5 メンバー

12のガイドは作成済み

0 件のコメント

コメントを追加

統計データ:

過去 24時間: 1

過去 7 日: 2

過去 30 日: 11

今までの合計 315