メインコンテンツにスキップ

Nerf Vortex Praxis Handle Replacement

アーカイブされたガイド
このガイドは将来的な使用のためにのみ保存されてます。ご自身の修理作業には更新バージョンをご利用ください。

必要な工具と部品

  1. Nerf Vortex Praxis Handle Replacement, Handle: 手順 1、 1の画像 1
    • Start by taking out all of the screws for the casing of the gun. Using the PH #00 screwdriver, unscrew all four 1.3 cm screws in the pump.

  2. Nerf Vortex Praxis Handle Replacement: 手順 2、 1の画像 1
    • Take out all of the screws with a Phillips screwdriver. Using a PH #00 Screwdriver, unscrew all fourteen, 1.2 cm screws.

  3. Nerf Vortex Praxis Handle Replacement: 手順 3、 1の画像 1
    • Remove the small stock at the back end of the gun by removing two, 1-cm screws.

  4. Nerf Vortex Praxis Handle Replacement: 手順 4、 1の画像 1
    • Pull apart the case of the gun.

  5. Nerf Vortex Praxis Handle Replacement: 手順 5、 1の画像 1
    • Remove the 1.2 cm Phillips screw towards the front of the blaster.

    • Remove the silver 1.1 cm Phillips screw next to the first screw.

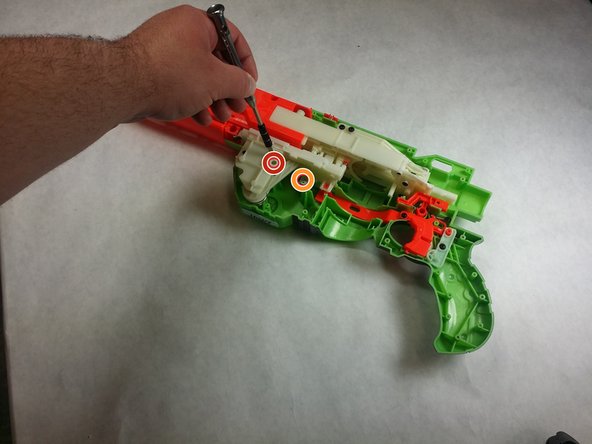
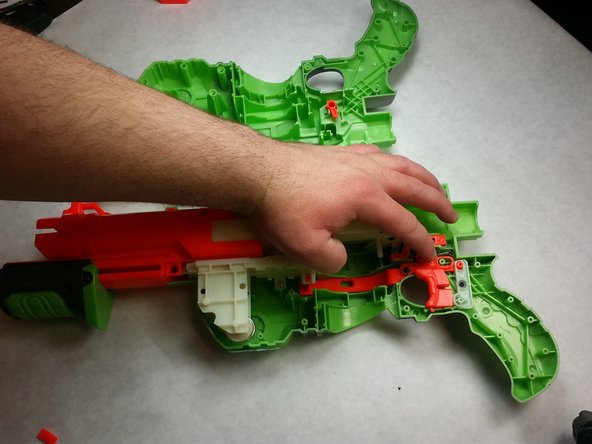
  6. Nerf Vortex Praxis Handle Replacement: 手順 6、 2の画像 1 Nerf Vortex Praxis Handle Replacement: 手順 6、 2の画像 2
    • Remove the trigger components by removing these two 1.2 cm screws.

  7. Nerf Vortex Praxis Handle Replacement: 手順 7、 1の画像 1
    • Remove the .7-cm screws towards the back of the inside of the outer case.

  8. Nerf Vortex Praxis Handle Replacement: 手順 8、 1の画像 1
    • Remove single 1.2 cm screw that connects loading assembly.

  9. Nerf Vortex Praxis Handle Replacement: 手順 9、 1の画像 1
    • Pull out the white piece from the rest of the gun.

  10. Nerf Vortex Praxis Handle Replacement: 手順 10、 1の画像 1
    • Pull off the orange piece.

    • The outer casing can now be replaced.

終わりに

To reassemble your device, follow these instructions in reverse order.

作成者

4人の作成者と共同で作成されました。

Diego medina

メンバー登録日: 02/18/16

558 ポイント

5のガイドは作成済み

チーム

IUPUI, Team 3-1, Harley Spring 2016 IUPUI, Team 3-1, Harley Spring 2016人のメンバー

IUPUI-HARLEY-S16S3G1

3 メンバー

5のガイドは作成済み

0 件のコメント

コメントを追加

統計データ:

過去 24時間: 0

過去 7 日: 1

過去 30 日: 1

今までの合計 379