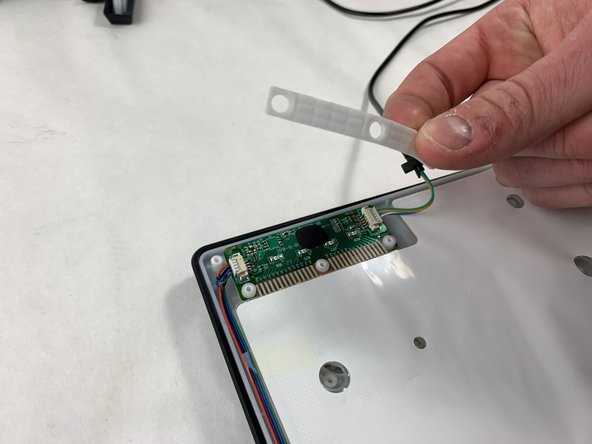
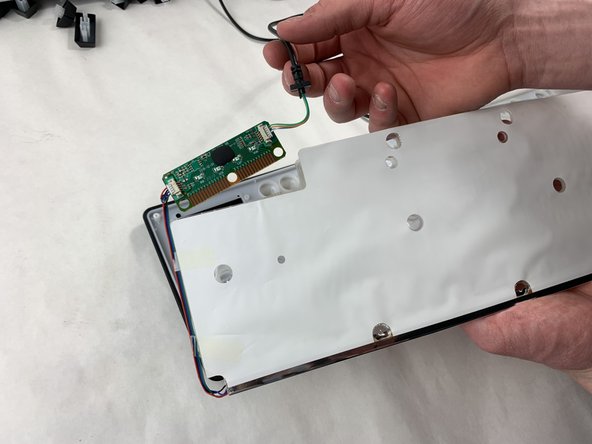
メインコンテンツにスキップ

NPET K10V3 Membrane Replacement

必要な工具と部品

  1. NPET K10V3 Membrane Replacement, Key Cap: 手順 1、 1の画像 1
    • Remove the keyboard from its power source.

  2. NPET K10V3 Membrane Replacement: 手順 2、 2の画像 1 NPET K10V3 Membrane Replacement: 手順 2、 2の画像 2
    • Firmly grasp the key that will be removed.

    • Remove the keycap by pulling directly upward.

    • Not pulling straight upward or securely will cause damage to the device.

    • If your fingers cannot get a good grip the key cap, use a key cap puller in the same orientation as with fingers.

  3. NPET K10V3 Membrane Replacement, Membrane: 手順 3、 1の画像 1
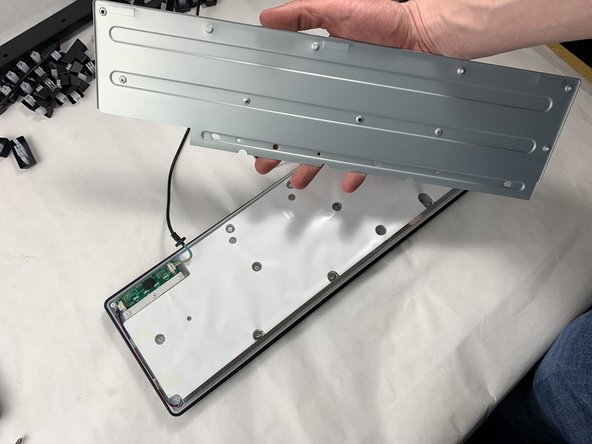
    • Flip the keyboard over so the bottom is facing upwards.

    • Remove fifteen 4.5 mm screws using a Phillips #2 screwdriver.

    • Remove three 9 mm screws using a Phillips #2 screwdriver.

    • Remove the screws from the kickstand plate first followed by the remaining screws for removal of the backplate.

  4. NPET K10V3 Membrane Replacement: 手順 4、 2の画像 1 NPET K10V3 Membrane Replacement: 手順 4、 2の画像 2
    • Remove the kickstand.

    • Remove the back plate.

    • Keep in mind the location of the USB cable to ensure it is not damaged when re-assembling.

  5. NPET K10V3 Membrane Replacement: 手順 5、 2の画像 1 NPET K10V3 Membrane Replacement: 手順 5、 2の画像 2
    • Remove the rubber gasket that compresses the connections.

    • When removing the gasket, lift straight upward to avoid damage and snagging.

    • Clean the gasket if there is any dirt or debris.

    • Do not use chemicals or liquids when cleaning to avoid damage.

  6. NPET K10V3 Membrane Replacement: 手順 6、 2の画像 1 NPET K10V3 Membrane Replacement: 手順 6、 2の画像 2
    • Remove the membrane gently to reveal the copper connections for both motherboard and membrane.

    • Remove the motherboard from the membrane.

    • Remove the membrane out with the motherboard.

    • When removing both parts, lift straight upward to avoid damage and snagging.

  7. NPET K10V3 Membrane Replacement: 手順 7、 1の画像 1
    • Place the membrane with the motherboard on a clean surface.

    • If the membrane is dirty around the key gaskets, clean gently without chemicals or liquids.

終わりに

To reassemble your device, follow these instructions in reverse order.

ある他の人がこのガイドを完成しました。

作成者

3人の作成者と共同で作成されました。

Matthew Costa

メンバー登録日: 03/18/24

343 ポイント

2のガイドは作成済み

チーム

UMass Dartmouth, Team 2-6, Konn Spring 2024 UMass Dartmouth, Team 2-6, Konn Spring 2024人のメンバー

UMASSD-KONN-S24S2G6

5 メンバー

3のガイドは作成済み

0 件のコメント

コメントを追加

統計データ:

過去 24時間: 5

過去 7 日: 5

過去 30 日: 12

今までの合計 89