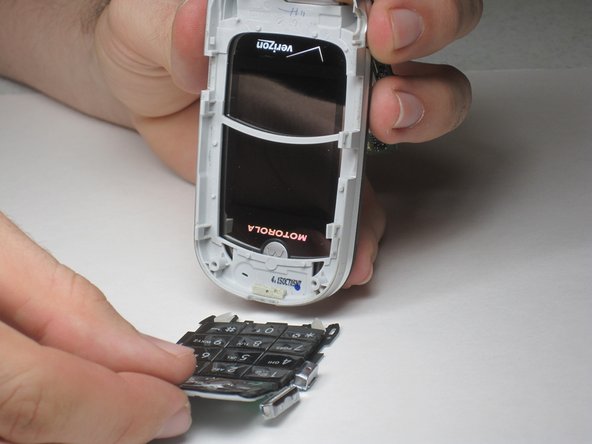
メインコンテンツにスキップ

Motorola V325 Keypad Replacement

必要な工具と部品

  1. Motorola V325 Keypad Replacement, Battery: 手順 1、 1の画像 1
    • Flip the phone over so that the back is visible.

    • Push down on the silver button using your fingernail or thumbnail. Push down all the way until the button stops.

  2. Motorola V325 Keypad Replacement: 手順 2、 3の画像 1 Motorola V325 Keypad Replacement: 手順 2、 3の画像 2 Motorola V325 Keypad Replacement: 手順 2、 3の画像 3
    • While holding down the silver button, simultaneously pull downward on the rear cover, then lift it off to reveal the battery.

    • This will only take a moment to do.

  3. Motorola V325 Keypad Replacement: 手順 3、 3の画像 1 Motorola V325 Keypad Replacement: 手順 3、 3の画像 2 Motorola V325 Keypad Replacement: 手順 3、 3の画像 3
    • Using your thumbnail and fingernail, grip the battery where indicated as "pull here" and lift the battery upward, starting at that side.

    • Remove the battery completely by lifting it straight out of the phone.

  4. Motorola V325 Keypad Replacement: 手順 4、 1の画像 1
    • When replacing the battery, ensure that the side that has the "pull here" arrows goes toward the bottom of the phone. Place the side of the battery with the metallic contacts in toward the inside of the phone, making a full connection with the contacts within the phone (shown in the red rectangle).

  5. Motorola V325 Keypad Replacement, Rear Panel: 手順 5、 3の画像 1 Motorola V325 Keypad Replacement, Rear Panel: 手順 5、 3の画像 2 Motorola V325 Keypad Replacement, Rear Panel: 手順 5、 3の画像 3
    • Using a small flat head screwdriver or your fingernail, remove the rubber covers near the top of the phone

  6. Motorola V325 Keypad Replacement: 手順 6、 3の画像 1 Motorola V325 Keypad Replacement: 手順 6、 3の画像 2 Motorola V325 Keypad Replacement: 手順 6、 3の画像 3
    • There are four Torx screws located on the four corners of the rear panel

    • Remove all four screws using the T6 Torx Screwdriver.

  7. Motorola V325 Keypad Replacement: 手順 7、 3の画像 1 Motorola V325 Keypad Replacement: 手順 7、 3の画像 2 Motorola V325 Keypad Replacement: 手順 7、 3の画像 3
    • Unscrew the antenna.

    • Remove the antenna protective tubing

  8. Motorola V325 Keypad Replacement: 手順 8、 3の画像 1 Motorola V325 Keypad Replacement: 手順 8、 3の画像 2 Motorola V325 Keypad Replacement: 手順 8、 3の画像 3
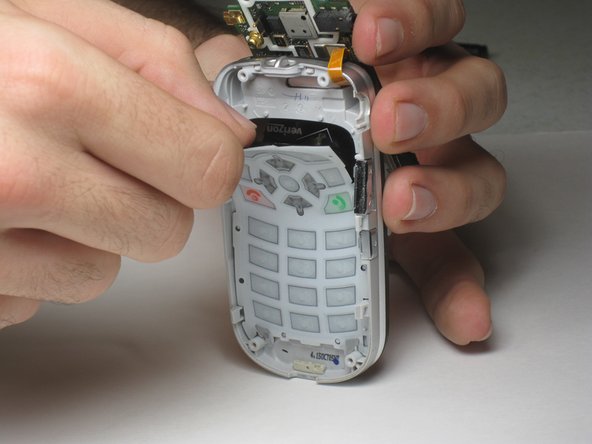
    • There are four light gray tabs located around the phone (two on each side)

    • Using your finger nail or a flat head screwdriver, pull the gray tab away from the body while simultaneously lifting upward on the black rear panel.

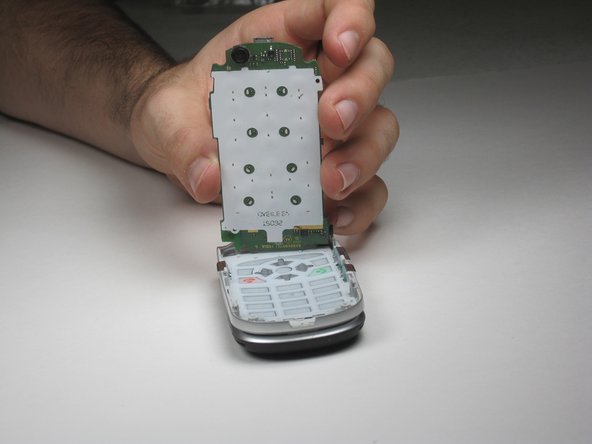
    • Once all four tabs are removed, lift up the back panel to reveal the interior logic board.

  9. Motorola V325 Keypad Replacement, Keypad: 手順 9、 1の画像 1
    • Make sure the phone appears as shown after removing the rear panel.

  10. Motorola V325 Keypad Replacement: 手順 10、 3の画像 1 Motorola V325 Keypad Replacement: 手順 10、 3の画像 2 Motorola V325 Keypad Replacement: 手順 10、 3の画像 3
    • Gently lift up the logic board by placing your index finger at the top while keeping your thumb at the bottom of the phone for leverage.

  11. Motorola V325 Keypad Replacement: 手順 11、 3の画像 1 Motorola V325 Keypad Replacement: 手順 11、 3の画像 2 Motorola V325 Keypad Replacement: 手順 11、 3の画像 3
    • Gently remove the keypad from the phone by getting a grip on the top of the keypad and slowly peeling it top to bottom.

終わりに

To reassemble your device, follow these instructions in reverse order.

作成者

5人の作成者と共同で作成されました。

Stephanie

メンバー登録日: 01/14/10

1 ポイント

2のガイドは作成済み

チーム

Cal Poly, Team 4-15, Forte Winter 2010 Cal Poly, Team 4-15, Forte Winter 2010人のメンバー

CPSU-FORTE-W10S4G15

5 メンバー

8のガイドは作成済み

0 件のコメント

コメントを追加

統計データ:

過去 24時間: 0

過去 7 日: 0

過去 30 日: 2

今までの合計 1,162