メインコンテンツにスキップ

Motorola V190 Mini-USB Port/Motherboard Replacement

必要な工具と部品

  1. Motorola V190 Mini-USB Port/Motherboard Replacement, Antenna: 手順 1、 2の画像 1 Motorola V190 Mini-USB Port/Motherboard Replacement, Antenna: 手順 1、 2の画像 2
    • Rotate the antenna counter-clockwise until the antenna is completely removed.

  2. Motorola V190 Mini-USB Port/Motherboard Replacement, Battery: 手順 2、 2の画像 1 Motorola V190 Mini-USB Port/Motherboard Replacement, Battery: 手順 2、 2の画像 2
    • Press the button at the bottom of the back cover.

    • Pull the back cover down.

    • Remove the battery.

    • Our device is missing the battery.

  3. Motorola V190 Mini-USB Port/Motherboard Replacement, Mini-USB Port/Motherboard: 手順 3、 1の画像 1
    • Use the TR6 Torx Security Screwdriver to remove the four 6.3mm Torx screws on the back.

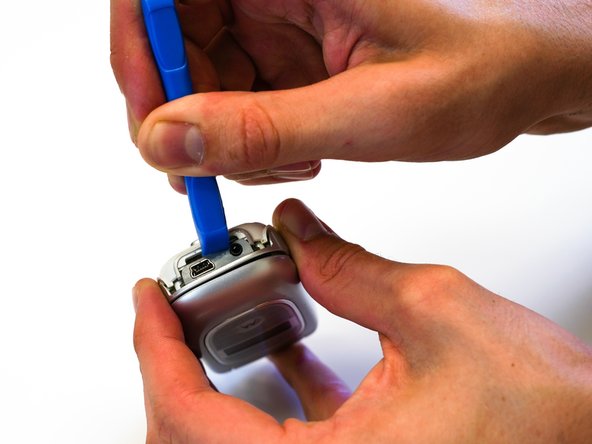
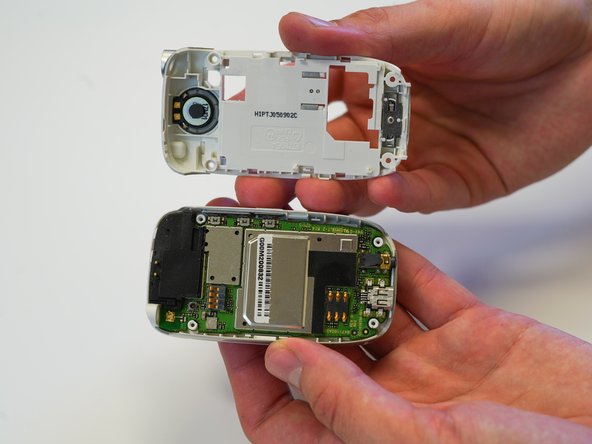
  4. Motorola V190 Mini-USB Port/Motherboard Replacement: 手順 4、 3の画像 1 Motorola V190 Mini-USB Port/Motherboard Replacement: 手順 4、 3の画像 2 Motorola V190 Mini-USB Port/Motherboard Replacement: 手順 4、 3の画像 3
    • Use the iFixit opening tool to pry open the crevice at the top of phone.

    • Use the same tool to pry open the crevice at the bottom of the phone.

    • At this time, do not separate the ribbon from the motherboard at the bottom of the phone.

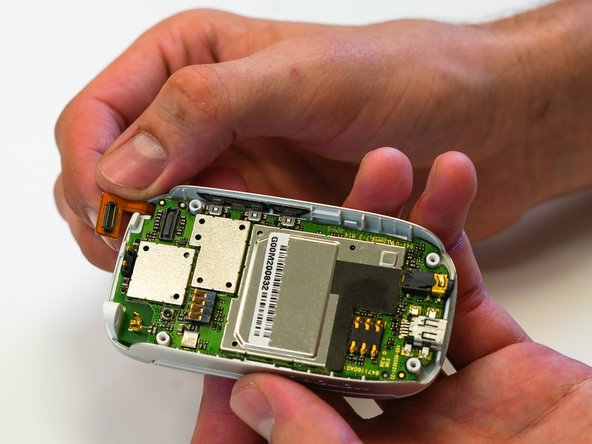
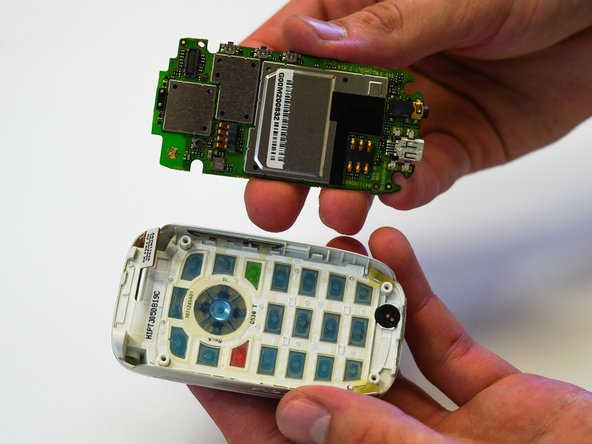
  5. Motorola V190 Mini-USB Port/Motherboard Replacement: 手順 5、 3の画像 1 Motorola V190 Mini-USB Port/Motherboard Replacement: 手順 5、 3の画像 2 Motorola V190 Mini-USB Port/Motherboard Replacement: 手順 5、 3の画像 3
    • Remove the black rubber piece from the top of the motherboard.

    • Disconnect the rectangular ribbon from the motherboard.

    • Remove the motherboard.

終わりに

To reassemble your device, follow these instructions in reverse order.

作成者

2人の作成者と共同で作成されました。

Michael Pollock

メンバー登録日: 08/28/19

545 ポイント

5のガイドは作成済み

チーム

University of North Texas, Team S1-G1, Friess Fall 2019 University of North Texas, Team S1-G1, Friess Fall 2019人のメンバー

UNT-FRIESS-F19S1G1

2 メンバー

5のガイドは作成済み

0 件のコメント

コメントを追加

統計データ:

過去 24時間: 0

過去 7 日: 2

過去 30 日: 3

今までの合計 177