メインコンテンツにスキップ

このバージョンは誤った内容を含んでいる可能性があります。最新の承認済みスナップショットに切り替えてください。

必要な工具と部品

  1. この手順は未翻訳です。 翻訳を手伝う。

    : 手順 1、 1の画像 1
    • To ensure safety, discharge your phone battery below 25% before starting. A fully charged lithium-ion battery may cause a fire and/or explosion due to defects or damage.

    • Turn off your phone before beginning disassembly.

    • Remove the phone back cover by firmly pushing down on the black tab located at the top center of the Motorola Slvr L7.

  2. この手順は未翻訳です。 翻訳を手伝う。

    : 手順 2、 1の画像 1
    • Remove the battery by pressing it towards the rear-facing camera while pulling it outward.

  3. この手順は未翻訳です。 翻訳を手伝う。

    : 手順 3、 1の画像 1
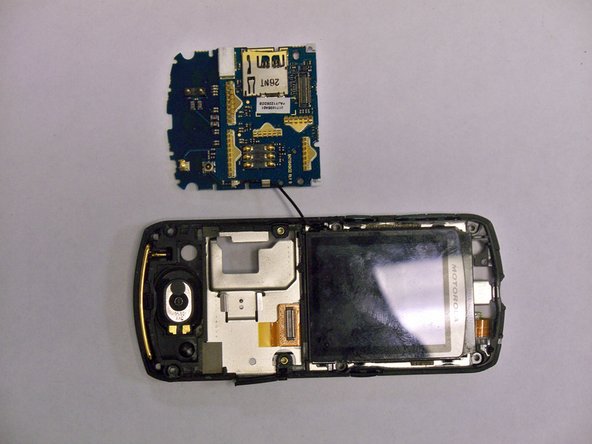
    • Using a T6 Torx Screwdriver, remove the four (4) T6 2 mm Torx screws that are securing the rear metal plate.

    • Apply moderate pressure with the screwdriver and rotate it counterclockwise to loosen the screw.

    • Ensure that you keep track of the screws and return them to their original positions once the repair is finished.

  4. この手順は未翻訳です。 翻訳を手伝う。

    : 手順 4、 2の画像 1 : 手順 4、 2の画像 2
    • Gently use the iFixit opening tool to lift the metal cover away from the phone.

  5. この手順は未翻訳です。 翻訳を手伝う。

    : 手順 5、 2の画像 1 : 手順 5、 2の画像 2
    • Using the flat end of the iFixit Opening Tool, carefully disconnect the two connectors from their sockets on the motherboard.

  6. この手順は未翻訳です。 翻訳を手伝う。

    : 手順 6、 1の画像 1
    • Use the iFixit Opening Tool to pry the antenna cable connectors from the motherboard.

    • Remove the antenna cable by pulling it out.

  7. この手順は未翻訳です。 翻訳を手伝う。

    : 手順 7、 1の画像 1
    • At the bottom of the phone near the speaker, use the iFixit Opening Tool to remove the black plastic screw cover.

    • Some force is required as the cover is attached by several clips. The first clips will be the hardest to dislodge.

    • Under the cover are round plastic pieces that cover the microphone. Be careful not to lose them.

  8. この手順は未翻訳です。 翻訳を手伝う。

    : 手順 8、 1の画像 1
    • Remove the two T6 screws that are now visible.

  9. この手順は未翻訳です。 翻訳を手伝う。

    : 手順 9、 2の画像 1 : 手順 9、 2の画像 2
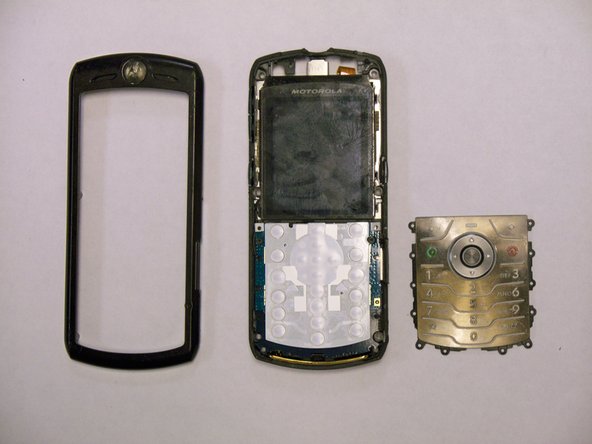
    • Now turn the phone over. Insert the iFixit Opening Tool between the frame and the outer case on the side of the phone.

    • Apply pressure using the iFixit Opening Tool to pry the case apart. Some force is required as the frame is attached by several clips. The first clip will be the hardest to dislodge.

    • As soon as the first clip is dislodged, work the tool around the entire edge of the phone to carefully remove the remaining clips. This will avoid breaking the frame.

    • Once the frame is completely separated from the outer case, remove the top numerical layer of the keypad by lifting it up.

  10. この手順は未翻訳です。 翻訳を手伝う。

    : 手順 10、 2の画像 1 : 手順 10、 2の画像 2
    • Carefully insert the flat end of the iFixit Opening Tool under the keyboard and pry it off.

ゴール

2 の人々がこのガイドを完成させました。

作成者

10人の作成者と共同で作成されました。

Jorge Trujillo

メンバー登録日: 05/19/11

520 ポイント

4のガイドは作成済み

チーム

CSU Los Angeles, Team 1-1, Nelson Spring 2011 CSU Los Angeles, Team 1-1, Nelson Spring 2011人のメンバー

CSULA-NELSON-S11S1G1

2 メンバー

4のガイドは作成済み

0 件のコメント

コメントを追加

統計データ:

過去 24時間: 0

過去 7 日: 10

過去 30 日: 17

今までの合計 5,713