はじめに
Use this guide to replace the rear-facing camera on your Motorola Z2 Play.
Before you begin, download the Rescue and Smart Assistant app to backup your device and diagnose whether your problem is software or hardware related.
Warning: Because of the strong adhesive securing the display, minimal clearance for inserting your tools, and high heat required, there's a good chance of accidentally damaging the display when removing it. If you intend to re-use the display, take serious care when heating and inserting tools to separate the display from the rest of the device.
必要な工具と部品
-
-
Insert a SIM eject tool, bit, or a straightened paperclip into the hole in the SIM tray, located at the top left edge of the phone.
-
Push firmly to eject the tray.
-
Pull the tray straight out to remove the tray.
-
-
-
Heat the edges of your Motorola Moto Z2 Play screen for two to three minutes with a heat gun. You adjust the heat gun to 85 degrees centigrade, and be careful not to hold the heat gun on one position for too long; to avoid damaging, or "hotspotting" the LCD. The screen should be very warm, but not painful, to the touch. Reheat as necessary.
-
-
-
-
Remove the three silver 2.6 mm T3 Torx screws on the speaker shell at the top of the phone with a screwdriver by turning counterclockwise.
-
Remove the four black 3.5 mm T3 Torx screws on the speaker shell at the top of the phone with a screwdriver by turning counterclockwise.
-
-
-
Remove the seven silver 2.6 mm T3 Torx screws on the black battery cable cover at the bottom of the phone with a screwdriver by turning counterclockwise.
-
Remove the single black 3.5 mm T3 Torx screw on the black battery cable cover at the bottom of the phone with a screwdriver by turning counterclockwise.
-
-
-
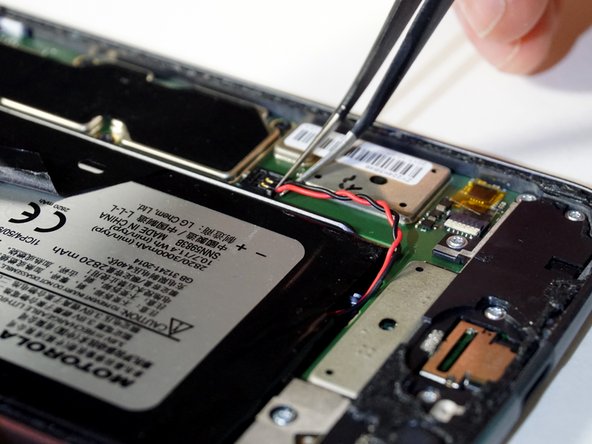
Remove the three black 2.6 mm T3 Torx screws on the motherboard panel at the side of the phone with a screwdriver by turning counterclockwise.
-
-
-
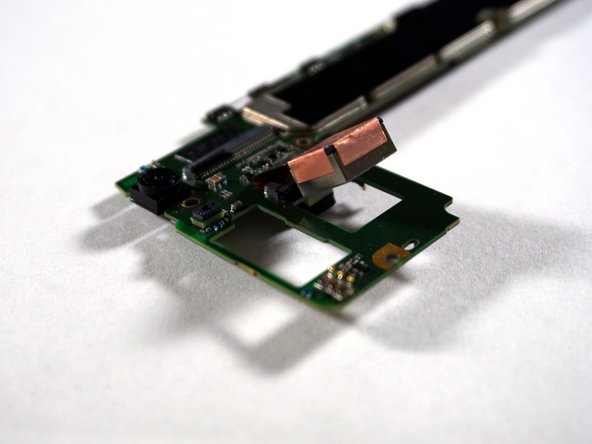
Flip over the motherboard so the rear-facing camera and its ribbon can be seen.
-
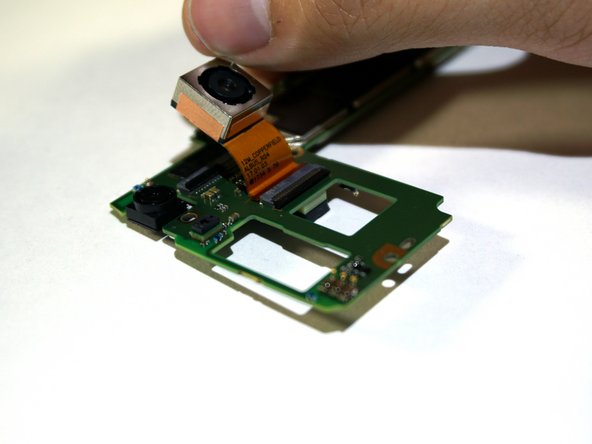
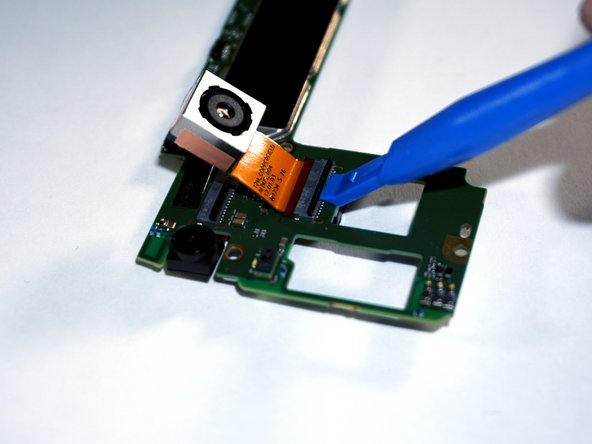
Bend the camera back to reveal its ribbon-wire port.
-


To reassemble your device, follow these instructions in reverse order.
To reassemble your device, follow these instructions in reverse order.

チーム

Cal Poly, Team S19-G5, Livingston Winter 2018 Cal Poly, Team S19-G5, Livingston Winter 2018人のメンバー
CPSU-LIVINGSTON-W18S19G5
4 メンバー
30のガイドは作成済み