はじめに
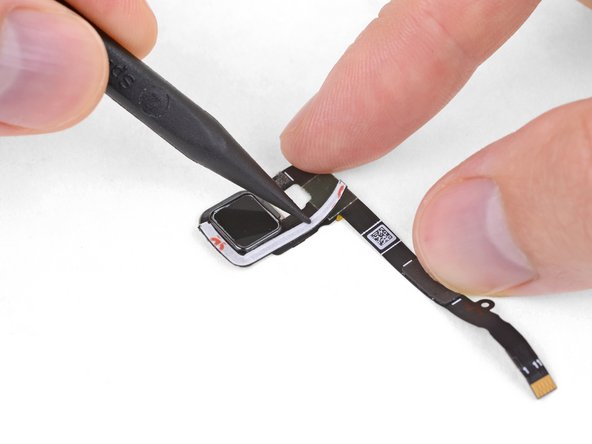
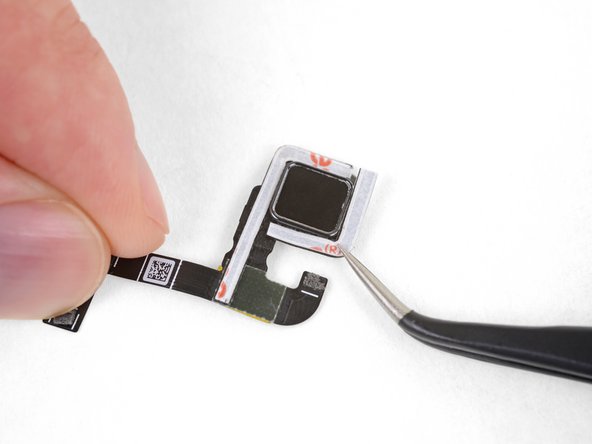
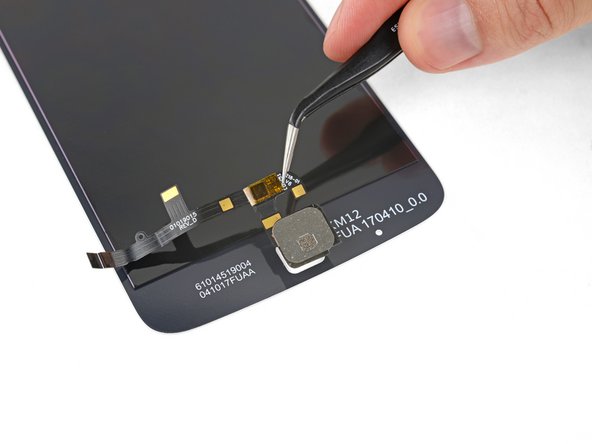
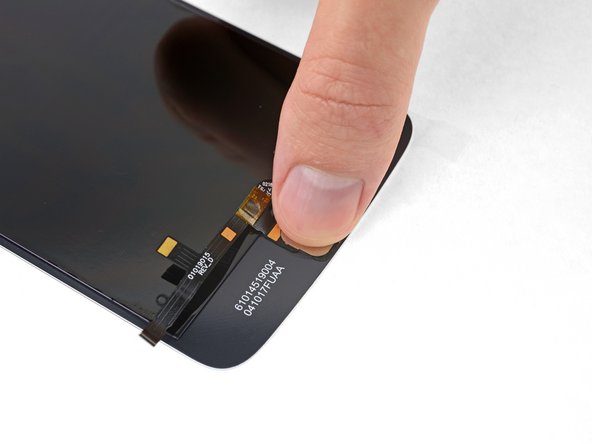
このガイドを使用して、スクリーン/デジタイザーユニットを交換して、Motorola Moto ZPlayのスクリーンを交換します。 交換用のスクリーンアセンブリには、通常、指紋センサーやフロントカメラフラッシュが含まれていません。 新しいパーツに、スクリーン/デジタイザーを移植しない場合は、古いスクリーンから新しいスクリーンに移す必要があります。
作業を始める前に、Rescue and Smart Assistantアプリをダウンロードしてデバイスをバックアップし、問題がソフトウェアまたはハードウェアに関連しているかを診断してください。
ご注意: ディスプレイを固定している強力な接着剤や、ツールを挿入できる最小限のスペース、および作業に必要な高熱のために、ディスプレイを取り外す作業中、アクシデントでディスプレイを損傷する可能性が高くなります。新しいディスプレイに交換する場合は、心配する必要はありませんが、ディスプレイを再利用する場合は、すべての警告に注意し、慎重に作業してください。
必要な工具と部品
-
-
解体前にバッテリーを放電してください。バッテリーが充電されてオーバーヒートしてしまうと、危険な熱を伴うアクシデントが発生することがあります。
-
ディスプレイが飛散している場合、怪我を防止するために、透明な梱包テープをガラス表面に貼って保護してください。
-
-
-
-
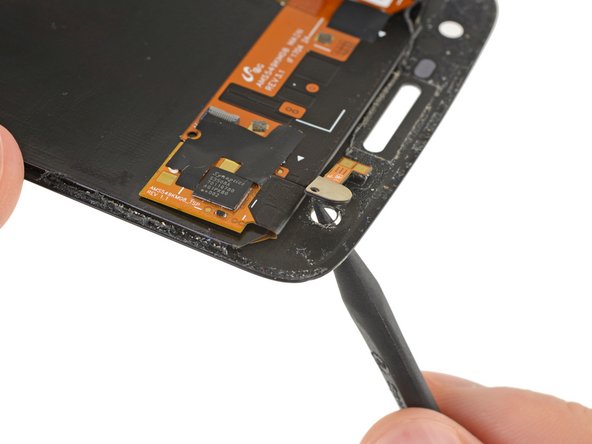
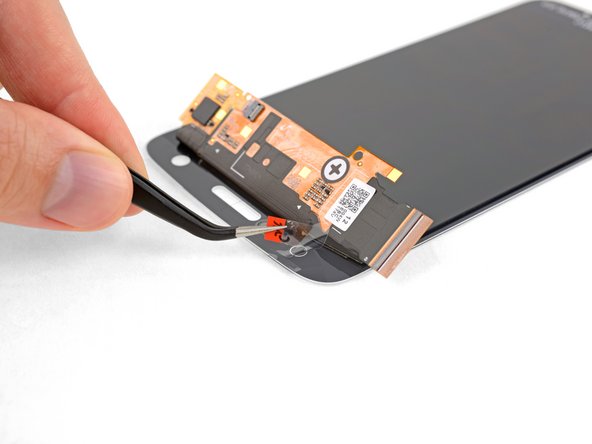
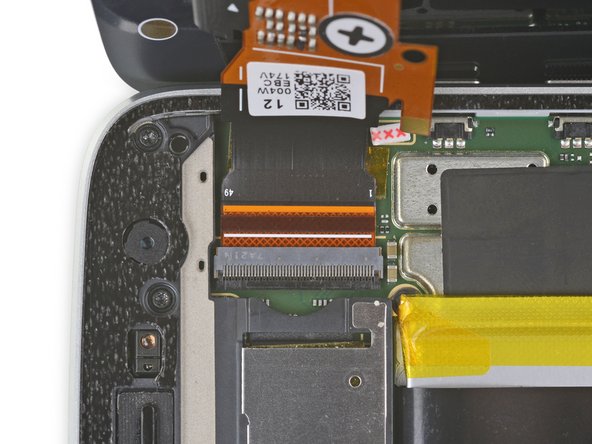
デバイスの反対端にあるディスプレイケーブルコネクタ上のロッキングタブも、スパッジャーで跳ね上げます。
The locking tab on the is dark colored and runs almost the entire width of the ZIF connector. It is located on the opposite side from where the cable connects into. Pry upward from the bottom- it works like a hinge.
-
-
-
古いディスプレイ用接着剤をデバイス本体から剥がします。
-
スパッジャーの先端を使って、残っている小さな接着剤を取り除きます。
-
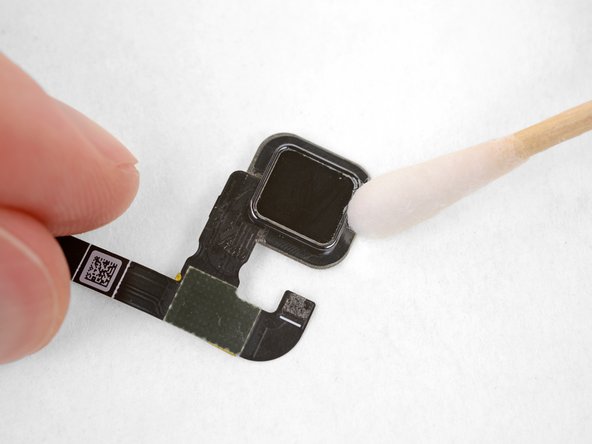
接着剤エリアの底をイソプロピルアルコールを使って綺麗に拭き取ると、新しい接着剤を塗布する準備ができ、接着力の強度が増します。
-
-
-
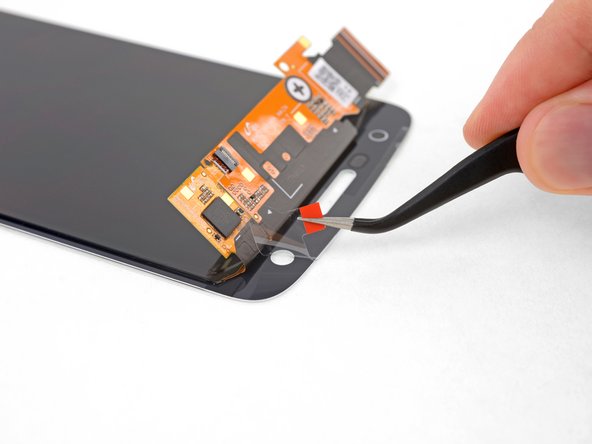
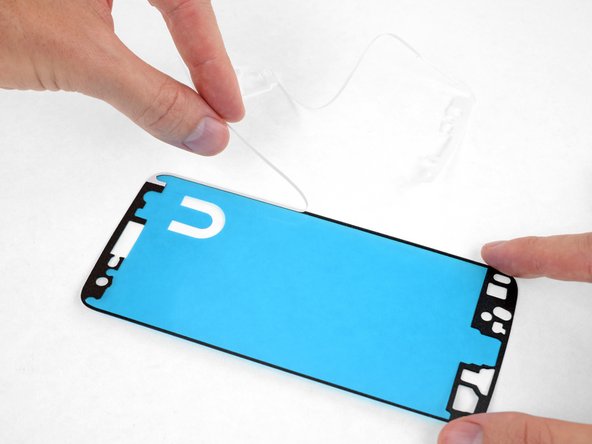
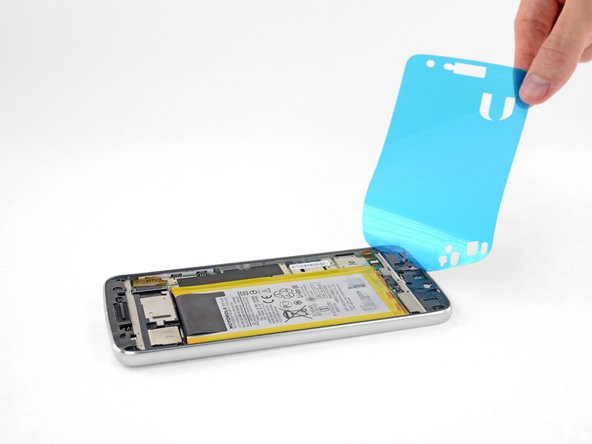
プラスチックのライナー(ブルー)を剥がして、ディスプレイ側の接着面を露出させます。
Should the removal of the blue plastic backing wait until after verifying the screen works in the next step?
Well, you can’t connect the screen with the plastic in the way. But in principle, you’re right—it wouldn’t be a bad idea to pause before installing the display adhesive, plug everything in, and verify that it works. Unfortunately, you then have to unplug it again to install the adhesive, so you’ll want to test it again once it’s plugged back in, but before sealing up your phone—just to make sure the cables are seated properly. So, the verification step is probably best left where it’s at.
Well, I connected the screen to the motherboard without peeling off the plastic.
It is possible!
And after testing the phone I took off the plastic foil from the adhesive without unpluging the two connectors. The plasic foil herefor has two cuts in the area of the connectors .
So I think it’s a good idea to swap step 35 to step 36.
-
-
-
ディスプレイを固定する前に、ディスプレイと指紋センサー用のフレックスケーブルを接続させて、デバイスの電源を入れてください。
-
修理が上手くいったか全ての機能を確認してから、ディスプレイを密封します。
-


e-wasteを処理する場合は、認可済みリサイクルセンターR2を通じて廃棄してください。
修理が上手く進みませんか?ベーシックなトラブルシューティングのページを参照するか、このモデルのアンサーコミュニティに尋ねてみましょう。
e-wasteを処理する場合は、認可済みリサイクルセンターR2を通じて廃棄してください。
修理が上手く進みませんか?ベーシックなトラブルシューティングのページを参照するか、このモデルのアンサーコミュニティに尋ねてみましょう。
54 の人々がこのガイドを完成させました。
以下の翻訳者の皆さんにお礼を申し上げます:
100%

Midori Doiさんは世界中で修理する私たちを助けてくれています! あなたも貢献してみませんか?
翻訳を始める ›


13 件のコメント
I am also confused about the Double Sided Tape. My kit seems to have come with everything I need except for this double sided tape!
i with that i had seen this before i let some third party company ruin my otherwise perfectly good phone
Followed exactly as written and successfully replaced screen on my water damaged Moto Z Play. Be sure to test everything before sealing the screen to adhesive. I didn’t test the camera prior to sealing the screen and don’t feel like opening it back up! Purchased the $99 kit with screen and tools. Unfortunately, the iOpener didn’t last second time in the microwave and leaked even after waiting 10 minutes per directions.
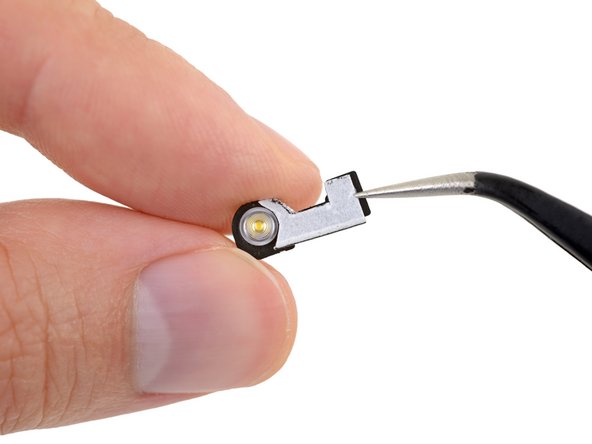
Screen successfully replaced. I managed to crack the plastic backing plate of the front-facing LED, but that doesn’t matter. The last bit about the heavy stack of books was rather silly in my opinion. I heated the screen with a hairdryer and pressed the phone screen down on a soft mouse mat. I don’t a have microwave, so I couldn’t use the provided iOpener at all.
Install went well. I was sweating bullets since this was my first time doing a smartphone repair, but this guide was very thorough. Take your time and be careful since this is very precise work. I also took probably about an extra 30-60 minutes carefully cleaning the dust and hair that had collected just barely under the edges of the screen after several years of use. I really recommend it since how often do you plan on opening up your phone like this?
The entire surface of my screen was completely shattered (100%) and removing all the little peices of it was difficult. I bought the complete kit and followed these instructions. I managed to pry the screen peice by peice, without heat or the suction cup tool. Very tedious work (unless you’re use to working with such small, delicate instrumentation), so take a break if you’re feeling frustrated. I would highly recommend using some type of hands free magnification throughout the process. My phone works perfectly now- complete success! Thank you IFIXIT.
This worked perfectly for me. Thank You!!!!
Israel 329 - 返信
Excellent step by step. I was nervous at first, but I managed it! This is my first cell phone screen repair. I can hardly wait until something else breaks!
~Kristi
Excellent explanation. My son and I bought the spare screen (pre-assembled with touch screen) of his old and crashed Moto Z2Play from another website, but my IFixit Pro-Tech Toolkit made the difference!!
Thank you!
And keep on Fixing It!!
Warum ist es so wichtig das Handy beim Displaytausch auszuschalten?
I also cracked the plastic backing plate of the front-facing LED. My advice is to use a knife to separate the flash flex cable, and carefully cut through the adhesive securing it in place BEFORE you try to push the LED out of its mounting hole from the front. If you push the LED out first, it will crack the plastic backing plate underneath the flex cable. It still works OK when you glue it back to the new screen. Other than that, repair was a complete success.