メインコンテンツにスキップ

この修理ガイドは変更されています。最新の未承認バージョンに切り替えます。

Motorola Moto X Motherboard Assembly Replacement

必要条件のみ
この修理ガイドは、他のガイドの前提条件として使用されます。それ自体は不完全で、単独で使用されることはありません。

必要な工具と部品

  1. Motorola Moto X Motherboard Assembly Replacement, Motherboard Assembly: 手順 1、 1の画像 1
    • Remove the five 3 mm T3 Torx screws from the headphone jack/speaker assembly.

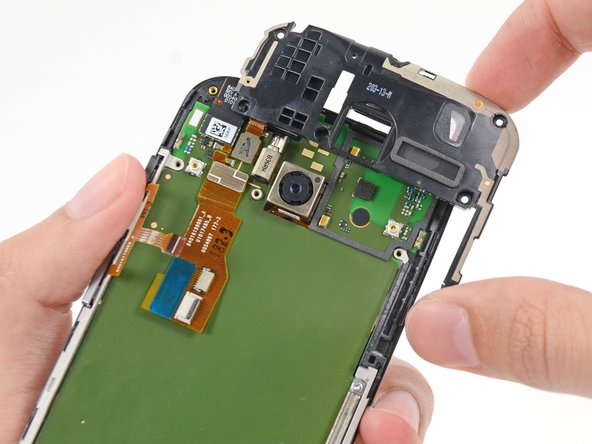
  2. Motorola Moto X Motherboard Assembly Replacement: 手順 2、 3の画像 1 Motorola Moto X Motherboard Assembly Replacement: 手順 2、 3の画像 2 Motorola Moto X Motherboard Assembly Replacement: 手順 2、 3の画像 3
    • Insert a spudger under the panhandle of the headphone jack/speaker assembly and pry it up from its recess.

    • Remove the headphone jack/speaker assembly.

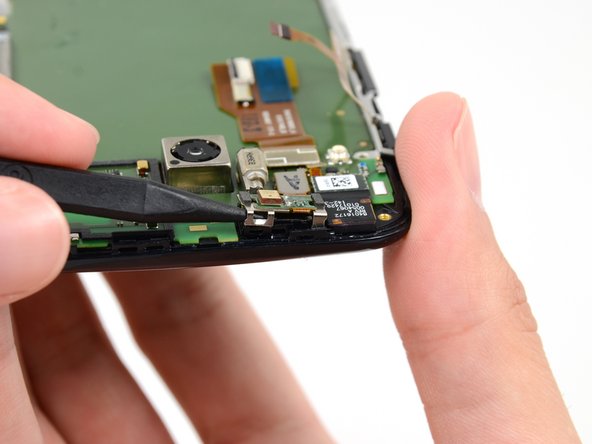
  3. Motorola Moto X Motherboard Assembly Replacement: 手順 3、 2の画像 1 Motorola Moto X Motherboard Assembly Replacement: 手順 3、 2の画像 2
    • Push the tip of a spudger under the microphone assembly clip to free it from the earpiece speaker.

    • If the assembly clip seems to be missing, check the speaker assembly that was removed from the previous step.

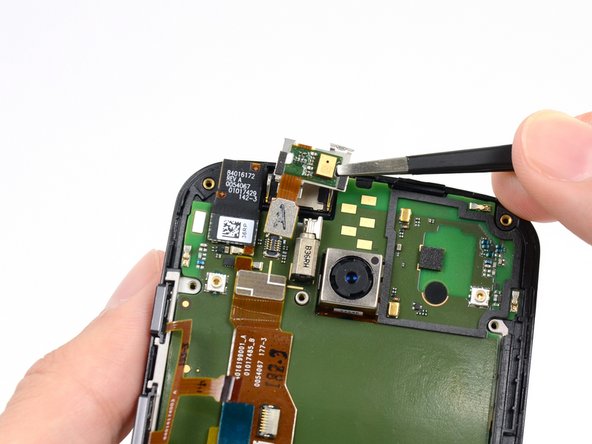
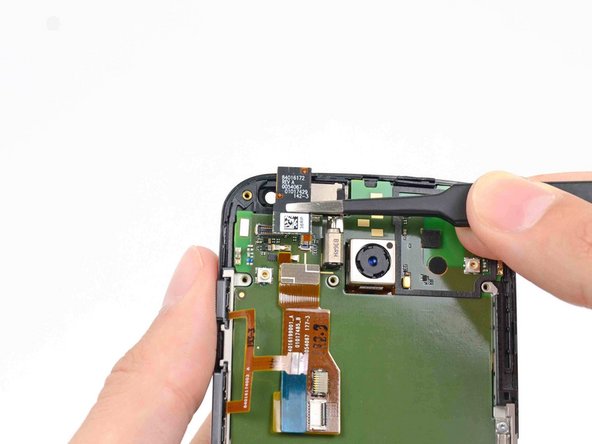
  4. Motorola Moto X Motherboard Assembly Replacement: 手順 4、 2の画像 1 Motorola Moto X Motherboard Assembly Replacement: 手順 4、 2の画像 2
    • Use the flat end of a spudger to free the microphone assembly cable connector.

    • Use tweezers to remove the microphone assembly.

  5. Motorola Moto X Motherboard Assembly Replacement: 手順 5、 2の画像 1 Motorola Moto X Motherboard Assembly Replacement: 手順 5、 2の画像 2
    • Disconnect the front-facing camera cable connector.

    • Remove the front-facing camera from its recess with a pair of tweezers.

  6. Motorola Moto X Motherboard Assembly Replacement: 手順 6、 1の画像 1
    • Remove the final two 3 mm T3 Torx screws from the SIM slot bracket.

  7. Motorola Moto X Motherboard Assembly Replacement: 手順 7、 1の画像 1
    • Remove the SIM slot bracket from the motherboard.

  8. Motorola Moto X Motherboard Assembly Replacement: 手順 8、 2の画像 1 Motorola Moto X Motherboard Assembly Replacement: 手順 8、 2の画像 2
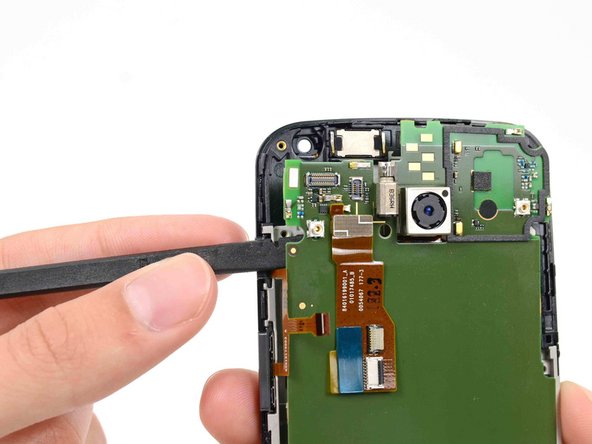
    • Insert the flat end of a spudger under the motherboard above the button assembly cable, and pry it out of the phone.

    • Be careful not to snag any cables.

    • The buttons may pop out of their recesses; take care not to lose them.

  9. Motorola Moto X Motherboard Assembly Replacement: 手順 9、 2の画像 1 Motorola Moto X Motherboard Assembly Replacement: 手順 9、 2の画像 2
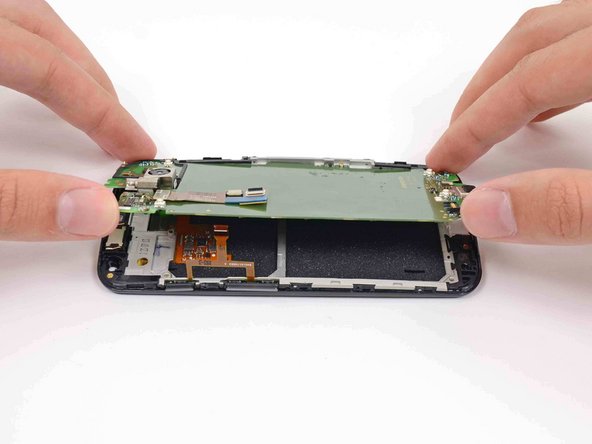
    • Gently lift the motherboard out of the phone, rotating it from the SIM slot edge of the phone.

    • Do not attempt to separate the motherboard entirely; it is still connected to the display by the display cable.

  10. Motorola Moto X Motherboard Assembly Replacement: 手順 10、 3の画像 1 Motorola Moto X Motherboard Assembly Replacement: 手順 10、 3の画像 2 Motorola Moto X Motherboard Assembly Replacement: 手順 10、 3の画像 3
    • Lay the motherboard down to allow access to the display cable connector.

    • Use the flat end of a spudger to flip the retaining tab on the display cable ZIF connector.

    • Carefully pull the display cable out of its connector as you remove the motherboard from the display assembly.

終わりに

To reassemble your device, follow these instructions in reverse order.

作成者

3人の作成者と共同で作成されました。

Sam Goldheart

メンバー登録日: 10/18/12

465,647 ポイント

538のガイドは作成済み

チーム

iFixit iFixit人のメンバー

Staff

135 メンバー

16,732のガイドは作成済み

0 件のコメント

コメントを追加

統計データ:

過去 24時間: 0

過去 7 日: 0

過去 30 日: 0

今までの合計 91