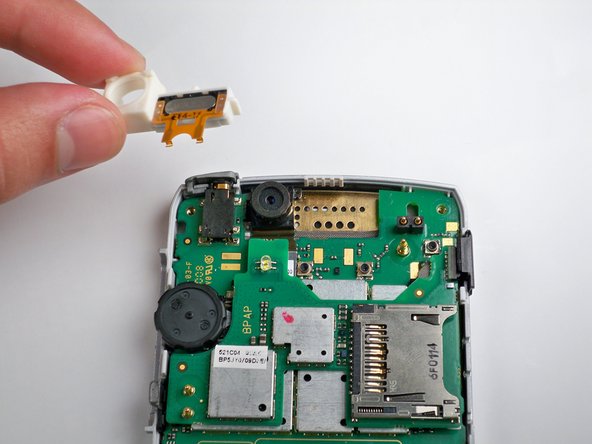
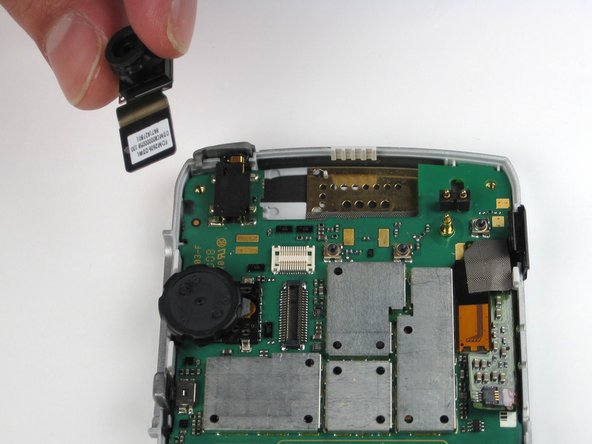
メインコンテンツにスキップ

Motorola Moto Q Camera Replacement

必要な工具と部品

  1. Motorola Moto Q Camera Replacement, Back Casing: 手順 1、 1の画像 1
    • Use the Push Pin to remove the rubber screw covers by pushing the needle into the rubber and pulling up.

    • Be careful not to poke yourself when handling the push pin because it is very sharp.

  2. Motorola Moto Q Camera Replacement: 手順 2、 1の画像 1
    • Use the T6 screwdriver to remove the four screws holding the casing together.

    • Note: they are in the same place where you removed the four rubber coverings

  3. Motorola Moto Q Camera Replacement: 手順 3、 2の画像 1 Motorola Moto Q Camera Replacement: 手順 3、 2の画像 2
    • Wedge the plastic opening tool in between the top and bottom cases. This may require a little or a lot of force so be careful.

    • Note: the phone should be face up and the plastic opening tool should be face downwards

    • Once you get the plastic opening tool in, slide it across the side of the phone, making sure to keep the plastic opening tool wedged in between the two casings.

    • Repeat the 3 steps above for the top, bottom, and opposite side.

  4. Motorola Moto Q Camera Replacement: 手順 4、 2の画像 1 Motorola Moto Q Camera Replacement: 手順 4、 2の画像 2
    • Gently lift and remove the back casing.

  5. Motorola Moto Q Camera Replacement, Camera: 手順 5、 2の画像 1 Motorola Moto Q Camera Replacement, Camera: 手順 5、 2の画像 2
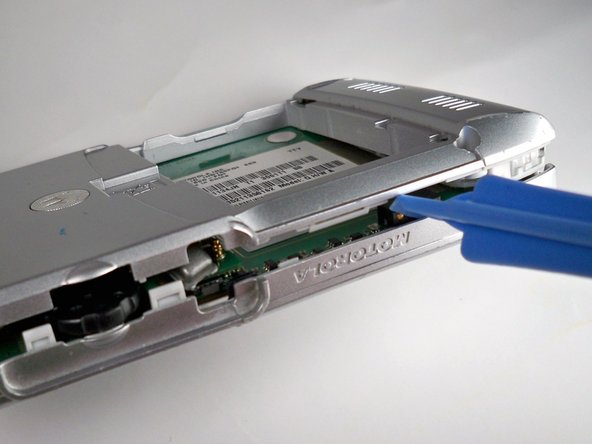
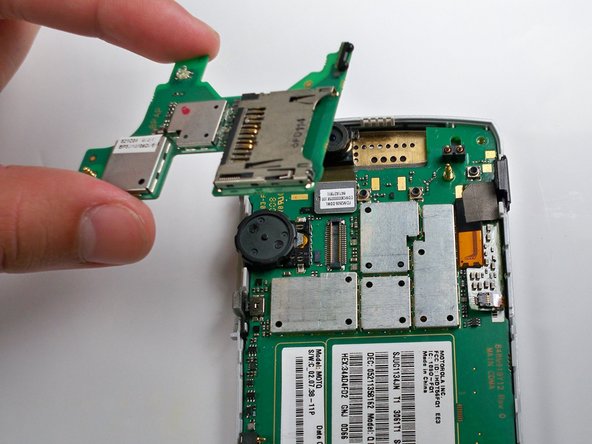
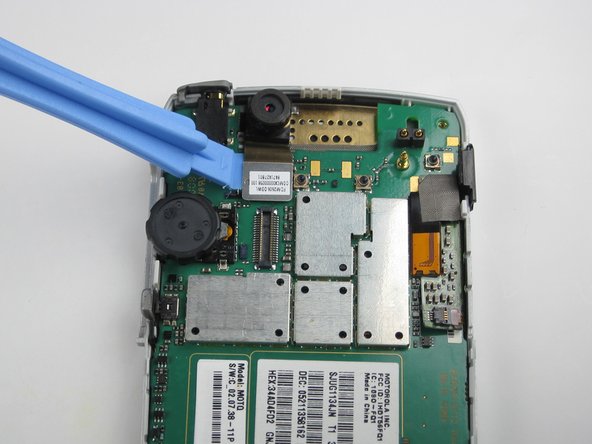
    • Remove the plastic inner cover by placing the spudger under the left-most side and pry to the left and upwards.

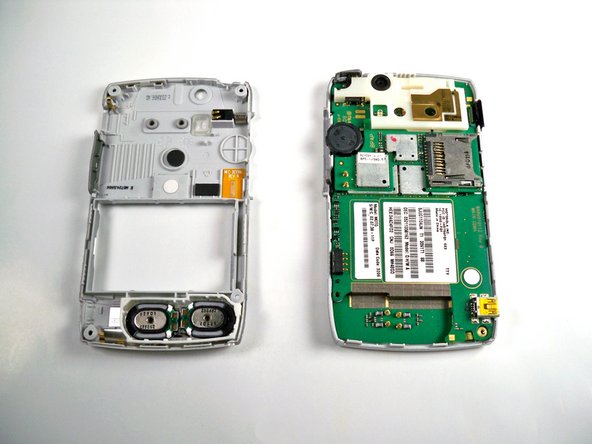
    • Gently rotate/wiggle the cover until you can pull it off the phone.

  6. Motorola Moto Q Camera Replacement: 手順 6、 2の画像 1 Motorola Moto Q Camera Replacement: 手順 6、 2の画像 2
    • Using your fingers, remove the plastic piece that holds the camera in place.

  7. Motorola Moto Q Camera Replacement: 手順 7、 2の画像 1 Motorola Moto Q Camera Replacement: 手順 7、 2の画像 2
    • Carefully pry up the upper circuit board with the spudger.

    • The second picture shows what your phone should look like when the upper circuit board is removed.

  8. Motorola Moto Q Camera Replacement: 手順 8、 2の画像 1 Motorola Moto Q Camera Replacement: 手順 8、 2の画像 2
    • Take out the camera and attached chip with the iPod removal tool. Carefully pry the chip off its connection and the camera will come out too.

終わりに

To reassemble your device, follow these instructions in reverse order.

ある他の人がこのガイドを完成しました。

作成者

4人の作成者と共同で作成されました。

Dave Uth

メンバー登録日: 01/20/10

35 ポイント

1ガイドが承認済み

チーム

Cal Poly, Team 16-33, Maness Winter 2010 Cal Poly, Team 16-33, Maness Winter 2010人のメンバー

CPSU-MANESS-W10S16G33

4 メンバー

10のガイドは作成済み

0 件のコメント

コメントを追加

統計データ:

過去 24時間: 0

過去 7 日: 0

過去 30 日: 1

今までの合計 1,928