メインコンテンツにスキップ

Motorola Moto G5 Motherboard Replacement

必要な工具と部品

  1. Motorola Moto G5 Motherboard Replacement, Back Cover: 手順 1、 2の画像 1 Motorola Moto G5 Motherboard Replacement, Back Cover: 手順 1、 2の画像 2
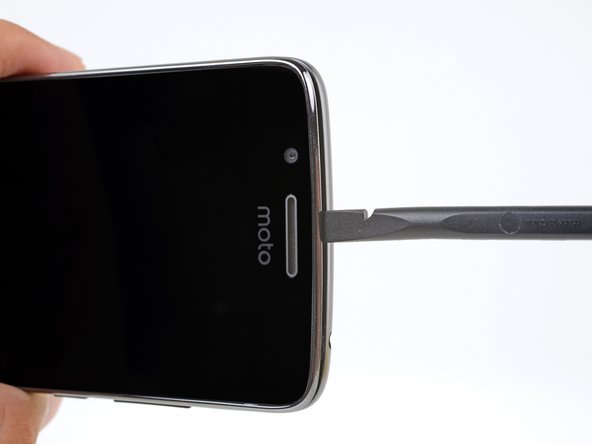
    • Insert your fingernail or the flat end of a spudger into the notch on the bottom edge of the phone near the charging port.

    • Pry with your fingernail or twist the spudger to release the back cover from the phone.

  2. Motorola Moto G5 Motherboard Replacement: 手順 2、 3の画像 1 Motorola Moto G5 Motherboard Replacement: 手順 2、 3の画像 2 Motorola Moto G5 Motherboard Replacement: 手順 2、 3の画像 3
    • Insert the flat end of a spudger into the seam and slide it along the bottom edge to release the clips holding the back cover to the phone.

  3. Motorola Moto G5 Motherboard Replacement: 手順 3、 3の画像 1 Motorola Moto G5 Motherboard Replacement: 手順 3、 3の画像 2 Motorola Moto G5 Motherboard Replacement: 手順 3、 3の画像 3
    • Continue sliding the flat end of the spudger along the seam for the remaining sides of the phone.

  4. Motorola Moto G5 Motherboard Replacement: 手順 4、 2の画像 1 Motorola Moto G5 Motherboard Replacement: 手順 4、 2の画像 2
    • Lift the back cover and remove it from the phone.

    • To reinstall the back cover, align the cover with the phone and squeeze along the edges to snap the clips back into place.

  5. Motorola Moto G5 Motherboard Replacement, Battery: 手順 5、 2の画像 1 Motorola Moto G5 Motherboard Replacement, Battery: 手順 5、 2の画像 2
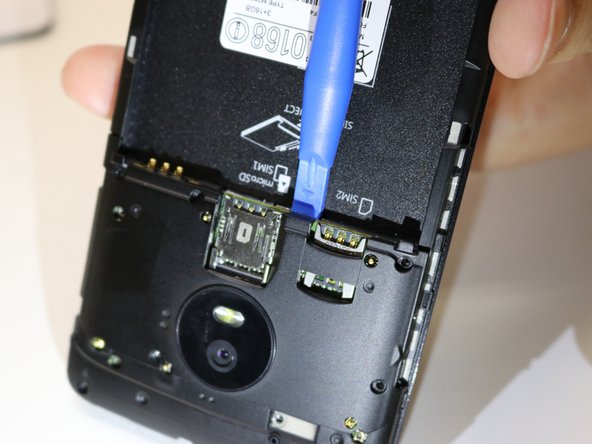
    • Insert your fingernail or the flat end of the spudger into the notch below the battery.

    • Pry with your fingernail or spudger until you free the battery from its recess.

  6. Motorola Moto G5 Motherboard Replacement: 手順 6、 1の画像 1
    • Remove the battery.

    • When installing the battery, make sure the battery's contacts line up with the three gold pins on the top right.

  7. Motorola Moto G5 Motherboard Replacement, Rear Facing Camera: 手順 7、 2の画像 1 Motorola Moto G5 Motherboard Replacement, Rear Facing Camera: 手順 7、 2の画像 2
    • Remove the eight (8) 4mm screws with a Phillips screwdriver.

  8. Motorola Moto G5 Motherboard Replacement: 手順 8、 3の画像 1 Motorola Moto G5 Motherboard Replacement: 手順 8、 3の画像 2 Motorola Moto G5 Motherboard Replacement: 手順 8、 3の画像 3
    • Pry the top motherboard cover off using a plastic opening tool.

    • When prying it open, make sure to pry it around evenly so that the cover will not snap. This will require some force.

  9. Motorola Moto G5 Motherboard Replacement: 手順 9、 3の画像 1 Motorola Moto G5 Motherboard Replacement: 手順 9、 3の画像 2 Motorola Moto G5 Motherboard Replacement: 手順 9、 3の画像 3
    • Disconnect the marked connector with a pair of tweezers and remove the camera piece.

  10. Motorola Moto G5 Motherboard Replacement, Motherboard: 手順 10、 1の画像 1
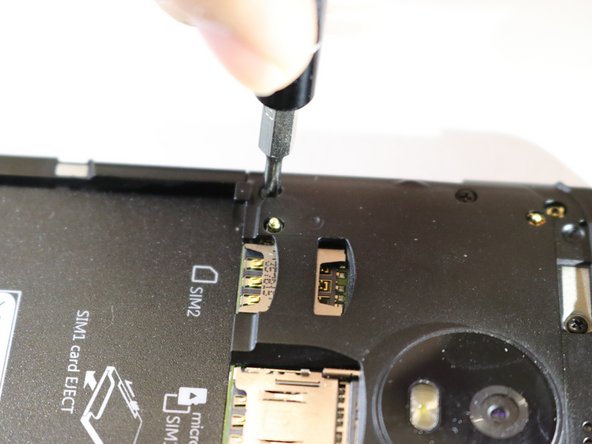
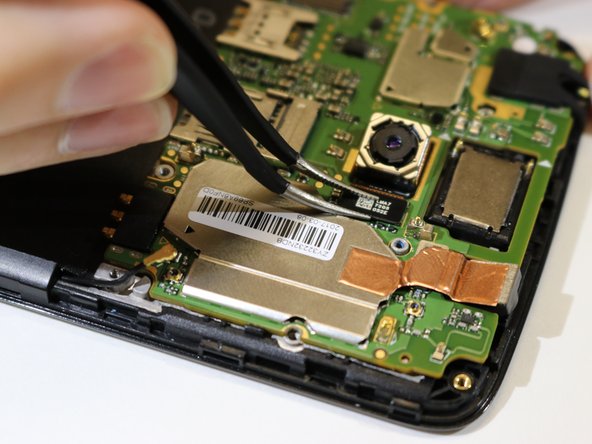
    • Remove the two 4mm screws shown in the picture using a Phillips #00 screwdriver.

  11. Motorola Moto G5 Motherboard Replacement: 手順 11、 1の画像 1
    • Lift the motherboard up from the top of the phone.

  12. Motorola Moto G5 Motherboard Replacement: 手順 12、 1の画像 1
    • Unplug the back connector from the motherboard using tweezers.

終わりに

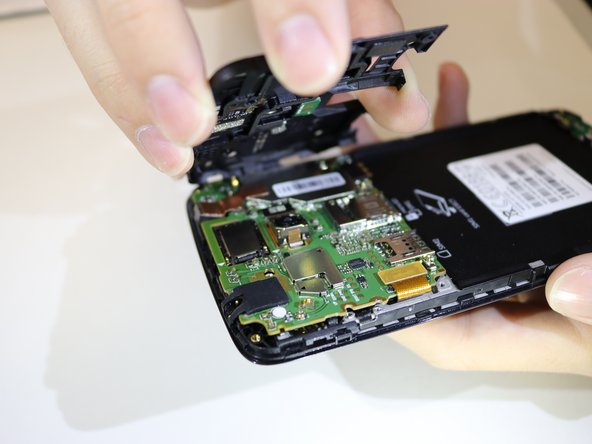
To reassemble your device, follow these instructions in reverse order.

10 の人々がこのガイドを完成させました。

作成者

6人の作成者と共同で作成されました。

Luis Garcia

メンバー登録日: 01/24/18

289 ポイント

1ガイドが承認済み

チーム

Cal Poly, Team S2-G3, Livingston Winter 2018 Cal Poly, Team S2-G3, Livingston Winter 2018人のメンバー

CPSU-LIVINGSTON-W18S2G3

4 メンバー

16のガイドは作成済み

2 件のコメント

is a xt1670 logic board compatible with a xt1671 phone?

Jaime Oziel Moreno - 返信

While disassembling I accidentally broke off one of the antenna "pins" (the one under the audio jack). I'll try to solder it on again, but in case I cannot, you think it will affect its proper operation too much? I cannot test it right now as I am waiting a replacement side buttons board.

karajay - 返信

コメントを追加

統計データ:

過去 24時間: 0

過去 7 日: 14

過去 30 日: 34

今までの合計 6,190