メインコンテンツにスキップ

Motorola Moto G 2nd Generation Front Camera Replacement

必要な工具と部品

  1. Motorola Moto G 2nd Generation Front Camera Replacement, Battery: 手順 1、 3の画像 1 Motorola Moto G 2nd Generation Front Camera Replacement, Battery: 手順 1、 3の画像 2 Motorola Moto G 2nd Generation Front Camera Replacement, Battery: 手順 1、 3の画像 3
    • Make sure your Moto G is turned off and that any SIM or SD cards are removed before beginning disassembly.

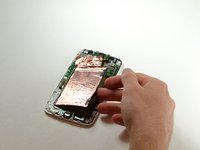
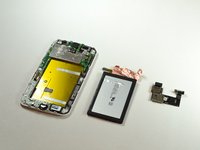
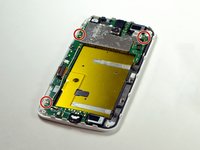
    • Starting at the USB port on the bottom, remove the rear cover by prying it off with your finger.

    • Work your way down the sides to avoid cracking the rear cover.
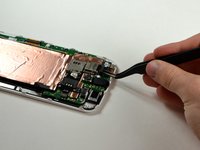
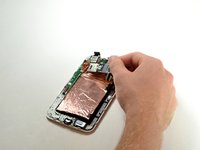
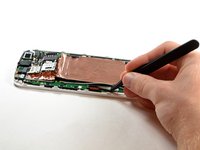
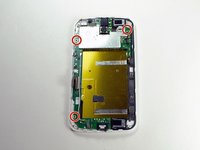
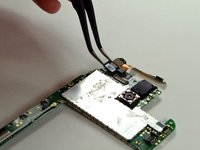
  2. Motorola Moto G 2nd Generation Front Camera Replacement: 手順 2、 3の画像 1 Motorola Moto G 2nd Generation Front Camera Replacement: 手順 2、 3の画像 2 Motorola Moto G 2nd Generation Front Camera Replacement: 手順 2、 3の画像 3
    • Remove the eight 4.2 mm screws at the top and bottom of the phone using a T5 Torx screwdriver.

    • Using the same screwdriver, remove the six 3.2 mm screws on the sides.

    • Remove the next layer of the phone by prying it off with your fingers.

  3. Motorola Moto G 2nd Generation Front Camera Replacement: 手順 3、 3の画像 1 Motorola Moto G 2nd Generation Front Camera Replacement: 手順 3、 3の画像 2 Motorola Moto G 2nd Generation Front Camera Replacement: 手順 3、 3の画像 3
    • Using a plastic opening tool or tweezers, disconnect the SIM/SD card reader at the top of the phone.

    • Disconnect the battery connector by prying it off of the motherboard.

    • Disconnect the vibration motor by prying its connector off of the motherboard.

  4. Motorola Moto G 2nd Generation Front Camera Replacement: 手順 4、 3の画像 1 Motorola Moto G 2nd Generation Front Camera Replacement: 手順 4、 3の画像 2 Motorola Moto G 2nd Generation Front Camera Replacement: 手順 4、 3の画像 3
    • Using a plastic opening tool, carefully pry off the entire SIM/SD card reader component.

    • Don't worry about ripping the copper foil a little bit, it is easy to put back on.

    • When reassembling the device, do not attempt to smooth the foil down with your finger. Metal foil can become sharp if folded in a certain way, and you may be cut.

    • The battery may be removed without removing the SIM/SD card reader. Simply peel back the copper foil from the opposite end of the device, stopping just before you reach the SIM/SD card reader.

  5. Motorola Moto G 2nd Generation Front Camera Replacement: 手順 5、 3の画像 1 Motorola Moto G 2nd Generation Front Camera Replacement: 手順 5、 3の画像 2 Motorola Moto G 2nd Generation Front Camera Replacement: 手順 5、 3の画像 3
    • Peel off the two black stickers on the right side of the battery using your fingers.

    • Remove the battery by pulling the right side of it upwards.

    • The black stickers are the protruding ends of the two parallel adhesive strips which hold the battery in place. You can see the adhesive strips in the third image. Focus your effort on these regions.

    • If you did not remove the SIM/SD card reader in the previous step, you will need to carefully slide the battery ribbon cable out from under it once you have freed the battery from the adhesive strips.

  6. Motorola Moto G 2nd Generation Front Camera Replacement, Motherboard: 手順 6、 3の画像 1 Motorola Moto G 2nd Generation Front Camera Replacement, Motherboard: 手順 6、 3の画像 2 Motorola Moto G 2nd Generation Front Camera Replacement, Motherboard: 手順 6、 3の画像 3
    • Remove LCD connector by lifting the black plastic flap.

  7. Motorola Moto G 2nd Generation Front Camera Replacement: 手順 7、 3の画像 1 Motorola Moto G 2nd Generation Front Camera Replacement: 手順 7、 3の画像 2 Motorola Moto G 2nd Generation Front Camera Replacement: 手順 7、 3の画像 3
    • Using a T5 Torx screwdriver, unscrew the three 2.2 mm screws holding the motherboard in place.

  8. Motorola Moto G 2nd Generation Front Camera Replacement: 手順 8、 2の画像 1 Motorola Moto G 2nd Generation Front Camera Replacement: 手順 8、 2の画像 2
    • Carefully remove the motherboard.

  9. Motorola Moto G 2nd Generation Front Camera Replacement, Front Camera: 手順 9、 3の画像 1 Motorola Moto G 2nd Generation Front Camera Replacement, Front Camera: 手順 9、 3の画像 2 Motorola Moto G 2nd Generation Front Camera Replacement, Front Camera: 手順 9、 3の画像 3
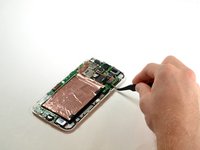
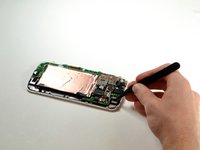
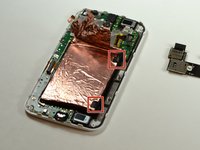
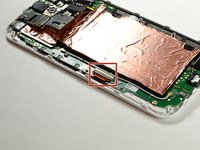
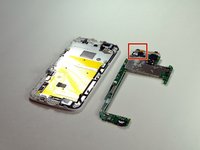
    • Use the prying tweezers to remove the front facing camera.

終わりに

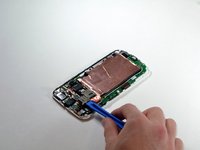
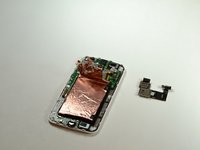
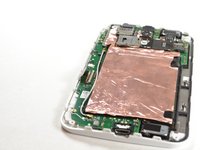
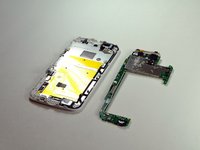
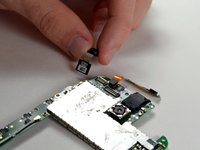
To reassemble your device, follow these instructions in reverse order.

9 の人々がこのガイドを完成させました。

作成者

4人の作成者と共同で作成されました。

stanley rosky

メンバー登録日: 10/01/15

713 ポイント

2のガイドは作成済み

チーム

Cal Poly, Team 1-19, Maness Fall 2015 Cal Poly, Team 1-19, Maness Fall 2015人のメンバー

CPSU-MANESS-F15S1G19

4 メンバー

15のガイドは作成済み

0 件のコメント

コメントを追加

統計データ:

過去 24時間: 0

過去 7 日: 0

過去 30 日: 4

今までの合計 5,809