はじめに
With a few simple steps, this guide shows you how to open your Moto G to get to the innards of your phone.
必要な工具と部品
-
-
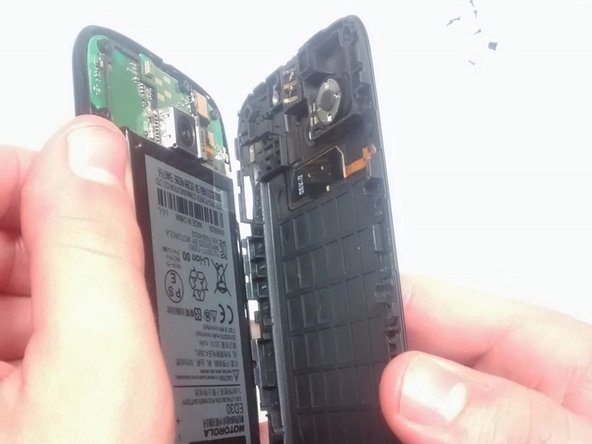
You can remove the outer cover on the back of the phone by using a plastic opening tool. After removal the inner back cover will be exposed as shown.
-
This part is moderately difficult, especially if you've never taken the outer back cover off before this point.
-
It may take you several tries, but please be patient. The cover is surprisingly flexible, but not enough to withstand a lot of pressure.
-
-
-
Shut down the phone.
-
Push SIM card until it pops out.
-
Remove SIM card.
-
Be careful as to not damage the microSD memory card. Unlike the SIM card, pushing this in may not spring release, as there may not be an eject mechanism.
-
If there is no spring release eject mechanism, hopefully your microSD card has a ridge/raised edge that you can push on with your fingernail or plastic/rubber tool to push the card out. This may be difficult - be patient and do not use excessive force/sharp tools that could cause permanent damage and permanent loss of data.
-
-
-
-
Using a T5 Torx screwdriver head, take out the 14 screws (3.5 mm diameter and 5 mm long) that hold the back plate in place.
-
Make sure to keep all of the screws together, as they are very easily lost.
-
The magnetic project mat or a container is a great way to keep all the little metal screws as well as other small metal pieces from being lost.
-
-
-
Use the plastic opening tool to take out the inner back cover after all the screws have been removed.
-
This will expose the motherboard and the attached battery.
-
Take note that once the inner back cover is removed the volume and power buttons on the side can easily fall out or be removed.
-


To reassemble your device, follow these instructions in reverse order.
To reassemble your device, follow these instructions in reverse order.
9 の人々がこのガイドを完成させました。
チーム

USF Tampa, Team 1-6, Brown Fall 2014 USF Tampa, Team 1-6, Brown Fall 2014人のメンバー
USFT-BROWN-F14S1G6
4 メンバー
17のガイドは作成済み