メインコンテンツにスキップ

Motorola Moto E6 Play Display Assembly Replacement

必要な工具と部品

  1. Motorola Moto E6 Play Display Assembly Replacement, Back Cover: 手順 1、 2の画像 1 Motorola Moto E6 Play Display Assembly Replacement, Back Cover: 手順 1、 2の画像 2
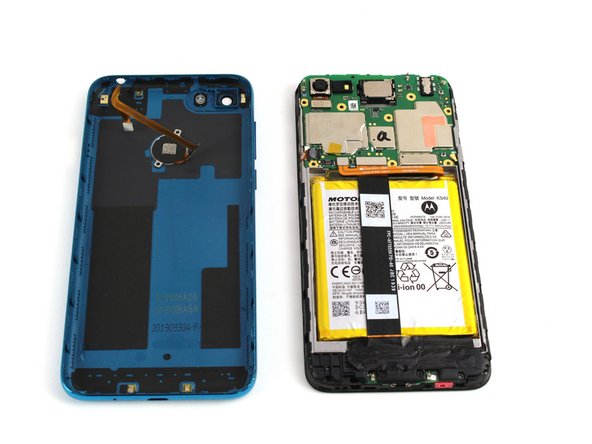
    • Run the halberd spudger along the edges of the device. The back cover should easily pop off.

    • Gently remove the back cover. Do not pull hard, as it is still connected to the fingerprint scanner inside the phone.

  2. Motorola Moto E6 Play Display Assembly Replacement, Circuit Board Covers: 手順 2、 2の画像 1 Motorola Moto E6 Play Display Assembly Replacement, Circuit Board Covers: 手順 2、 2の画像 2
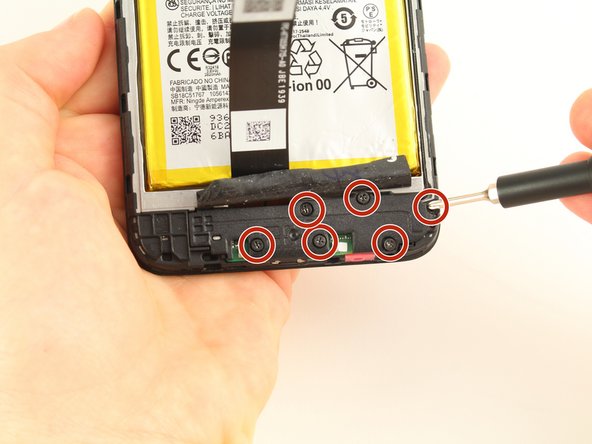
    • To remove the cover on the motherboard, remove the 10 silver 3.90 mm Phillips screws attaching the cover to the board using the Phillips #0 screwdriver.

    • One of these ten screws is covered by black tape located at the bottom left corner of the black cover. Peel back the black tape to access this screw.

  3. Motorola Moto E6 Play Display Assembly Replacement: 手順 3、 2の画像 1 Motorola Moto E6 Play Display Assembly Replacement: 手順 3、 2の画像 2
    この手順で使用する道具:
    Tweezers
    $3.99
    購入する
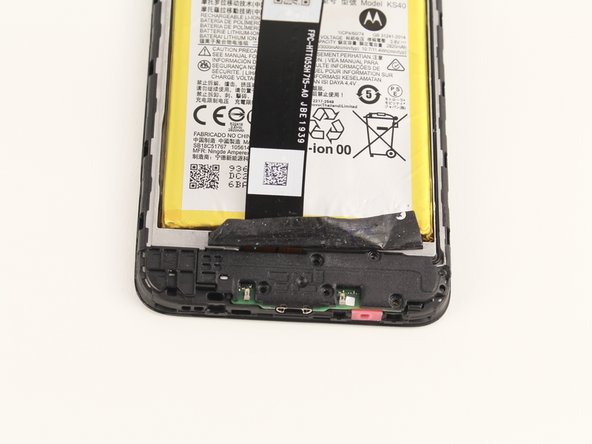
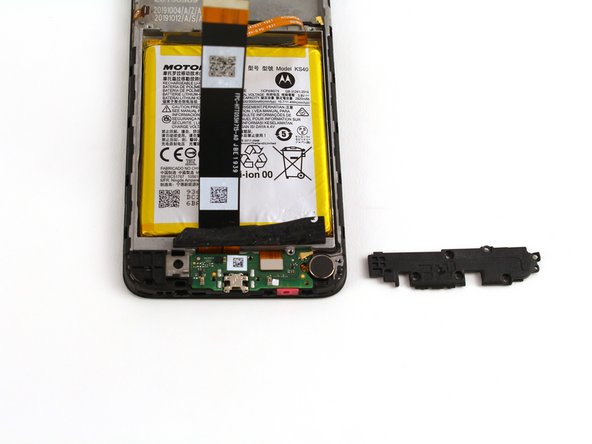
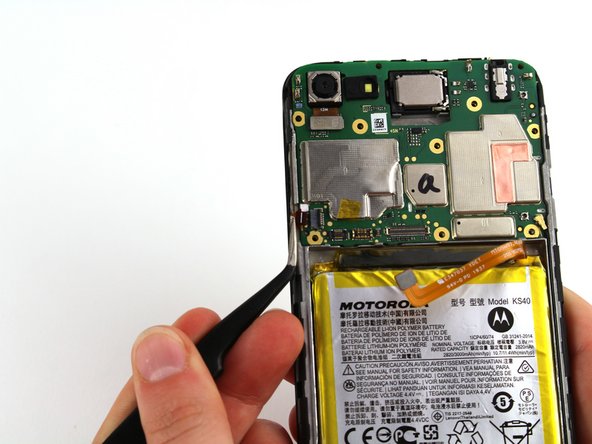
    • With the angled tweezers, remove the black cover to reveal the motherboard underneath.

    • Remove the black piece cover with caution to avoid puncturing the motherboard with the tweezers.

  4. Motorola Moto E6 Play Display Assembly Replacement: 手順 4、 3の画像 1 Motorola Moto E6 Play Display Assembly Replacement: 手順 4、 3の画像 2 Motorola Moto E6 Play Display Assembly Replacement: 手順 4、 3の画像 3
    • The bottom plastic piece covering the daughterboard can be seen by peeling back the tape covering the bottom section of the phone below the battery.

    • To remove the cover, unscrew the six black 3.45 mm Phillips screws holding the cover in place using the Phillips #0 screwdriver.

  5. Motorola Moto E6 Play Display Assembly Replacement: 手順 5、 2の画像 1 Motorola Moto E6 Play Display Assembly Replacement: 手順 5、 2の画像 2
    • Remove the black cover piece using the angled tweezers.

  6. Motorola Moto E6 Play Display Assembly Replacement, Display Assembly: 手順 6、 2の画像 1 Motorola Moto E6 Play Display Assembly Replacement, Display Assembly: 手順 6、 2の画像 2
    この手順で使用する道具:
    Tweezers
    $3.99
    購入する
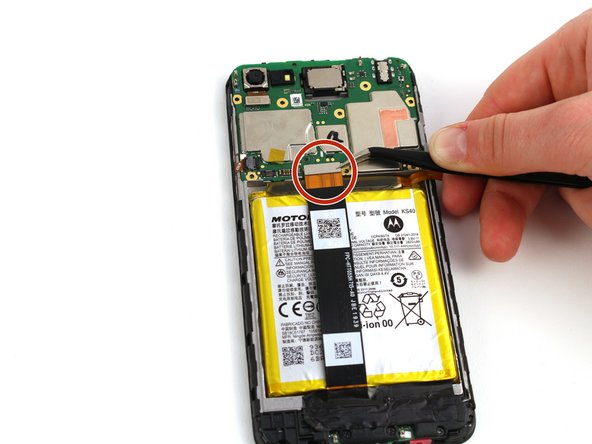
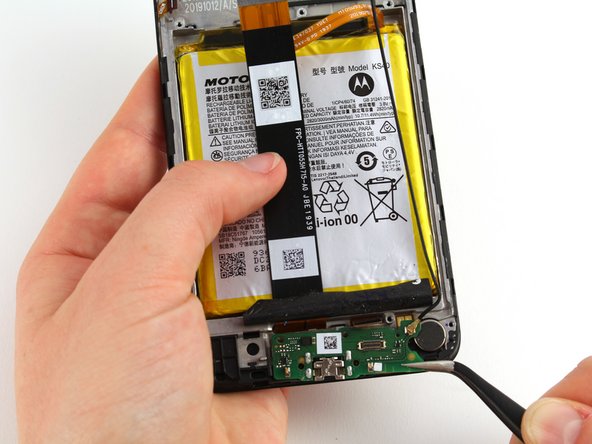
    • Use the angled tweezers to pry off the metal head of the connecting piece from the motherboard assembly.

  7. Motorola Moto E6 Play Display Assembly Replacement: 手順 7、 2の画像 1 Motorola Moto E6 Play Display Assembly Replacement: 手順 7、 2の画像 2
    • Using the angled tweezers, detach the two connectors from the motherboard by pulling the metallic head vertically perpendicular from the phone.

  8. Motorola Moto E6 Play Display Assembly Replacement: 手順 8、 2の画像 1 Motorola Moto E6 Play Display Assembly Replacement: 手順 8、 2の画像 2
    • Use the angled tweezers to flip the black plastic piece from flat to upright.

    • This will allow you to separate the mini connector from the motherboard later.

  9. Motorola Moto E6 Play Display Assembly Replacement: 手順 9、 2の画像 1 Motorola Moto E6 Play Display Assembly Replacement: 手順 9、 2の画像 2
    • Disconnect the rod connected to the motherboard using the angled tweezers.

    • Gently pull the small metal head of the vertically perpendicular from the motherboard, with caution to avoid puncturing the board with the tweezers.

  10. Motorola Moto E6 Play Display Assembly Replacement: 手順 10、 3の画像 1 Motorola Moto E6 Play Display Assembly Replacement: 手順 10、 3の画像 2 Motorola Moto E6 Play Display Assembly Replacement: 手順 10、 3の画像 3
    • Using the angled tweezers, disconnect the clip connecting the daughterboard to the battery by pulling the metal head vertically perpendicular to the phone.

    • Then, remove the circuit board.

  11. Motorola Moto E6 Play Display Assembly Replacement: 手順 11、 1の画像 1
    • Using the angled tweezers, remove the calling speaker from the top of the frame.

    • The empty frame remaining after removing all components is the screen assembly, and must be replaced as a whole.

  12. Motorola Moto E6 Play Display Assembly Replacement: 手順 12、 2の画像 1 Motorola Moto E6 Play Display Assembly Replacement: 手順 12、 2の画像 2
    • Remove the battery by inserting the spudger under the battery and gently pulling it up from the device to loosen the adhesive glue underneath.

    • Continue to push the spudger towards the center of the compartment holding the battery, and gently pry the battery away from the device.

    • In this image, the metal spudger is used. However, you should NOT use a metal spudger to remove the battery. Use the plastic spudger instead, as this is less likely to puncture the battery.

終わりに

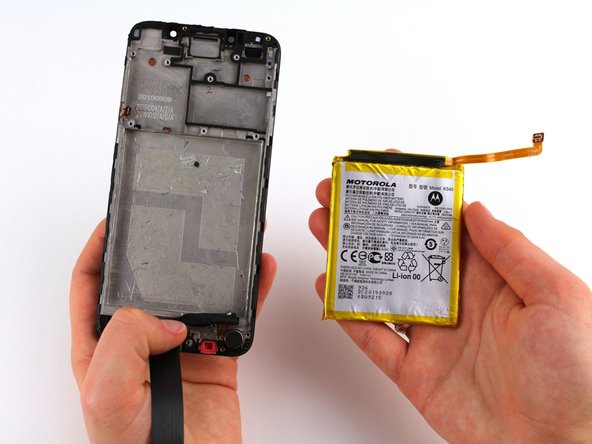
To reassemble your device, follow these instructions in reverse order.

4 の人々がこのガイドを完成させました。

作成者

6人の作成者と共同で作成されました。

Charlie Priebe

メンバー登録日: 02/10/20

824 ポイント

5のガイドは作成済み

チーム

Cal Poly, Team S22-G4, Regan Winter 2020 Cal Poly, Team S22-G4, Regan Winter 2020人のメンバー

CPSU-REGAN-W20S22G4

4 メンバー

14のガイドは作成済み

コメント 1 件

I have done all steps here and removed screen. Now added new screen and put back together. However now the touchscreen completely doesnt work when you touch it. It starts up and screen looks amazing and shows images well but the touch aspect doesnt work. Any ideas?

sandy hoax ha - 返信

コメントを追加

統計データ:

過去 24時間: 4

過去 7 日: 10

過去 30 日: 29

今までの合計 3,728