メインコンテンツにスキップ

Motorola Moto E4 Plus Motherboard Replacement

アーカイブされたガイド
このガイドは将来的な使用のためにのみ保存されてます。ご自身の修理作業には更新バージョンをご利用ください。

必要な工具と部品

  1. Motorola Moto E4 Plus Motherboard Replacement, Back Plate and Battery: 手順 1、 2の画像 1 Motorola Moto E4 Plus Motherboard Replacement, Back Plate and Battery: 手順 1、 2の画像 2
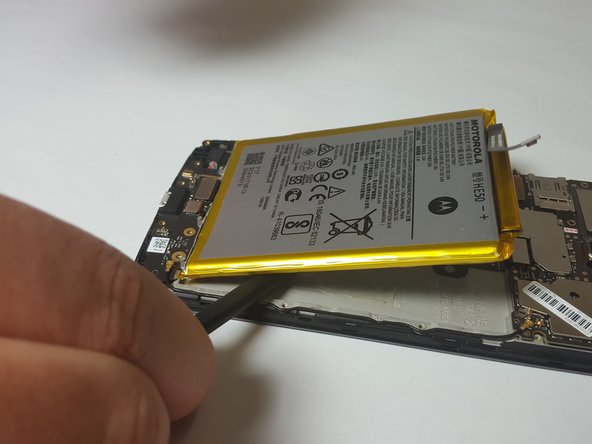
    • Insert the spudger into the notch on the corner of the phone and lift up to remove the back case.

  2. Motorola Moto E4 Plus Motherboard Replacement: 手順 2、 1の画像 1
    • Use the T4 Torx Screwdriver to remove the 17 3.2 mm screws in the back panel covering the battery.

  3. Motorola Moto E4 Plus Motherboard Replacement: 手順 3、 3の画像 1 Motorola Moto E4 Plus Motherboard Replacement: 手順 3、 3の画像 2 Motorola Moto E4 Plus Motherboard Replacement: 手順 3、 3の画像 3
    • Lift up and remove the back panel.

  4. Motorola Moto E4 Plus Motherboard Replacement: 手順 4、 2の画像 1 Motorola Moto E4 Plus Motherboard Replacement: 手順 4、 2の画像 2
    • After removing the back panel, use the spudger to lift and detach the Battery Flux Cable from the Motherboard.

  5. Motorola Moto E4 Plus Motherboard Replacement: 手順 5、 3の画像 1 Motorola Moto E4 Plus Motherboard Replacement: 手順 5、 3の画像 2 Motorola Moto E4 Plus Motherboard Replacement: 手順 5、 3の画像 3
    • Wedge the spudger between the battery and the phone to lift the battery up and remove the battery. There will be slight resistance to this but the battery will not be damaged by this. It is just the adhesive tape.

  6. Motorola Moto E4 Plus Motherboard Replacement, Rear Camera: 手順 6、 2の画像 1 Motorola Moto E4 Plus Motherboard Replacement, Rear Camera: 手順 6、 2の画像 2
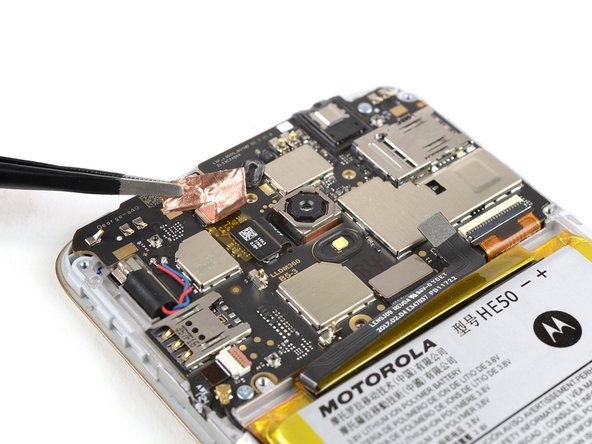
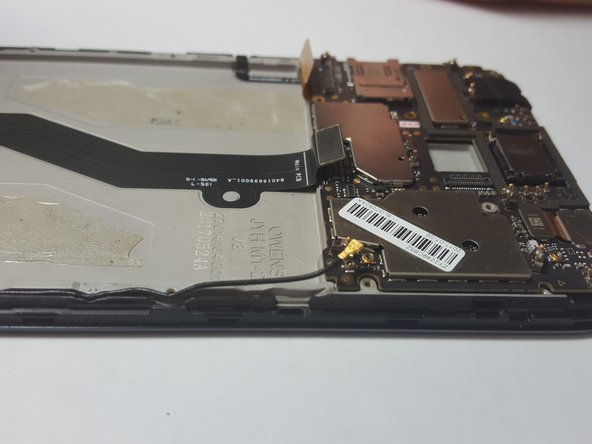
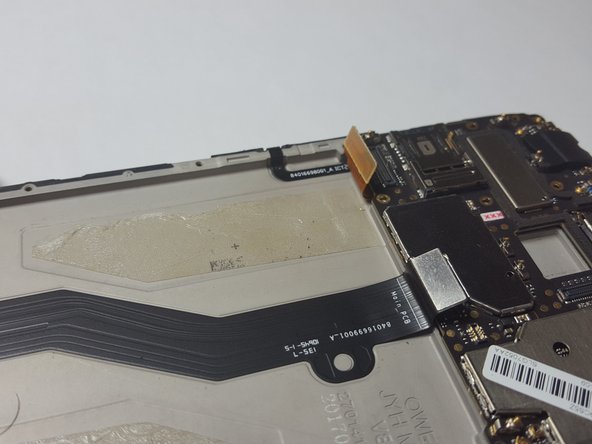
    • Use a pair of tweezers to peel up the copper tape that covers the rear camera flex connector.

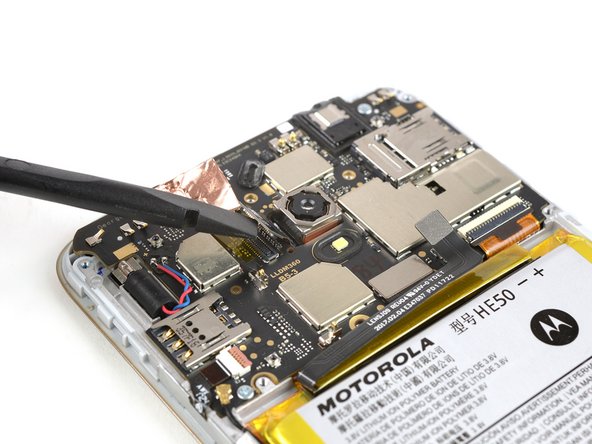
    • Fold the copper tape out of the way.

  7. Motorola Moto E4 Plus Motherboard Replacement: 手順 7、 2の画像 1 Motorola Moto E4 Plus Motherboard Replacement: 手順 7、 2の画像 2
    • Use the flat end of a spudger to pry up and disconnect the rear camera flex cable.

  8. Motorola Moto E4 Plus Motherboard Replacement: 手順 8、 1の画像 1
    • Carefully remove the rear camera with a pair of tweezers.

  9. Motorola Moto E4 Plus Motherboard Replacement, Motherboard: 手順 9、 1の画像 1
    • Use the T4 Torx Screwdriver to remove the 2 3.2 mm screws circled in the image.

  10. Motorola Moto E4 Plus Motherboard Replacement: 手順 10、 2の画像 1 Motorola Moto E4 Plus Motherboard Replacement: 手順 10、 2の画像 2
    • Use the Spudger to lift up and detach the Main Flex Cable from the Motherboard.

  11. Motorola Moto E4 Plus Motherboard Replacement: 手順 11、 2の画像 1 Motorola Moto E4 Plus Motherboard Replacement: 手順 11、 2の画像 2
    • Use the Spudger to lift up and detach the LCD Screen Flex Cable from the Motherboard.

  12. Motorola Moto E4 Plus Motherboard Replacement: 手順 12、 1の画像 1
    • Use the Plastic Spudger to lift up and detach the Signal Flex Cable from the Motherboard. The Signal Flex Cable should still be attached to the body of the phone.

  13. Motorola Moto E4 Plus Motherboard Replacement: 手順 13、 2の画像 1 Motorola Moto E4 Plus Motherboard Replacement: 手順 13、 2の画像 2
    • Use the Spudger to lift up and remove the Motherboard from the phone.

終わりに

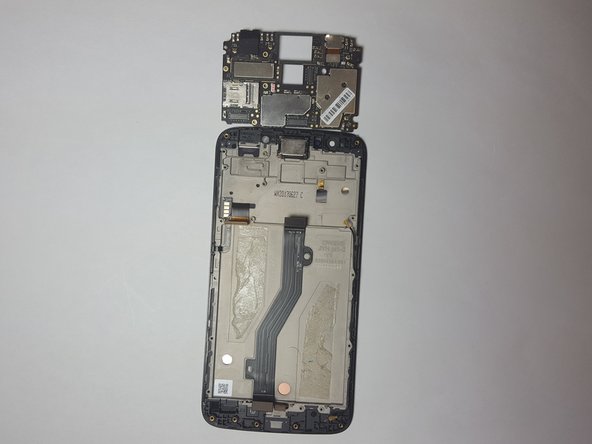
To reassemble your device, follow these instructions in reverse order.

10 の人々がこのガイドを完成させました。

作成者

6人の作成者と共同で作成されました。

Jack Haseman

メンバー登録日: 03/19/18

1,396 ポイント

6のガイドは作成済み

チーム

Baylor, Team S3-G2, Williams Spring 2018 Baylor, Team S3-G2, Williams Spring 2018人のメンバー

BU-WILLIAMS-S18S3G2

4 メンバー

13のガイドは作成済み

2 件のコメント

guide states that there are 17 screws to remove (step 2) but there are 20 screws circled… Counting is hard I guess?

CPR South Portland - 返信

From step 9 it’s another phone. I’m guessing E4 (regular) but they are not the same. The vibration motor, second sim tray, and many other components disappear suddenly. Mixing different phones is very irresponsable and lazy.

Randy Sickmind - 返信

コメントを追加

統計データ:

過去 24時間: 0

過去 7 日: 0

過去 30 日: 1

今までの合計 6,030