メインコンテンツにスキップ

Motorola MOTO W755 Cell Phone Speaker Replacement

必要な工具と部品

  1. Motorola MOTO W755 Cell Phone Speaker Replacement, Top Panel: 手順 1、 3の画像 1 Motorola MOTO W755 Cell Phone Speaker Replacement, Top Panel: 手順 1、 3の画像 2 Motorola MOTO W755 Cell Phone Speaker Replacement, Top Panel: 手順 1、 3の画像 3
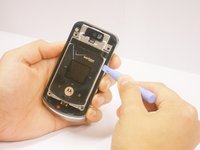
    • Use the plastic opening tool to pull peel back screen cover.

    • Gently peel back the screen cover from the speaker slit.

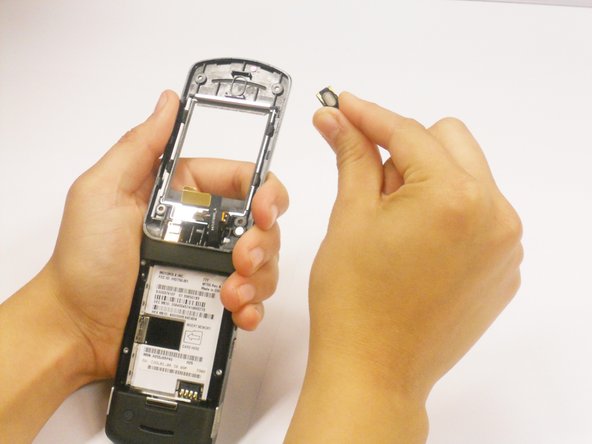
    • Using the T6 Torx-screwdriver, remove the four 4.3 mm screws from the top panel.

  2. Motorola MOTO W755 Cell Phone Speaker Replacement: 手順 2、 3の画像 1 Motorola MOTO W755 Cell Phone Speaker Replacement: 手順 2、 3の画像 2 Motorola MOTO W755 Cell Phone Speaker Replacement: 手順 2、 3の画像 3
    • Using the flat end of the plastic opening tool, insert it underneath the plastic cover on the top right corner.

    • Move the opening tool around the phone counter clockwise.

    • Pop the plastic cover off by twisting the plastic covering tool.

  3. Motorola MOTO W755 Cell Phone Speaker Replacement: 手順 3、 2の画像 1 Motorola MOTO W755 Cell Phone Speaker Replacement: 手順 3、 2の画像 2
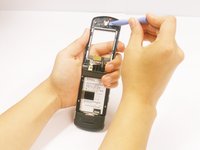
    • Using a flat head screwdriver, insert it between the metal logic board casing and the top portion of the phone

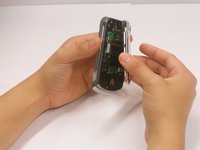
    • Move the plastic opening tool around the phone until part of the casting is popped off.

    • You will need to pop in the four plastic fasteners individually from the metal casing to remove it

    • Be careful not to rip the cable ribbons that are attached to the logic board and casing

  4. Motorola MOTO W755 Cell Phone Speaker Replacement: 手順 4、 1の画像 1
    • Use the flat end of the plastic opening tool to unclip the cable ribbon from the logic board

  5. Motorola MOTO W755 Cell Phone Speaker Replacement: 手順 5、 1の画像 1
    • You now have the top panel completely detached.

  6. Motorola MOTO W755 Cell Phone Speaker Replacement, Speaker: 手順 6、 2の画像 1 Motorola MOTO W755 Cell Phone Speaker Replacement, Speaker: 手順 6、 2の画像 2
    • Flip the top portion of the phone so that the back is facing you.

    • Using the flat end of the plastic opening tool, pry the speaker off the back of the phone.

終わりに

To reassemble your device, follow these instructions in reverse order.

作成者

4人の作成者と共同で作成されました。

Roberta Glenn

メンバー登録日: 07/11/12

43 ポイント

4のガイドは作成済み

チーム

Cal Poly, Team 1-3, Regan SU 2012 Cal Poly, Team 1-3, Regan SU 2012人のメンバー

CPSU-REGAN-SU12S1G3

2 メンバー

14のガイドは作成済み

0 件のコメント

コメントを追加

統計データ:

過去 24時間: 0

過去 7 日: 1

過去 30 日: 1

今までの合計 1,584