メインコンテンツにスキップ

Motorola MBP667CONNECT Circuit Board Replacement

必要な工具と部品

  1. Motorola MBP667CONNECT Circuit Board Replacement, Circuit Board: 手順 1、 3の画像 1 Motorola MBP667CONNECT Circuit Board Replacement, Circuit Board: 手順 1、 3の画像 2 Motorola MBP667CONNECT Circuit Board Replacement, Circuit Board: 手順 1、 3の画像 3
    • Remove the two 5 mm Phillips #1 screws on the back of the camera.

    • Use a nylon spudger to remove the casing.

  2. Motorola MBP667CONNECT Circuit Board Replacement: 手順 2、 3の画像 1 Motorola MBP667CONNECT Circuit Board Replacement: 手順 2、 3の画像 2 Motorola MBP667CONNECT Circuit Board Replacement: 手順 2、 3の画像 3
    • Remove the brackets by the speaker on the front side of the camera using the metal spudger.

    • Continue to use the metal spudger to carefully disconnect remaining brackets from casing.

    • Remove the two 5mm Phillips #1 screws on the backside of the camera.

  3. Motorola MBP667CONNECT Circuit Board Replacement: 手順 3、 3の画像 1 Motorola MBP667CONNECT Circuit Board Replacement: 手順 3、 3の画像 2 Motorola MBP667CONNECT Circuit Board Replacement: 手順 3、 3の画像 3
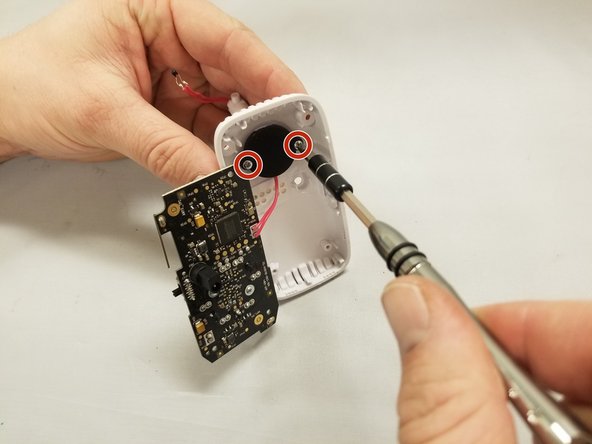
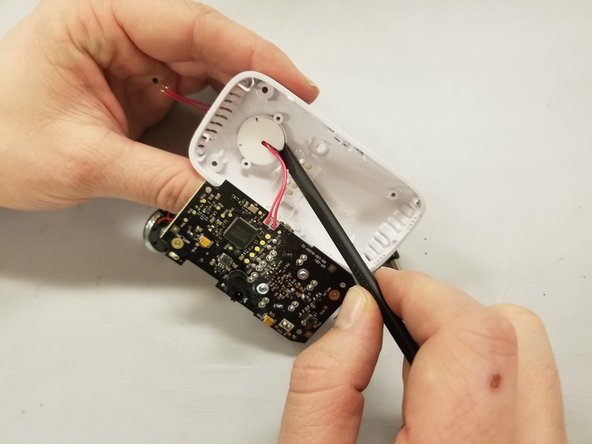
    • Use the nylon spudger to remove the circuit board from the plastic casing for the backside of the camera.

    • Remove the two 5 mm Phillips #1 screws on the black circle receiver housing.

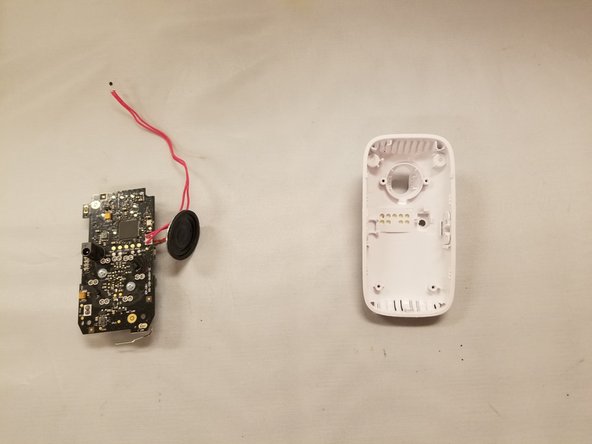
    • Now that the black circle is detached, use a nylon spudger to remove the white plastic circle from the casing.

  4. Motorola MBP667CONNECT Circuit Board Replacement: 手順 4、 2の画像 1 Motorola MBP667CONNECT Circuit Board Replacement: 手順 4、 2の画像 2
    • You will now be able to carefully pull the receiver wire through the gap in the casing.

終わりに

To reassemble your device, follow these instructions in reverse order.

作成者

3人の作成者と共同で作成されました。

Jordan Webb

メンバー登録日: 01/16/19

109 ポイント

1ガイドが承認済み

チーム

0 件のコメント

コメントを追加

統計データ:

過去 24時間: 0

過去 7 日: 3

過去 30 日: 8

今までの合計 379