はじめに
This guide will provide the steps needed to replace a defective Motorola K1m keypad. The guide will show you the steps to disassemble the phone to detach the broken keypad. Lastly, this guide can be followed in reverse order replace the old keypad with a new keypad to have a working phone.
必要な工具と部品
-
-
Remove the battery with your fingers by pulling the battery from the top corners labeled "Pull Here" located on the left and right side of the top of the battery.
-
Remove the battery.
-
-
この手順で使用する道具:Spudger$3.99
-
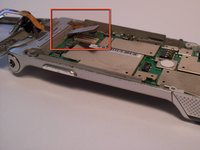
To begin detaching the battery dock, unscrew the 4 black screws on each corner of the phone with the T5 Torx Screwdriver.
-
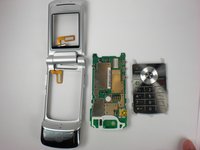
Lift up the battery dock where the hinges are located. Carefully insert the T5 Torx Screwdriver in between the battery dock and the back plate of the battery. (See the picture to locate the hinges)
-
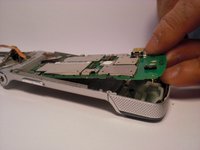
Remove the battery dock by popping it up with The Spudger.
-
-


To reassemble your device, follow these instructions in reverse order.
To reassemble your device, follow these instructions in reverse order.
チーム

Cal Poly, Team 11-1, Forte Winter 2010 Cal Poly, Team 11-1, Forte Winter 2010人のメンバー
CPSU-FORTE-W10S11G1
5 メンバー
6のガイドは作成済み