メインコンテンツにスキップ

このバージョンは誤った内容を含んでいる可能性があります。最新の承認済みスナップショットに切り替えてください。

必要な工具と部品

  1. この手順は未翻訳です。 翻訳を手伝う。

    : 手順 1、 1の画像 1
    • Locate the back cover release slide.

    • Use your finger to slide it down.

  2. この手順は未翻訳です。 翻訳を手伝う。

    : 手順 2、 1の画像 1
    • Remove the back cover by pulling it away from the phone.

  3. この手順は未翻訳です。 翻訳を手伝う。

    : 手順 3、 2の画像 1 : 手順 3、 2の画像 2
    • Locate the battery removal slot.

    • Use your finger to pull the battery out from the top.

    • Remove the battery.

  4. この手順は未翻訳です。 翻訳を手伝う。

    : 手順 4、 1の画像 1
    • Locate the antenna port on the top of the phone.

  5. この手順は未翻訳です。 翻訳を手伝う。

    : 手順 5、 2の画像 1 : 手順 5、 2の画像 2
    • Grip the plastic support post and unscrew the apparatus using a counterclockwise twist.

    • Pull the apparatus up and out of the phone.

  6. この手順は未翻訳です。 翻訳を手伝う。

    : 手順 6、 3の画像 1 : 手順 6、 3の画像 2 : 手順 6、 3の画像 3
    • Locate the two screws on the backside of the phone.

    • Unscrew the two screws using your T6 screwdriver.

  7. この手順は未翻訳です。 翻訳を手伝う。

    : 手順 7、 3の画像 1 : 手順 7、 3の画像 2 : 手順 7、 3の画像 3
    この手順で使用する道具:
    Tweezers
    $4.99
    購入する
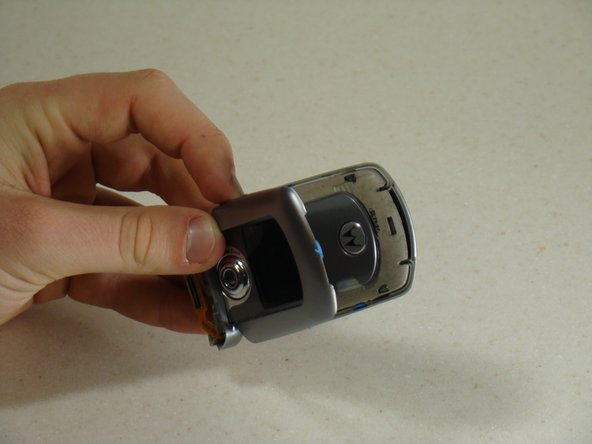
    • Grasp the top of the phone near the speaker.

    • Gently pull the top section of the phone upwards until you feel some resistance.

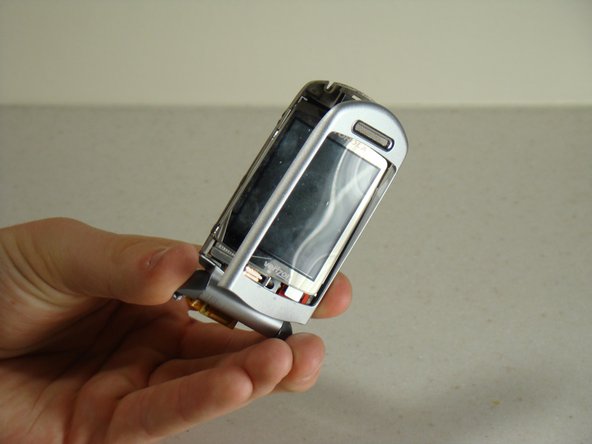
    • Locate the brown connector that runs from the top section of the phone to the circuit board under the keypad.

    • Using tweezers, gently pry the connector from the circuit board.

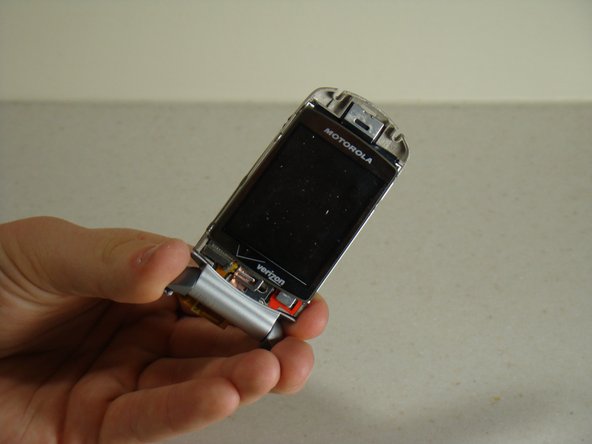
    • Detach the top section of the phone from the keypad section.

  8. この手順は未翻訳です。 翻訳を手伝う。

    : 手順 8、 2の画像 1 : 手順 8、 2の画像 2
    • Carefully insert the blue pry tool into the notch between the two halves of the top section of the phone.

    • Gently pry the two halves apart.

  9. この手順は未翻訳です。 翻訳を手伝う。

    : 手順 9、 1の画像 1
    • Rotate the top section of the phone around so that you are looking at the outer screen.

    • Disconnect the cover from the outer screen side of the phone.

  10. この手順は未翻訳です。 翻訳を手伝う。

    : 手順 10、 3の画像 1 : 手順 10、 3の画像 2 : 手順 10、 3の画像 3
    • Rotate the top section of the phone around so you are looking at the large screen.

    • Using your fingers, lift the protector off of the screen.

  11. この手順は未翻訳です。 翻訳を手伝う。

    : 手順 11、 1の画像 1
    • Using the blue pry tool, gently remove the screen cover.

    • Since it is glued into place, it may take some maneuvering to remove.

  12. この手順は未翻訳です。 翻訳を手伝う。

    : 手順 12、 3の画像 1 : 手順 12、 3の画像 2 : 手順 12、 3の画像 3
    • Turn the phone so that you can see the side metal clasps.

    • Using the blue lifter tool, snap the metal clasps off of screen body.

    • Proceed to snap all four corners of the metal cover off of the screen body.

  13. この手順は未翻訳です。 翻訳を手伝う。

    : 手順 13、 2の画像 1 : 手順 13、 2の画像 2
    • Using tweezers, gently detach the brown connecting strip from the back of the screen.

    • Separate the screen from the phone frame.

    • The front screen can now be accessed and replaced!

  14. この手順は未翻訳です。 翻訳を手伝う。

    : 手順 14、 1の画像 1
    • The inside screen can now be accessed for repair or replacement!

ゴール

ある他の人がこのガイドを完成しました。

作成者

5人の作成者と共同で作成されました。

Zoie E

メンバー登録日: 01/12/11

603 ポイント

5のガイドは作成済み

チーム

Cal Poly, Team 14-8, Forte Winter 2011 Cal Poly, Team 14-8, Forte Winter 2011人のメンバー

CPSU-FORTE-W11S14G8

5 メンバー

5のガイドは作成済み

0 件のコメント

コメントを追加

統計データ:

過去 24時間: 0

過去 7 日: 1

過去 30 日: 14

今までの合計 2,213