はじめに
The rear case of the Droid RAZR contains the loudspeaker and the flash for the rear-facing camera. Removing the rear case is necessary in order to access either of those components.
必要な工具と部品
-
-
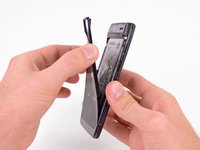
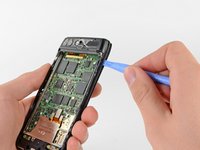
Insert a plastic opening tool between the back cover and rear case at the lower left edge of the back cover.
-
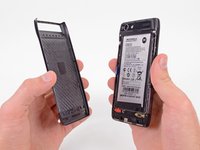
Pry the back cover up with the plastic opening tool to free the plastic clips.
-
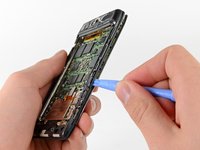
Continue prying along the left edge of the back cover towards the top of the phone.
-
-
-
-
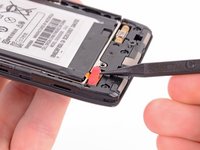
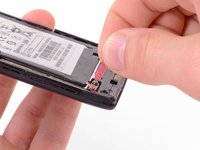
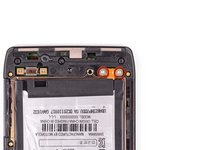
Use the tip of a spudger to lift up the red silicone cover over the battery terminal screws and remove it.
-
-
-
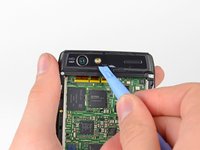
Use a heat gun or hair dryer to soften the adhesive underneath the camera cover.
-
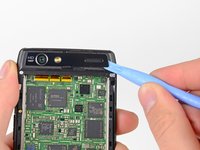
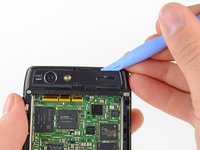
Gently pry up the bottom edge of the camera cover with a plastic opening tool.
-
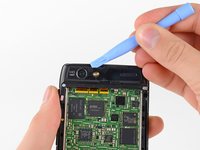
Carefully slide the plastic opening tool across the bottom edge to free it from the adhesive.
-
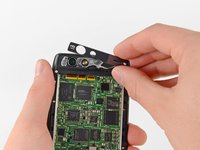
Continue to use the heat gun as needed to soften the adhesive as you remove the camera cover.
-
-
-
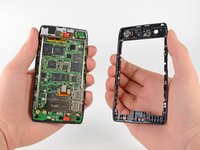
Remove the six screws securing the rear case to the rest of the phone:
-
three 6.7 mm silver T3 Torx screws at the top,
-
four 4.0 mm gold T3 Torx screws in the middle,
-
and three 4.5 mm black T5 Torx screws at the bottom.
-


To reassemble your device, follow these instructions in reverse order.
3 の人々がこのガイドを完成させました。
