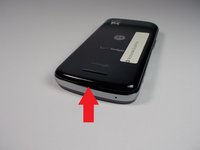
メインコンテンツにスキップ

Motorola Droid Pro Screen Replacement

必要な工具と部品

  1. Motorola Droid Pro Screen Replacement, SD Card/SIM Card PCB Board: 手順 1、 2の画像 1 Motorola Droid Pro Screen Replacement, SD Card/SIM Card PCB Board: 手順 1、 2の画像 2
    • Remove the back cover and battery by using the thumb tabs.

  2. Motorola Droid Pro Screen Replacement: 手順 2、 1の画像 1
    • Unscrew the 8 back panel screws using the T4 Torx screwdriver.

  3. Motorola Droid Pro Screen Replacement: 手順 3、 1の画像 1
    • Use a spudger to open the phone along the sides between the back panel and the chrome trim.

    • It is held together by small clips that lock in. You may have to use a little force to unlock them.

    • Go around on all sides then pull the back panel off.

  4. Motorola Droid Pro Screen Replacement: 手順 4、 2の画像 1 Motorola Droid Pro Screen Replacement: 手順 4、 2の画像 2
    • Gently lift the SD & SIM card board (PCB) as shown in the following pictures.

    • This will expose the ribbon cable attached to the board and another ribbon cable for the mother board. Remove them both using the spudger.

    • Once the small one is removed the small board can be pulled off.

  5. Motorola Droid Pro Screen Replacement, Screen: 手順 5、 1の画像 1
    • Unscrew the 6 screws using the T5 Torx screwdriver.

  6. Motorola Droid Pro Screen Replacement: 手順 6、 1の画像 1
    • Unlock the ribbon cable and then you can pull the screen out.

    • When replacing screen make sure you lock the ribbon cable back in place.

終わりに

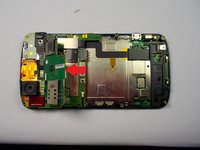
To reassemble your device, follow these instructions in reverse order.

作成者

6人の作成者と共同で作成されました。

Peter Cakounes

メンバー登録日: 10/21/14

19 ポイント

4のガイドは作成済み

チーム

UMass Dartmouth, Team 5-8, Vijaybhaskar Fall 2014 UMass Dartmouth, Team 5-8, Vijaybhaskar Fall 2014人のメンバー

UMASSD-VIJAYBHASKAR-F14S5G8

4 メンバー

8のガイドは作成済み

0 件のコメント

コメントを追加

統計データ:

過去 24時間: 0

過去 7 日: 2

過去 30 日: 5

今までの合計 266