メインコンテンツにスキップ

このバージョンは誤った内容を含んでいる可能性があります。最新の承認済みスナップショットに切り替えてください。

必要な工具と部品

  1. この手順は未翻訳です。 翻訳を手伝う。

    : 手順 1、 3の画像 1 : 手順 1、 3の画像 2 : 手順 1、 3の画像 3
    • Slide the battery cover toward the bottom edge of the phone.

    • Remove the battery cover from the rear of the phone.

  2. この手順は未翻訳です。 翻訳を手伝う。

    : 手順 2、 2の画像 1 : 手順 2、 2の画像 2
    • Lift the battery out of the Droid 2 from the edge closest to the bottom of the phone.

    • Remove the battery from the Droid 2.

  3. この手順は未翻訳です。 翻訳を手伝う。

    : 手順 3、 2の画像 1 : 手順 3、 2の画像 2
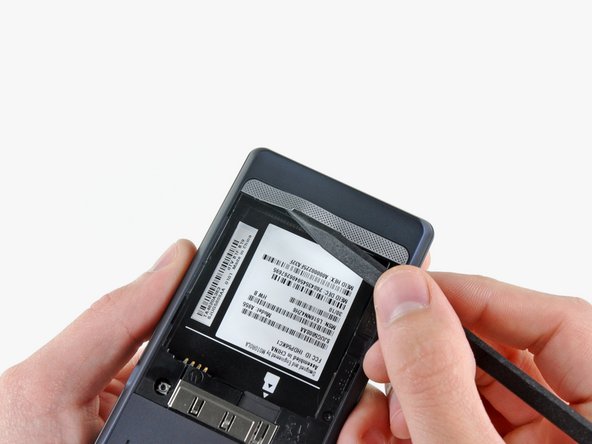
    • Using the tip of a spudger, peel up one corner of the silver ribbon below the battery compartment.

    • Peel the ribbon off the phone.

  4. この手順は未翻訳です。 翻訳を手伝う。

    : 手順 4、 1の画像 1
    • Insert the flat end of a spudger and pry the plastic camera cover up off the phone.

    • The thin plastic cover is attached to the phone with an adhesive. Work slowly and carefully.

  5. この手順は未翻訳です。 翻訳を手伝う。

    : 手順 5、 1の画像 1
    • Use the tip of a spudger to remove the camera bezel stuck to the rear case.

  6. この手順は未翻訳です。 翻訳を手伝う。

    : 手順 6、 1の画像 1
    • Remove the seven 5.5 mm T5 Torx screws securing the rear case to the inner case.

  7. この手順は未翻訳です。 翻訳を手伝う。

    : 手順 7、 1の画像 1
    • Insert the flat end of a spudger and pry downwards to release the plastic tab holding the rear case to the motherboard screw.

  8. この手順は未翻訳です。 翻訳を手伝う。

    : 手順 8、 1の画像 1
    • Gently insert a spudger between the rear case and front case at the top of the phone, near the audio jack.

    • Carefully pry the top edge of the rear case up from the rest of the phone.

  9. この手順は未翻訳です。 翻訳を手伝う。

    : 手順 9、 2の画像 1 : 手順 9、 2の画像 2
    • With the spudger still inserted between the rear case and front case, slide the spudger along the right edge of the device, moving toward the bottom, prying as you go.

    • Continue prying along the bottom edge of the device from right to left, freeing it from the front panel.

  10. この手順は未翻訳です。 翻訳を手伝う。

    : 手順 10、 2の画像 1 : 手順 10、 2の画像 2
    • Continue prying the rear case from the front case along the left side, moving from bottom to top.

    • Lift the rear case up out of the phone.

    • At this point, the button covers on the side of the phone are free and may fall out if you tip the phone upside down.

  11. この手順は未翻訳です。 翻訳を手伝う。

    : 手順 11、 1の画像 1
    • Carefully lift the speaker/antenna assembly up and out of the phone.

    • If you are re-assembling your phone, insert any power, camera, or volume buttons that may have fallen out at this point.

ゴール

3 の人々がこのガイドを完成させました。

作成者

3人の作成者と共同で作成されました。

Andrew Bookholt

586,444 ポイント

619のガイドは作成済み

0 件のコメント

コメントを追加

統計データ:

過去 24時間: 1

過去 7 日: 9

過去 30 日: 12

今までの合計 6,939