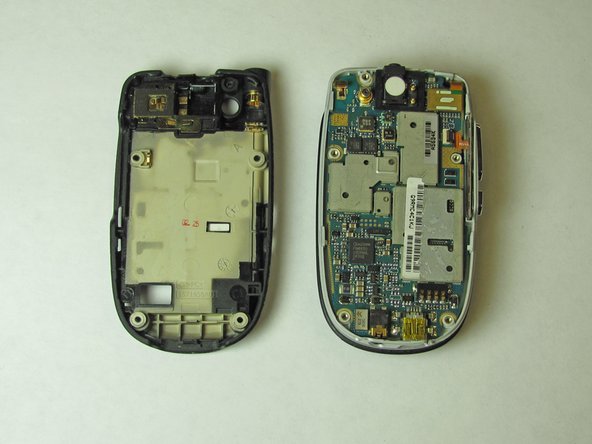
メインコンテンツにスキップ

Motorola C290 Logic Board Replacement

必要な工具と部品

  1. Motorola C290 Logic Board Replacement, Battery: 手順 1、 2の画像 1 Motorola C290 Logic Board Replacement, Battery: 手順 1、 2の画像 2
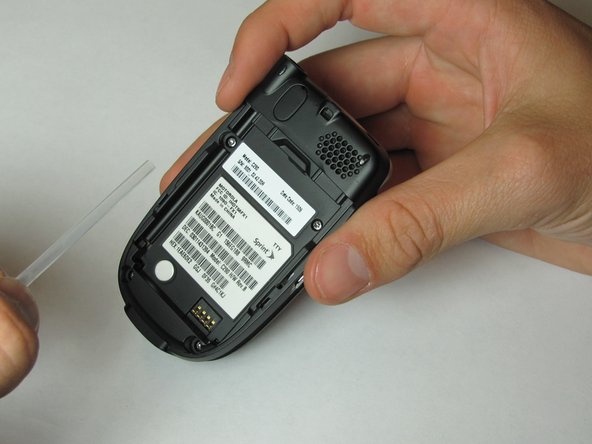
    • Position Motorola C290 so that the back of the phone is facing up.

    • Apply pressure to the back cover while simultaneously sliding it downwards.

    • Note: It may be easiest to apply pressure to the ridges at the top of the back cover.

  2. Motorola C290 Logic Board Replacement: 手順 2、 2の画像 1 Motorola C290 Logic Board Replacement: 手順 2、 2の画像 2
    • Place your finger in the notch at the top of the battery.

    • Gently lift and pull out battery.

  3. Motorola C290 Logic Board Replacement, Antenna: 手順 3、 3の画像 1 Motorola C290 Logic Board Replacement, Antenna: 手順 3、 3の画像 2 Motorola C290 Logic Board Replacement, Antenna: 手順 3、 3の画像 3
    • Unscrew antenna head from top of phone by twisting counterclockwise.

    • Pull the antenna out through the top hole and set aside.

  4. Motorola C290 Logic Board Replacement: 手順 4、 2の画像 1 Motorola C290 Logic Board Replacement: 手順 4、 2の画像 2
    • Remove the plastic tube by lifting the bottom and pulling out towards yourself.

  5. Motorola C290 Logic Board Replacement, Logic Board: 手順 5、 3の画像 1 Motorola C290 Logic Board Replacement, Logic Board: 手順 5、 3の画像 2 Motorola C290 Logic Board Replacement, Logic Board: 手順 5、 3の画像 3
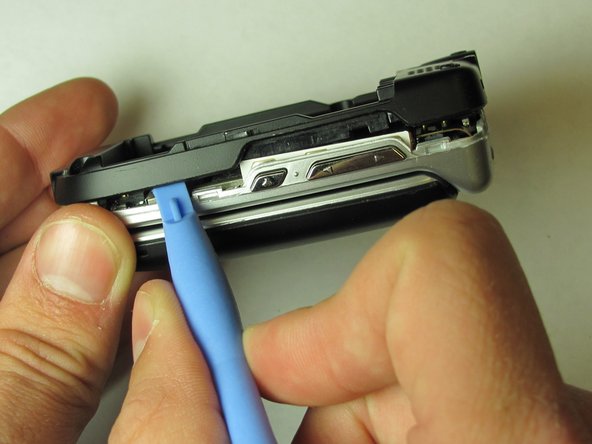
    • Insert a Spudger (or pushpin) into the top notch of the rubber cover, located on the top of the phone.

    • Press down and rotate the Spudger lifting the rubber cover. Remove and set cover aside.

    • Note: This will reveal a screw. Five screws should now be visible.

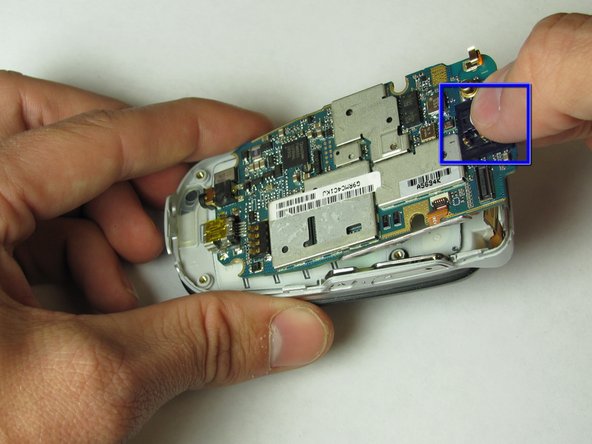
    • Using a T6 Torx screwdriver, unscrew all 5 screws and carefully set them aside.

  6. Motorola C290 Logic Board Replacement: 手順 6、 2の画像 1 Motorola C290 Logic Board Replacement: 手順 6、 2の画像 2
    • Insert the plastic opening tool in the groove at the top of the phone.

    • Rotate the tool to create an opening between the logic board cover and case.

  7. Motorola C290 Logic Board Replacement: 手順 7、 2の画像 1 Motorola C290 Logic Board Replacement: 手順 7、 2の画像 2
    • Slide the plastic opening tool along the groove, until the entire logic board cover has been opened.

    • Remove logic board cover and set aside.

  8. Motorola C290 Logic Board Replacement: 手順 8、 1の画像 1
    • Use the Spudger to detach the screen wire from the logic board.

  9. Motorola C290 Logic Board Replacement: 手順 9、 3の画像 1 Motorola C290 Logic Board Replacement: 手順 9、 3の画像 2 Motorola C290 Logic Board Replacement: 手順 9、 3の画像 3
    • Insert the Spudger into the slot on the top of the logic board.

    • Gently pry to loosen the top of the logic board.

    • Note: The logic board may initially seem glued to the phone. It is not glued but does require input of force to remove.

    • Grab the top of the logic board and pull at an angle to remove.

終わりに

To reassemble your device, follow these instructions in reverse order.

ある他の人がこのガイドを完成しました。

作成者

7人の作成者と共同で作成されました。

Paul

メンバー登録日: 04/15/10

22 ポイント

1ガイドが承認済み

チーム

Cal Poly, Team 24-28, Regan Spring 2010 Cal Poly, Team 24-28, Regan Spring 2010人のメンバー

CPSU-REGAN-S10S24G28

4 メンバー

6のガイドは作成済み

0 件のコメント

コメントを追加

統計データ:

過去 24時間: 0

過去 7 日: 0

過去 30 日: 0

今までの合計 1,387