メインコンテンツにスキップ

Moen Posi-Temp Cartridge Part #1112b Replacement

必要な工具と部品

  1. Moen Posi-Temp Cartridge Part #1112b Replacement, Moen Posi-Temp Cartridge Part #1112b: 手順 1、 1の画像 1
    • Turn the water shutoff valve counter-clockwise to the "off" position.

  2. Moen Posi-Temp Cartridge Part #1112b Replacement: 手順 2、 1の画像 1
    • Open both the hot and cold taps of a nearby faucet or shower until the water no longer flows.

  3. Moen Posi-Temp Cartridge Part #1112b Replacement: 手順 3、 2の画像 1 Moen Posi-Temp Cartridge Part #1112b Replacement: 手順 3、 2の画像 2
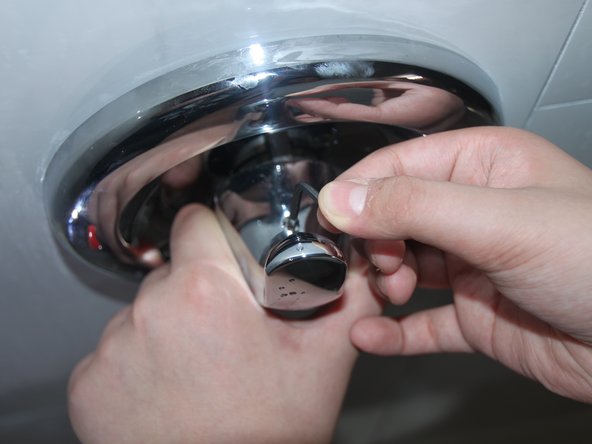
    • Turn the handle of the shower valve 180 degrees until it is in the "up" or "on" position.

  4. Moen Posi-Temp Cartridge Part #1112b Replacement: 手順 4、 2の画像 1 Moen Posi-Temp Cartridge Part #1112b Replacement: 手順 4、 2の画像 2
    • Unscrew the handle screw with an Allen wrench.

    • Remove the handle.

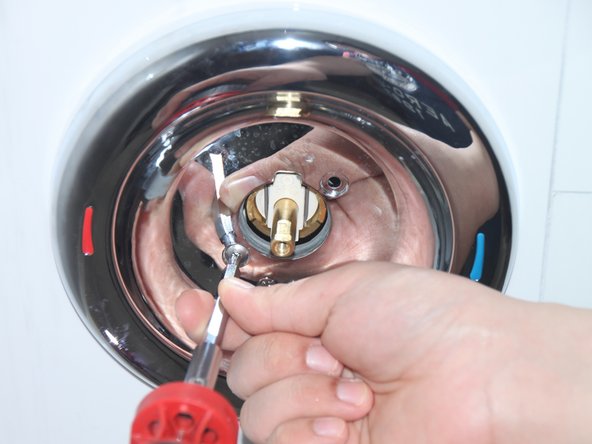
  5. Moen Posi-Temp Cartridge Part #1112b Replacement: 手順 5、 2の画像 1 Moen Posi-Temp Cartridge Part #1112b Replacement: 手順 5、 2の画像 2
    • Remove the handle adaptor screw with a Phillips screwdriver.

    • Remove the handle adaptor simply by pulling it out.

  6. Moen Posi-Temp Cartridge Part #1112b Replacement: 手順 6、 1の画像 1
    • Pull out the white key/adjustable limit stop.

  7. Moen Posi-Temp Cartridge Part #1112b Replacement: 手順 7、 3の画像 1 Moen Posi-Temp Cartridge Part #1112b Replacement: 手順 7、 3の画像 2 Moen Posi-Temp Cartridge Part #1112b Replacement: 手順 7、 3の画像 3
    • Gently pull out the stop tube.

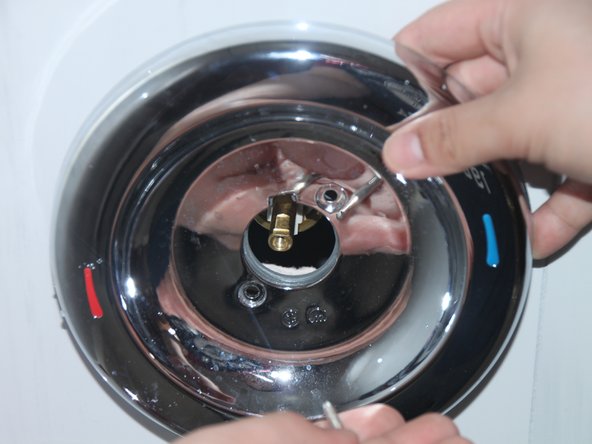
  8. Moen Posi-Temp Cartridge Part #1112b Replacement: 手順 8、 3の画像 1 Moen Posi-Temp Cartridge Part #1112b Replacement: 手順 8、 3の画像 2 Moen Posi-Temp Cartridge Part #1112b Replacement: 手順 8、 3の画像 3
    • Using the Phillips head screwdriver, remove the two screws located at the top right corner and bottom left corner.

    • Remove the metal plate.

  9. Moen Posi-Temp Cartridge Part #1112b Replacement: 手順 9、 3の画像 1 Moen Posi-Temp Cartridge Part #1112b Replacement: 手順 9、 3の画像 2 Moen Posi-Temp Cartridge Part #1112b Replacement: 手順 9、 3の画像 3
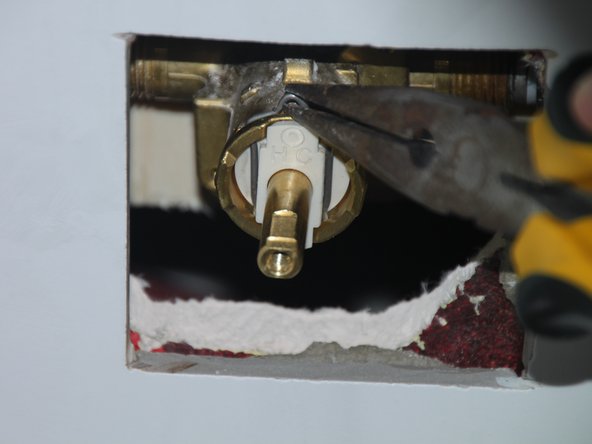
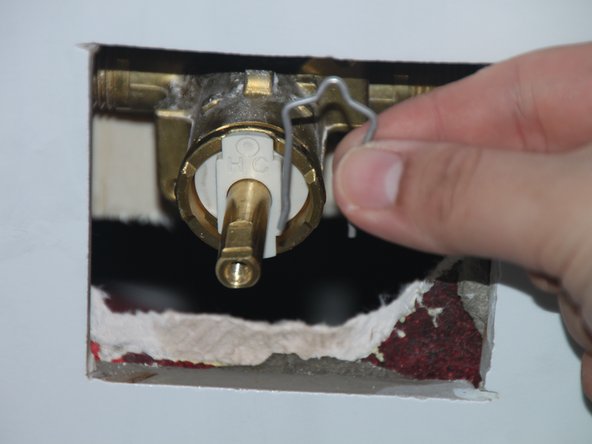
    • Slide the tip of needle-nose pliers under the notch of the retaining clip and pull the clip upwards.

  10. Moen Posi-Temp Cartridge Part #1112b Replacement: 手順 10、 3の画像 1 Moen Posi-Temp Cartridge Part #1112b Replacement: 手順 10、 3の画像 2 Moen Posi-Temp Cartridge Part #1112b Replacement: 手順 10、 3の画像 3
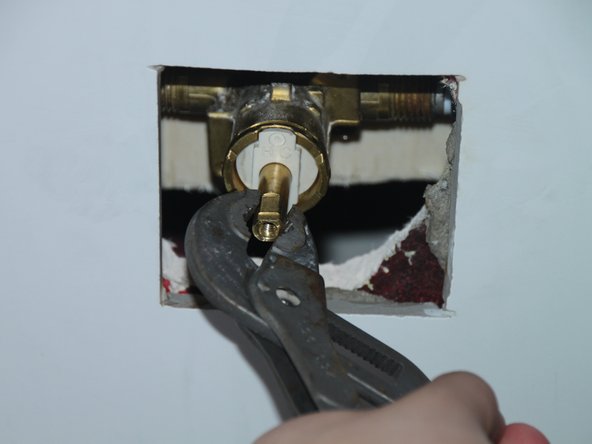
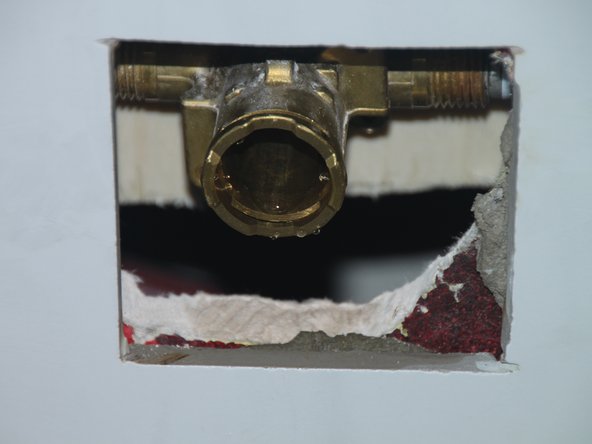
    • Clamp firmly onto the brass tube with a pair of vice grips and gently but firmly pull out the cartridge.

  11. Moen Posi-Temp Cartridge Part #1112b Replacement: 手順 11、 2の画像 1 Moen Posi-Temp Cartridge Part #1112b Replacement: 手順 11、 2の画像 2
    • Insert the new Moen Posi-Temp cartridge.

  12. Moen Posi-Temp Cartridge Part #1112b Replacement: 手順 12、 1の画像 1
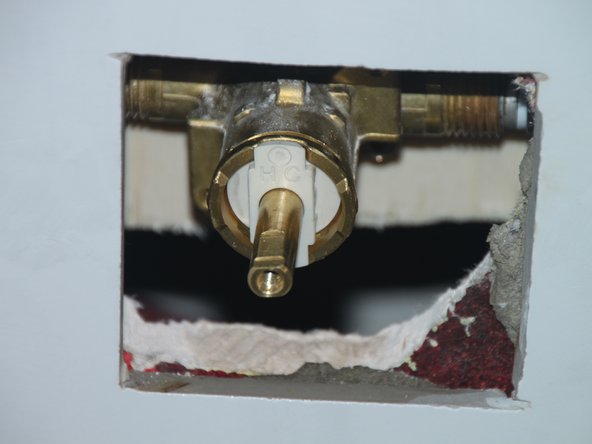
    • Insert the new cartridge into the valve assembly.

    • Ensure that the H/C symbols are facing up.

    • Ensure that the notch on the brass tube is also facing up.

終わりに

To reassemble your device, follow these instructions in reverse order.

作成者

1人の作成者と共同作成されました。

John Mendoza

メンバー登録日: 09/17/20

205 ポイント

1ガイドが承認済み

チーム

York University, Team S3-G57, Melo-Thaiss Fall 2020 York University, Team S3-G57, Melo-Thaiss Fall 2020人のメンバー

YORK-MELO-THAISS-F20S3G57

1 メンバー

1のガイドは作成済み

0 件のコメント

コメントを追加

統計データ:

過去 24時間: 4

過去 7 日: 17

過去 30 日: 53

今までの合計 1,167