メインコンテンツにスキップ

Mitsubishi Diamondpoint NXM76LCD Display Replacement

必要な工具と部品

  1. Mitsubishi Diamondpoint NXM76LCD  Display  Replacement, Removing the stand.: 手順 1、 3の画像 1 Mitsubishi Diamondpoint NXM76LCD  Display  Replacement, Removing the stand.: 手順 1、 3の画像 2 Mitsubishi Diamondpoint NXM76LCD  Display  Replacement, Removing the stand.: 手順 1、 3の画像 3
    • Lift the black cover off.

    • Remove all 4 Phillips #2 screws.

  2. Mitsubishi Diamondpoint NXM76LCD  Display  Replacement, Remove the 5 screws: 手順 2、 1の画像 1
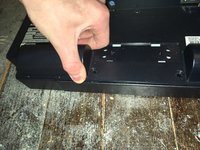
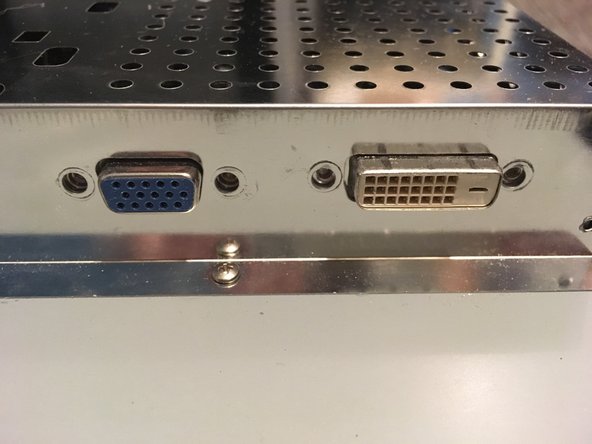
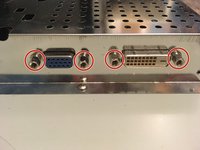
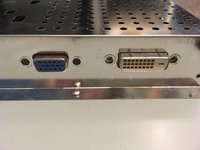
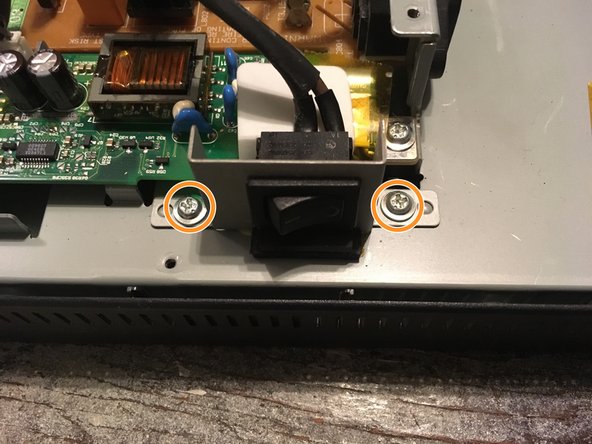
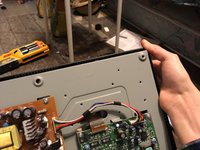
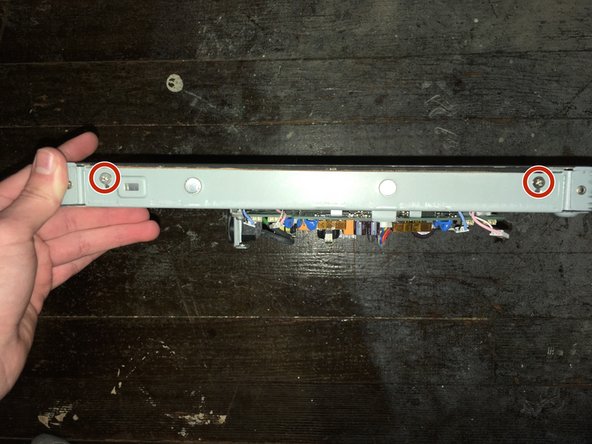
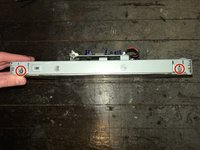
    • Remove the two 24mm Phillips #2 screws.

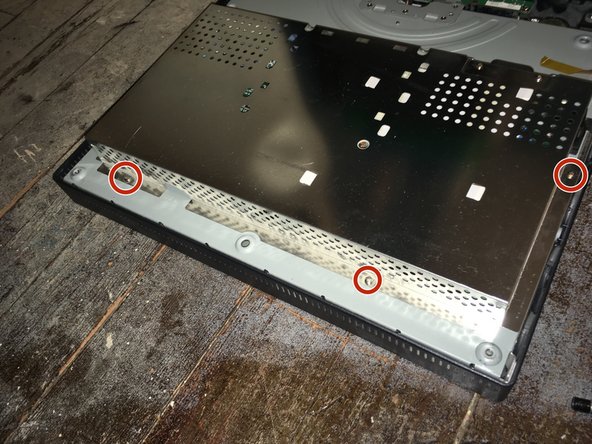
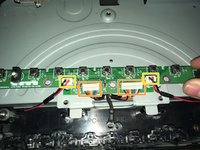
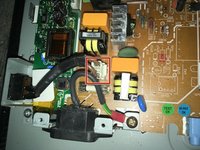
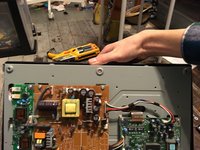
    • Remove the three 8mm Phillips #2 screws.

  3. Mitsubishi Diamondpoint NXM76LCD  Display  Replacement, Remove the back panel: 手順 3、 3の画像 1 Mitsubishi Diamondpoint NXM76LCD  Display  Replacement, Remove the back panel: 手順 3、 3の画像 2 Mitsubishi Diamondpoint NXM76LCD  Display  Replacement, Remove the back panel: 手順 3、 3の画像 3
    • Lift the back and pry the back off.

    • The panel is held in with clips on the side. It needs a lot of force the take it off.

  4. Mitsubishi Diamondpoint NXM76LCD  Display  Replacement, Remove the four screws: 手順 4、 2の画像 1 Mitsubishi Diamondpoint NXM76LCD  Display  Replacement, Remove the four screws: 手順 4、 2の画像 2
    • Remove the four 5mm nut screws.

  5. Mitsubishi Diamondpoint NXM76LCD  Display  Replacement, Remove the 5 screws: 手順 5、 2の画像 1 Mitsubishi Diamondpoint NXM76LCD  Display  Replacement, Remove the 5 screws: 手順 5、 2の画像 2
    • Remove the seven Phillips #1 screws.

  6. Mitsubishi Diamondpoint NXM76LCD  Display  Replacement, Remove the front panel: 手順 6、 2の画像 1 Mitsubishi Diamondpoint NXM76LCD  Display  Replacement, Remove the front panel: 手順 6、 2の画像 2
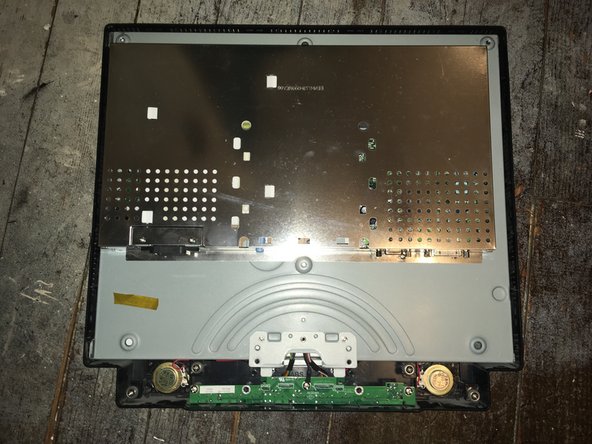
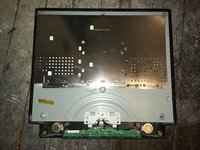
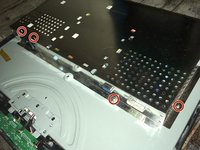
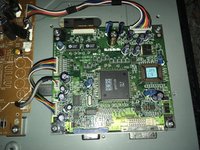
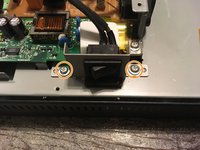
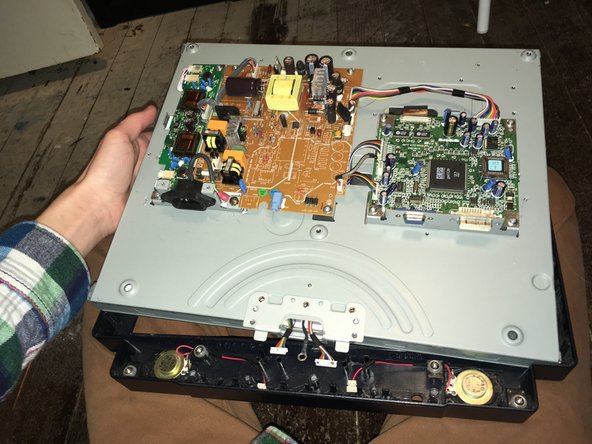
    • Remove the three Phillips #2 screws.

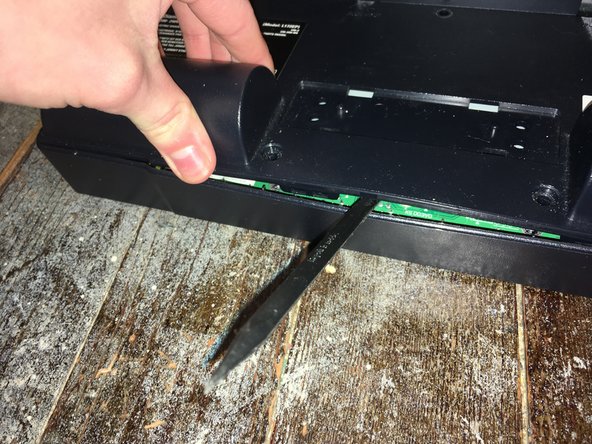
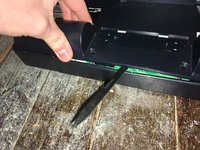
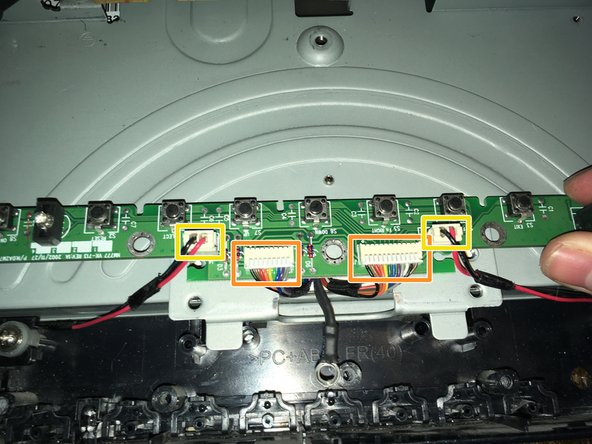
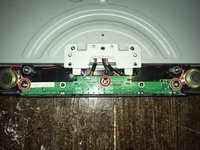
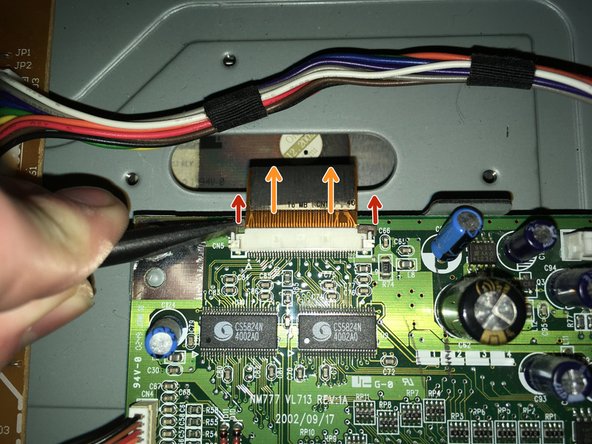
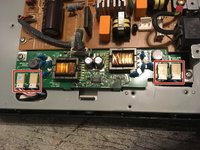
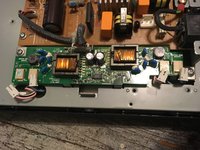
    • Remove the two data/power cables.

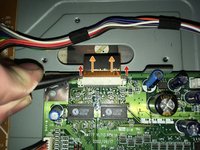
    • Remove the two speaker cables.

  7. Mitsubishi Diamondpoint NXM76LCD  Display  Replacement, Remove the display cable: 手順 7、 3の画像 1 Mitsubishi Diamondpoint NXM76LCD  Display  Replacement, Remove the display cable: 手順 7、 3の画像 2 Mitsubishi Diamondpoint NXM76LCD  Display  Replacement, Remove the display cable: 手順 7、 3の画像 3
    • Pull the two tabs.

    • Pull the connector off.

  8. Mitsubishi Diamondpoint NXM76LCD  Display  Replacement, Remove the power switch: 手順 8、 2の画像 1 Mitsubishi Diamondpoint NXM76LCD  Display  Replacement, Remove the power switch: 手順 8、 2の画像 2
    • Remove the switch cable off.

    • Remove the two Phillips #2 screws.

  9. Mitsubishi Diamondpoint NXM76LCD  Display  Replacement, Remove the display power: 手順 9、 2の画像 1 Mitsubishi Diamondpoint NXM76LCD  Display  Replacement, Remove the display power: 手順 9、 2の画像 2
    • Remove the four display power cables.

    • These cables are interchangeable.

  10. Mitsubishi Diamondpoint NXM76LCD  Display  Replacement, Lift the display out: 手順 10、 3の画像 1 Mitsubishi Diamondpoint NXM76LCD  Display  Replacement, Lift the display out: 手順 10、 3の画像 2 Mitsubishi Diamondpoint NXM76LCD  Display  Replacement, Lift the display out: 手順 10、 3の画像 3
    • Lift the display out.

  11. Mitsubishi Diamondpoint NXM76LCD  Display  Replacement, Remove the four screws: 手順 11、 2の画像 1 Mitsubishi Diamondpoint NXM76LCD  Display  Replacement, Remove the four screws: 手順 11、 2の画像 2
    • Remove the four Phillips #2 screws.

    • These screws release the display from its enclosure. Hold the screen when removing these screws.

  12. Mitsubishi Diamondpoint NXM76LCD  Display  Replacement: 手順 12、 2の画像 1 Mitsubishi Diamondpoint NXM76LCD  Display  Replacement: 手順 12、 2の画像 2
    • Remember to plug in all the cables on the display.

終わりに

To reassemble your device, follow these instructions in reverse order.

ある他の人がこのガイドを完成しました。

作成者

1人の作成者と共同作成されました。

Padraic Hoselton

メンバー登録日: 08/22/17

4,180 ポイント

12のガイドは作成済み

チーム

Master Techs Master Techs人のメンバー

Community

322 メンバー

2,528のガイドは作成済み

0 件のコメント

コメントを追加

統計データ:

過去 24時間: 1

過去 7 日: 2

過去 30 日: 2

今までの合計 152