メインコンテンツにスキップ

Minolta QTsi Maxxum Lens Replacement

必要な工具と部品

  1. Minolta QTsi Maxxum Lens Replacement, Lens: 手順 1、 2の画像 1 Minolta QTsi Maxxum Lens Replacement, Lens: 手順 1、 2の画像 2
    • The lens release button is located on the right front side of the camera.

    • Remove the lens from the camera by pushing the lens release button.

  2. Minolta QTsi Maxxum Lens Replacement: 手順 2、 1の画像 1
    • The detached module has multiple screws that must be removed in order to reach the lens.

    • Once detached, remove the (4) black Phillips #00 5mm screws from the outer rim of the module.

    • Next, remove the (2) remaining black Phillips #00 5mm screws.

  3. Minolta QTsi Maxxum Lens Replacement: 手順 3、 2の画像 1 Minolta QTsi Maxxum Lens Replacement: 手順 3、 2の画像 2
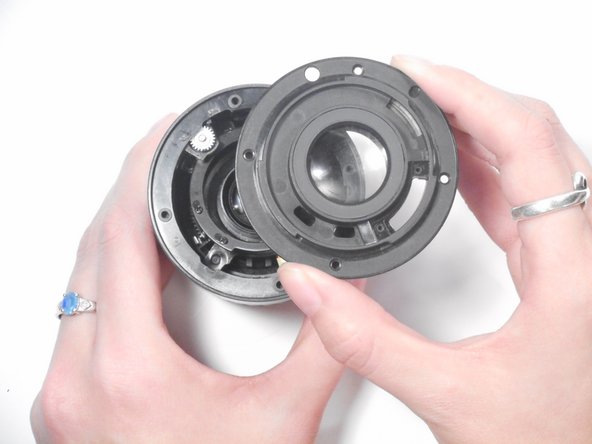
    • Once all screws have been removed, take the back piece off of the lens and replace it.

    • This piece should come off easily without using any tools.

    • There is film underneath the last 2 screws that are removed so be careful when taking it out because it could rip.

終わりに

To reassemble your device, follow these instructions in reverse order.

作成者

2人の作成者と共同で作成されました。

Jordan Ellery

メンバー登録日: 10/10/16

388 ポイント

3のガイドは作成済み

チーム

Sam Houston State, Team 12-4, Blackburne Fall 2016 Sam Houston State, Team 12-4, Blackburne Fall 2016人のメンバー

SHSU-BLACKBURNE-F16S12G4

4 メンバー

5のガイドは作成済み

0 件のコメント

コメントを追加

統計データ:

過去 24時間: 0

過去 7 日: 1

過去 30 日: 7

今までの合計 580