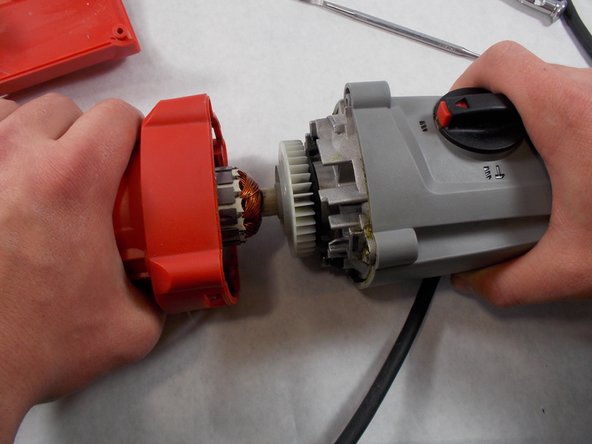
メインコンテンツにスキップ

Milwaukee 5262-21 Reduction Gear Assembly Replacement

必要な工具と部品

  1. Milwaukee 5262-21 Reduction Gear Assembly Replacement, Housing Assembly: 手順 1、 1の画像 1
    • Remove the ten 19mm T20 Torx screws shown in red.

  2. Milwaukee 5262-21 Reduction Gear Assembly Replacement: 手順 2、 1の画像 1
    • Remove the red Housing Assembly by lifting it up off of the tool.

  3. Milwaukee 5262-21 Reduction Gear Assembly Replacement, Reduction Gear Assembly: 手順 3、 2の画像 1 Milwaukee 5262-21 Reduction Gear Assembly Replacement, Reduction Gear Assembly: 手順 3、 2の画像 2
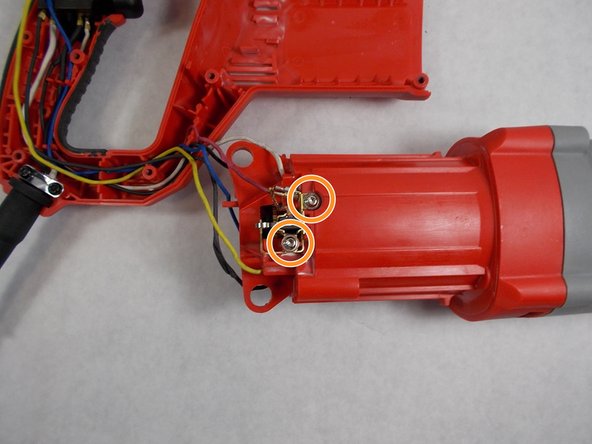
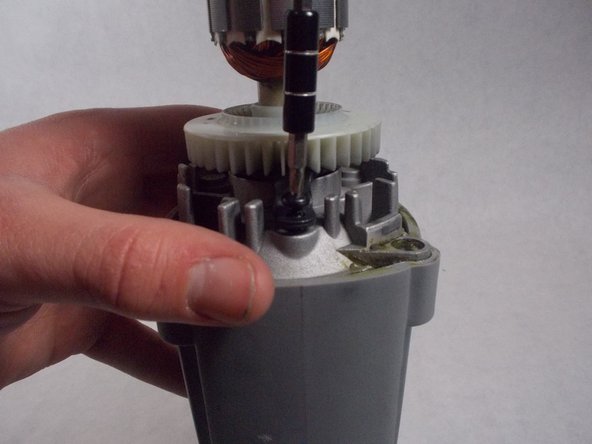
    • Remove the two 10mm T-10 Torx screws that attach the top brush holders to the motor housing.

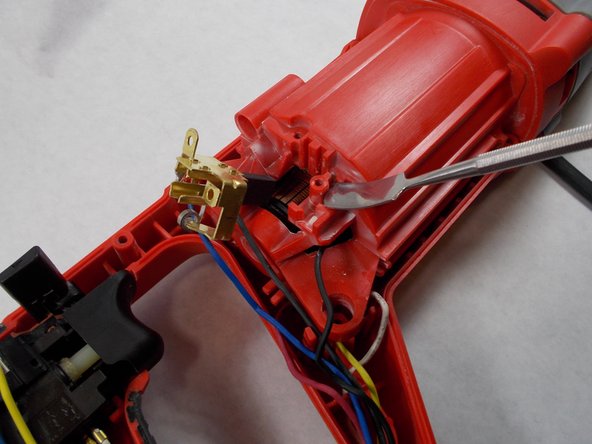
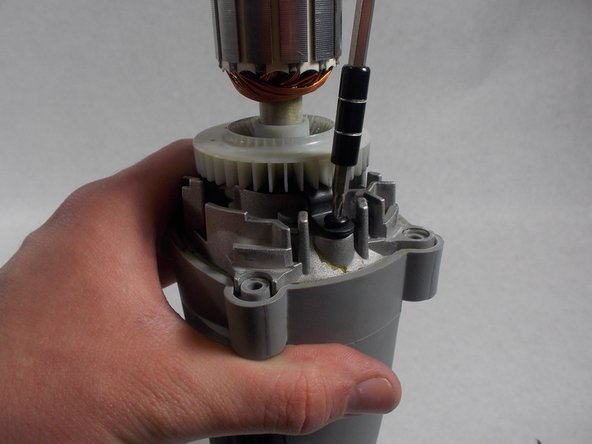
    • Remove the two 10mm T-10 Torx screws that attach the bottom brush holders to the motor housing.

  4. Milwaukee 5262-21 Reduction Gear Assembly Replacement: 手順 4、 2の画像 1 Milwaukee 5262-21 Reduction Gear Assembly Replacement: 手順 4、 2の画像 2
    • Using a metal spudger, pry off each brush holder.

  5. Milwaukee 5262-21 Reduction Gear Assembly Replacement: 手順 5、 3の画像 1 Milwaukee 5262-21 Reduction Gear Assembly Replacement: 手順 5、 3の画像 2 Milwaukee 5262-21 Reduction Gear Assembly Replacement: 手順 5、 3の画像 3
    • Remove the four 37mm T20 Torx screws shown in red.

  6. Milwaukee 5262-21 Reduction Gear Assembly Replacement: 手順 6、 2の画像 1 Milwaukee 5262-21 Reduction Gear Assembly Replacement: 手順 6、 2の画像 2
    • Pull the front portion of the tool out from the motor housing.

  7. Milwaukee 5262-21 Reduction Gear Assembly Replacement: 手順 7、 3の画像 1 Milwaukee 5262-21 Reduction Gear Assembly Replacement: 手順 7、 3の画像 2 Milwaukee 5262-21 Reduction Gear Assembly Replacement: 手順 7、 3の画像 3
    • Remove the two 11.5mm T10 Torx screws shown in red.

  8. Milwaukee 5262-21 Reduction Gear Assembly Replacement: 手順 8、 2の画像 1 Milwaukee 5262-21 Reduction Gear Assembly Replacement: 手順 8、 2の画像 2
    • Pull the 120V armature assembly out of the diaphragm assembly.

  9. Milwaukee 5262-21 Reduction Gear Assembly Replacement: 手順 9、 2の画像 1 Milwaukee 5262-21 Reduction Gear Assembly Replacement: 手順 9、 2の画像 2
    • Using a metal spudger, pry the diaphgram assembly out of the gear case.

  10. Milwaukee 5262-21 Reduction Gear Assembly Replacement: 手順 10、 2の画像 1 Milwaukee 5262-21 Reduction Gear Assembly Replacement: 手順 10、 2の画像 2
    • Now that you have loosened the diaphragm, you can now pull it out of the gear case.

  11. Milwaukee 5262-21 Reduction Gear Assembly Replacement: 手順 11、 3の画像 1 Milwaukee 5262-21 Reduction Gear Assembly Replacement: 手順 11、 3の画像 2 Milwaukee 5262-21 Reduction Gear Assembly Replacement: 手順 11、 3の画像 3
    • The diaphragm assembly will be lathered in grease. In order to move forward, you may want to give it a wipe down to remove any extra grease.

    • After removing some grease (if needed), remove the two 15mm T20 Torx screws shown in red.

  12. Milwaukee 5262-21 Reduction Gear Assembly Replacement: 手順 12、 3の画像 1 Milwaukee 5262-21 Reduction Gear Assembly Replacement: 手順 12、 3の画像 2 Milwaukee 5262-21 Reduction Gear Assembly Replacement: 手順 12、 3の画像 3
    • Now pull the reduction gear assembly up and out of the diaphragm.

終わりに

To reassemble your device, follow these instructions in reverse order.

ある他の人がこのガイドを完成しました。

作成者

2人の作成者と共同で作成されました。

Payton Parker

メンバー登録日: 03/08/19

534 ポイント

2のガイドは作成済み

チーム

UMass Dartmouth, Team S1-G3, Botvin Spring 2019 UMass Dartmouth, Team S1-G3, Botvin Spring 2019人のメンバー

UMASSD-BOTVIN-S19S1G3

4 メンバー

6のガイドは作成済み

0 件のコメント

コメントを追加

統計データ:

過去 24時間: 0

過去 7 日: 1

過去 30 日: 3

今までの合計 1,308